
Surgery
Real life MoLEP 18 - Big Prostate with MOSES
Dr. Fernando Gómez Sancha · ICUA
Dr. Fernando Gómez Sancha · YouTube
Language: English. YouTube audio metadata.
Surgical content for professionals. Contains footage of an operation.
Playback connects to YouTube. Your search query is not sent to the player.
About this video
An en-bloc MoLEP with early apical release in a large prostate. The description gives an estimated size of 200 g, retained here in the source's stated units. It does not report the weight of tissue removed or provide postoperative follow-up.
Documented details and sources
Only details explicitly stated in the sources. Missing information does not mean it did not occur.
- En bloc
In this case, a man with an estimated prostate volume of 200 g is submitted to En bloc MoLEP with an early apical release.
- MOSES / MoLEP
Real life MoLEP 18 - Big Prostate with MOSES
- Early apical release
In this case, a man with an estimated prostate volume of 200 g is submitted to En bloc MoLEP with an early apical release.
- 200 g
an estimated prostate volume of 200 g
Source checked: 2026-10-06.
Available transcript · English
Subtitles exported from the original-language YouTube Studio editor. Not clinically reviewed; source identity and timestamps verified, full audio coverage not verified.
Selected spellings of enucleation, morcellation and holmium terms have been edited. This is not a full audio or clinical review; the original captions remain the source.
They may contain transcription or translation errors; check the explanation in the video.
- Okay. So We just returned from our summer holidays. And uh We have a big prostate to start with. This man started experiencing some lumbar lumbar pain. Back pain. And he then started with hematuria.
- And uh He was uh having uh bothersome urinary tract symptoms and uh PSA of two despite having a prostate probably around 200 g. Uh So, here he is to to have a enucleation. Let's start by marking the optical It is not proper. What is it? The camera. Okay. Good. So, that's the external sphincter.
- We're going to get in there. We're going to mark the white line as we usually do. So, ascending vertically here at the apex. We are using the Moses uh 120 W holmium laser. But I'm working at 250. This is the normal Let's say the classical classical settings for polyp.
- Again, this is the white line coming up vertically. This is the 12:00 area here. We can try to deepen a little bit uh our white line there because that's going to make our life easier later, huh? So here This is the 12:00 fibers separating the apex from the sphincter. Okay. And if we come out, you can see the sphincter's perfectly perfectly preserved, huh? This is verumontanum.
- I'm going to do this lower, let's say, incision until I reach the the white line here. And deepening the white line a little bit and cutting these fibers at the edge of the lower that edge to allow me to introduce my scope into the plane without damaging the the sphincter, huh?
- Let's do the same thing on the other side. A little bit of mucosal bleeding here, but we don't care so much about it. Just don't pay too much attention. And continue with our objective.
- Of course, if the visibility is bad, then you can try to enter the plane. You can do that uh mechanically. Let's see. That looks like Or you can use some energy or both, huh? Let's Try This is this side. This is very Montana. Here I'm cutting on top of the veru.
- Also to communicate with this white line here in this side. Mhm. And as soon as we have some cavity here, some posterior posterior plane. That's a good plane. It's a little bit of mechanical dissection. We will try to perfect hemostasis and then try to start preparing the posterior posterior plane.
- This initially in in this very large glands can be a little bit of a nuisance at the beginning. This small amount of bleeding, mucosal bleeding. Like that. That's a good plane, I think. And we are establishing the line of attack. Line of attack, line of attack. Let's see. Here.
- It's a also good plane there. Okay. So, I'm going to turn my scope to keep the fiber anterior. And we will follow this line of attack to see we can develop the posterior plane of dissection.
- Here we are. It's not a beautiful plane as we are used to see in patients with very large glands. But it is uh detaching nicely. Sometimes I suspect that the reason why the plane is not beautiful is because we are probably half a millimeter away from the proper beautiful plane.
- It's hard to say. Sometimes you don't know if there's This is the quality of the plane or maybe we just a little bit off the proper plane, which is uh hard to believe on the other hand. So, here I'm using the Moses settings. You see, they provide a very nice dissection uh quality because it the plane is opened following the the path of uh least resistance, which should be the interface between the adenoma and the capsule. But also there is some effects on the tissue. There are some coagulative effects, which is supposed to give us a very nice hemostasis as we go, huh? Very nice control of bleeding during our dissection, speeding up the dissection and making things easier for us.
- When you use the normal holep sometimes you you have this dissection effect, but the energy doesn't reach the the heat doesn't reach the capsular plane, so you have to do additional passes if you want uh good hemostasis.
- So, that's a quite uniform and quite nice. You see posterior posterior plane. Let's see. We can control these uh small bleeders. And here we are coming towards the apex, huh? This is a sphincter. Anteriorly, this is the white line. Yeah, so what I'm going to do first is to to cut following the white line, huh? Cut a little bit into the depth of the adenoma but in a very close, let's say, relation with the sphincter because of course, I'm not trying to cut on the adenoma, I'm trying to release the apex a little bit from the from the sphincter so we can have much better access.
- And we will uh cut the fibers that are joining the sphincter to the adenoma this way. So then can we can go and and look for the proper plane. This would be the anatomical dissection plane.
- We can try to follow this plane anteriorly, huh, from here on the way up. You see this is the plane we are following. Because this will allow us to preserve the sphincter and preserve the sphincter submucosa.
- Which I think in many instances, it was detached from the sphincter when we use the classic uh technique. This is the 12 o'clock region. Here we're going to cut horizontally a little bit even on the adenoma but as we get in, you see, it's easier to to follow the the proper plane, the right plane. Yeah, I'm cutting also horizontally. These are the 12 o'clock fibers we marked at the beginning. And now I'm going to try to You see, connect here very carefully and very slowly until we release the apex completely. Of course, we do one side first and then we go to the other side. My objective here is to liberate the plane from 6:00 towards 12:00. You see like this. This is the plane we developed before, the posterior plane,
- and now we are a little bit more lateral coming upwards. And apically here, you see? Trying to find the the way towards the anterior aspect. There's a lot of debris that doesn't let us see very well, but See, I'm trying to concentrate on seeing the anatomy anatomic details. Here this look like 12:00 fibers that I'm touching.
- Here we are. This is uh natural lobe. It's continued. Let's see if we can release the apex completely from the from the adenoma, then the rest of the operation is going to be much much simpler. Huh? This This is the way we are following. And up here, I'm trying to go anterior. Maybe maybe the focus is not perfect. I'm going to try to focus a little bit better. So we can see more more detail.
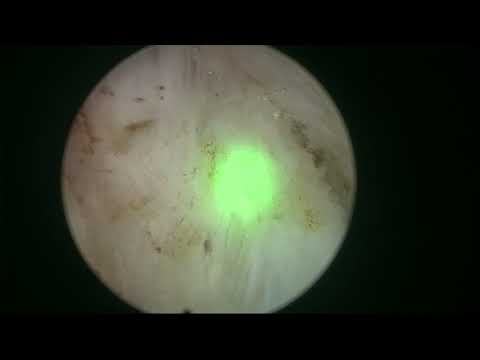
- Usually I don't need the See, I don't need the green stuff, you know, the guiding cuz I know where I'm lasering. And I think it's affecting the quality of the image. So I asked my nurse to take it off. Typically I I don't like it. Let's Now, you see we can see a little bit better.
- That's the anterior plane now. Anterior plane. So Here we are. Okay. That's the That's the other side. That This is the other side. This is the sphincter above. You see? This is the sphincter. So here Let's see if we can see where I marked the the white line. There's still some small bleeder, but this is the the white line clearly. So I'm going to cut a little bit on the adenoma, following the white line as we were doing before, and then coming towards this side.
- It should be slightly easier because we have already been here doing some of this uh work. This is coming from the normal of my gut. Okay. So back again to towards the sphincter. There's a vessel bleeding there. We will control it in a minute. Again, I'm cutting the attachments of the sphincter to the apex. Here.
- And now I'm going to look for the good plane, huh? This is the This is the good plane. There's a vessel there. Maybe that's what was bleeding. And I'm going to try to follow this plane a little bit. That's the good plane. Yeah.
- There's some bleeding coming from the apical prostate. Sometimes it's not easy to to coagulate the bleeders that come from the prostate. We do continue your dissection. This is going to devascularize this uh prostatic bleeder. So, here we are slowly slowly negotiating the ascension huh here. Coming from below, coming towards towards the anterior, but of course I want to step and take the scope a little bit outwards and check where we are in the relation with the white line here, you see.
- This is my white white line. Above of of this is the sphincter, so we don't want to cut very uh vertical there, more horizontal like this, you see. Trying to detach the apex from the sphincter.
- I'm coming this way. Okay. And now if we go back, the apex still bleeding, but when we detach the prostate from the capsule, huh, this uh nourishing vessel, this origin of this bleeding will be stopped. So, I think that we I will not uh lose a lot of time trying to coagulate that.
- So, the patient was sleeping and he woke up probably from his uh peaceful dream and uh he started moving his hand a little bit, so we have to Here I'm coming up, huh, trying to connect, you see the posterior plane following this path towards the anterior side. Here I have to come out. You see? Bring this horizontally towards this side seeing what we are doing and trying to understand the anatomy at the apical edge here. I think we have to continue horizontally horizontally to detach the adenoma from the apex and tell me It's very reassuring to find that you're working on a previously leased area. That means that you're not anywhere close to the sphincter. So this white tissue is quite safe to to work
- on because it means that you were there before the laser. So it's not mucosa. It's not sphincter. Even when you don't have the Let's say all the information from the anatomy. You cannot see everything here. We know where we are and we know that we are progressing in the right direction and in the right in the right way. Here this is more and more anterior. I'm progressing here more than I I can connect to the lower aspect. Let's see. This was coming from the other side. There we we have to look it up. Let's see if we can improve this situation here. These fibers up here.
- We have to detach them. Here we are. So now we can travel from 6:00 towards 12:00 in this side and we could do the same on the other side. Maybe there is some remaining little fibers to to cut uh at 12:00. So, let's have a look.
- This is the difficult part of the operation. The rest is quite uh straightforward. That's anterior. Going anteriorly. Okay. Anterior and white. Anterior and white. Anterior and white.
- Okay. Let's come from the other side and see. Probably there's a little bit of tissue there uh joining the 12:00 area still. So, let's use the opportunity to progress a little bit more.
- This looks like a good plane to me. Here we are coming towards the other side. You see here. This looks familiar now. So, we are just connecting anteriorly. Connecting. Connecting to the other side. This is wonderful.
- Okay. Okay. Okay. We were coming from this plane here. So, let's continue. Huh? Let's look for the proper plane. Take it all the way towards the other side. Trying to get close to the capsule anteriorly.
- So, we don't leave any anomalous tissue there. This looks good. That's a small vessel. Looks good. So, this is it. It's really not much more difficult to do a large gland than a smaller gland, I think it's uh psychological, let's say, difference.
- You get a little bit more anxious when you're going to do a larger gland. But there really is not uh it's it's a Of course, the anatomy is slightly different. There's a bigger diameter of of the prostatic fossa. So you have to follow But the principles are the same. Principles are the same. This is anterior tissue. This is anterior capsule. So I'm I'm trying to make this anterior plane uh more uniform and more established. You see, sometimes you have to work the plane is a little bit. So they connect more or less in the same depth.
- And allow you to travel seamlessly, easily from from side to side, you see, like this. And then your life is much easier. I I like to do this anterior plane development very much because then the prostate descends. And you can have you know, very nice very nice uh access to to the bladder neck anteriorly.
- But uh in principle, I like to try to carry the same depth uh circumferentially. So if I progress anteriorly, then I will go laterally to one side and try to dis- dissect more or less until I reach the same depth that I reached uh anteriorly. And then I would do the same on the the side. So trying to you know, carry a uniform depth of dissection circumferentially.
- Here we are. Wonderful. Most of this effect that gives us a very nice hemostasis as as we go. Uh, this is uh a great advantage for the very large glands because you can get a little bit better correlation of the prostatic capsule while you dissect.
- You're not going to build up uh collection of uh small bleeders that uh sum up, you know, to cause hematuria and difficulty uh to to view the plane properly. Uh, but also, of course, the fact that we are irrigating such small spaces uh wonderful because if there's a bleeder, you can wash out the blood. It's not going in the bladder where it can stagnate and you know, then visibility gets worse.
- all over the place. So, here we are. Uh, huh? You see, your clinical judgment has to tell you I mean, where to fire. Initially, we we fire towards the line of attack. And then as we progress, you have to start firing a little bit closer to the adenoma because of course, if you follow straight, maybe you go out. So, you need to tilt the scope a little bit.
- But also, make sure that you're firing, let's say, more towards the internal edge of the line of attack than towards the proper let's say, line. Every moment, every minute, you have to decide what depth you want to keep, where do you want to fire, and here we are starting to see something very interesting. You see, these are the vertical fibers of the bladder neck. This is the circle of fibers. These are vertical. This means that we are reaching the bladder here. So, before I get in the bladder, I'm going to try to let's say progress a little bit more. And also, it's very useful if you finalize your hemostasis before opening the connection to the bladder. So, if you're not in a hurry, if you have the time
- and the patience, because sometimes we are a little bit impatient, impatient, you can just withdraw the scope a little bit and check that the hemostasis uh in the capsule is is solid, is good.
- Probably now, if we look at the apex of the prostate, there's no bleeding anymore, huh? We have already devascularized this disconnected the arteries off the prostate from the capsule.
- Those who were bleeding at the apical level, so sometimes, if you concentrate in progressing with your dissection, you see the bleeding control is going to be much better, huh? We don't see anything bleeding here at the apex where it was bleeding before.
- So, as I said, let's have a look at the fossa. See if we can perfect hemostasis a little bit. And then we will move on to the next step. You see, sometimes I'm a a bit more reckless in the sense that I am going faster. I don't pay so much attention to hemostasis in the smaller prostates.
- But then when I have to do a very large one, I'm a little bit more careful. This is just surgical common sense and experience. You don't want to build up many bleeders in a very large fossa because then it's much more difficult to coagulate. So I mean, sometimes you can get away with a little bit less careful. I say hemostasis during the enucleation, but when you do a very large gland, please be careful and uh be reasonable.
- And be patient, huh? Sometimes spending 2 minutes here saves time operatively. So usually stopping to do hemostasis is a good strategy to save time rather than you know, slowing you down because maybe when we are able to detach the prostate completely and throw it into the bladder, we are already we are ready to to do uh the morcellation. We don't need to stop to to to spend a lot of time perfecting hemostasis and and finally ultimately you you save time, huh?
- In principle, it's a good idea to do hemostasis. Some bleeders are not important. Some others are a bit more relevant because they pump blood into the into the fossa. Sometimes you don't see where the bleeders are because the irrigation coming in, you know, fools you. You think something is not bleeding when you look at it, but uh as you move away from it, it starts bleeding. So you can aim to whiten all the red uh areas all the red uh stuff. I don't mean that you have to cook the prostate irrationally, you know, but uh sometimes there are some small bleeders that uh significantly bleed that are not clearly visible. Uh here, for example, I made it worse.
- I'm going to lower the the settings to 140. Let's see if I can just uh stop the bleeder. Okay, so let's go to the upright position. The fiber is now at uh 12:00. That's the line of attack.
- There's a bit of bleeder also, so let's try to get it under control. Let's progress carefully towards the bladder neck. Let's lift operationally. This looks very good. Yeah. Of course, we have to adapt to the shape of the prostate. It's a compressional shape.
- And here we're coming again towards the the interior. You see straight fibers here. And let's see. I can see it up here. My bags for the irrigation are a little bit low and I think there's no need to It's nice if you can work with low bags because with lower pressure you will see bleeders easier, you know, they they will be bleeding even when there's low irrigation pressure.
- So, the quality of the hemostasis you're going to have is probably better. So, typical bladder neck bleeders. And we are continuing with our dissection. Anteriorly. Yeah. All right. Let's see. Sometimes this green plastic gets in the way and it's a little bit uncomfortable. So, you can just cut the fiber.
- Here we are. This is the bladder. So, now we are entering the bladder. More or less at 12:00 and this is bladder neck fibers. I'm cutting I have to follow the curve of of the bladder neck.
- Look at We have had a glimpse of the middle lobe in here. You see it going It's going very very deep in the into the bladder. So, this is bladder neck lateral lobe, but there's a huge middle lobe in the bladder.
- One of the beauties of this technique is that we only have to dissect the adenoma that is touching the capsule. So, if you have a huge middle lobe in the bladder, I don't know, 70 80 g of middle lobe inside the bladder, we are only going to dissect the lower part of the middle lobe, you know? Whereas, if you do it classically incisions, you need to cut through all this very long middle lobe here. Of course, we have to morcellate the middle lobe, but we don't need to worry too much about uh cutting it. So, here we are again.
- fibers and the fibers of the bladder neck. Okay, here we are. And that's the posterior connection of the lateral plane with the posterior plane at the bladder neck up here. You see? Have to follow.
- Um make things better every minute, huh? It's not uh you don't want to go from the beginning to the end very fast. You just want to keep making things better. This is a good philosophy, you know?
- We will finish at the end. The patient is not bleeding. We're using saline, so it doesn't matter if the operation gets a little bit longer. There's no rush. Just concentrate on follow the surgical principles, concentrate on making things better, and we will come to an end, huh?
- Let's see there's some vessels here. Lowering I'm using the coagulation pedal now to to get this vessel. I don't want to penetrate too deep. There we are. Huh? So, this is bladder. There's some mucosal mucosal bleeding there. That's the wall. Okay, that's what I wanted to see. It's far away. So, we are in a very nice situation now. This is the posterior plane. You see that?
- We are trying to connect this to the You see? Posterior to lateral. Posterior to lateral here. It's important to keep the energy pointing towards the adenoma rather than pointing towards the capsule. If you want to dissect this plane, we cannot fire here because that will penetrate on a very thin uh capsule. We have to fire against the adenoma.
- You see in the attachments of the adenoma with the capsule will will be cut, will be released. But, the energy is not deepening in the in the capsule. Huh? This is how we carefully try to dissect the lower aspect.
- Here. Okay. Let's see if we can get a little bit further inside here. This looks very good. It's quite nice. Although, there is uh I don't know. This is the posterior aspect. Again, look at what where my fiber is firing. You see, always looking upwards, huh? Trying to fire against the adenoma. That's a small vessel. Let's try to coagulate it in a thin capsule.
- We can try to do the helicopter because sometimes when you do the helicopter like this, you see, it has a very nice hemostatic effect. And there we are trying to bring this plane up. It connects to the lateral aspect. Of course, this bladder neck we haven't cut yet, so I think you know, as long as you are, for example, down here, and you're progressing safely, and you're know what you're doing, you can progress.
- Because when we come back here, things are going to be easier, but the right thing to do right right now would be to go anteriorly, look for the opening of the bladder, and and dissect, you see, this side a little bit better. See where we are. Here, this is coming this way, so you see, we have developed this side much less than the other side. Okay.
- Big glands, this can happen, it's easier to mentally keep track of where you are and what you're doing in a smaller gland. In a very large gland, maybe I I I would have thought that we were closer to the bladder neck in this side than we really are, no, this is there's no problem, huh? There's no problem.
- We're coming up here. This is the 12 o'clock bladder neck. Release vessel. It's logical that very large glands have bigger vessels, huh? So, you have to expect that, too, that you'll find some arteries that are a little bit bigger than usual. And if you have to do the bigger prostate with low power, sometimes you can have a hard time coagulating very large bleeders, arterial bleeders.
- Also, sometimes they they bleed on your face and as you get close to the bleeder to to tackle it, the blood doesn't let you see where it is, so you can have a hard time there, as well. So, as I said many times, I always have a resectoscope on the table just in case things get very, very difficult, you don't panic, you don't let the patient bleed too much.
- Just get the resectoscope and try to coagulate it because with the resectoscope, you can use the loop to stop the bleeding by compressing the bleeder and then you look, you see where it is, and then, of course, you can coagulate. With this fiber, it's not so easy to to do that.
- And that does that mean that uh enucleation is not good, it's not bad, or that you have to convert to another technology, you know, that that's really not under my point of view, it's not so important. You have to You have some instruments to perform your your operation and uh in case you run into trouble you have to do what you have to do, huh? That happens in surgery all the time with all the disciplines. You always have a B plan in case you run into trouble or it gets hard or it gets difficult. Normally with a higher power lasers, I would say that's more difficult to find big leaders that you cannot coagulate. In my experience I feel much better equipped with a high power laser when I'm going to do a very large gland, but
- but you know, things can happen and you have always and you never regret being ready in case there's a problem. Some of the times, one of the good things of the this technique is that it's compressing the other side, so sometimes I have found vessels that were a little bit difficult to coagulate. I went to the other side to work and keep dissecting and when I came back, the bleeding was much less or it had stopped completely, so that's another thing you can do, huh? So, here we are. This is the bladder neck.
- This is the bladder neck. This is a huge base off the middle lobe. Bladder neck mucosa here. Bladder neck mucosa under the middle lobe. Here we should be able to see the UO here. Very good. There is some leader here. Let's try to stop it.
- It's a very large gland, yeah? Still, we can do this large glands in a reasonable time frame. Endoscopically, this man was 76 or something like that. So, it's a very old man, and I think if we did a robotic procedure under GA, his recovery probably not be I mean, the the stress of the surgery is not the same to have a spinal anesthetic and endoscopic operation that uh We We keep the catheter until tomorrow morning.
- There's more and more experience uh that with Moses, you can remove the catheter earlier. Or you can discharge the patient earlier with a catheter. So, uh I think the uh the stress of the operation is going to be much less for this patient here. It seems to be some And this is bladder neck. I think the prostate has already flipped.
- You see, one of the lobes has gone into the bladder. I think. It has uh flipped. That's why the anatomy was very confusing. Now, here here we are. Now, this is This is the last uh attachment.
- Here, there's some attachments on neck again, so here I'm going to just carefully connect here. Remembering that we have to fire closer to the adenoma than the capsule. So, we detach the adenoma from fibers of the capsule and here we are. It's a nice nice nice nice liberation here. I'm going to bring the fibers to 6:00 to cut this. Here.
- Uh the urethro should be around here somewhere, yeah, there. And the other urethro, so now we are medial to both urethro. We're safe and we just detached in the middle of from the trigon.
- And enucleation has finished, I think. Here we are, that's the adenoma in the bladder. And this is now the huge fossa. Let's do some hemostasis. You see, if we did our homework properly, we will have only remaining bleeders near the bladder neck because we already checked the rest of the fossa. Uh if we didn't do it properly, we'll have to go back and check, but I think there's not so much bleeding, just being a very large gland, there is uh a little bit of oozing. That sums up.
- The visibility is quite reasonable. Uh this is a small bleeder. Mhm. Nice nice nice nice nice. Here, as always, you see the mucosal edge. Can be a little bit tricky sometimes. Here we are. That's also mucosal edge, I think.
- Here we are. Ah, so that's the piece in the bladder. We have a reasonable reasonable visibility. Interiorly looks okay, I think. Let's see. It's looking pretty good. No big bleeders here. See what happens at the apex. If we come out what do we see? You see we see the sphincter here. We see that the mucosa is still on the sphincter, huh? Here there's a little bit of uh some mechanical trauma to the to the mucosa, but nothing else. Uh this patient will be continent on day one.
- Well, almost done with the bladder. So, we'll proceed to more station. Fiber out. Camera out. So, this is the table on the side. Let's change the instruments and start with the morcellation. Yeah. Nice change.
- There's a small clot forming there. The morcellator will also aspirate the clots. So, here, you see. It has spread the clot. Now we are in a good position. It's important to develop good habits and I am usually asked about the water bugs throughout morcellation phase. Initially, of course, at the beginning. But then again, the thing is you have to keep your eyes looking at the screen very carefully, you know, because you don't want to make a mistake and not realize because you were looking somewhere else. So, either you stop and look towards the water to check if there's enough water or you rely on your team, you know?
- So, but if you develop the habit of asking, "Do I have water? Do I have water?" And this is a proper habit, you know, where See, this would be bladder neck. This is a clot again.
- Mhm. This is adenoma. Then you are making things more safe, huh? The Piranha and especially the the Vmax fast blades have changed our lives in the sense that we can morcellate large amounts of tissue in a reasonable time frame. Typically in our hands the morcellator from Wolf can take out 10 g, 11 g per minute. And that means that uh for 200 g of tissue we can spend 20 minutes. More or less, huh?
- There's some variation, but uh that means that sometimes it goes faster than we would anticipate and some other times it can go a little bit slower. There's no longer the 1-hour morcellation time that's we were used to see before, huh? When the slower morcellators.
- There we are. The water box are a little bit emptying fast, so Also, you have to take into account that a a bag measures probably 30 cm in length. So, when you have a full bag hanging from the from the support the pressure is going to be 30 cm of water more. As you consume the bags the the pressure the height of the bag the level of the water is is a little bit lower and the pressure is going to be less. So you shouldn't be looking only at the height of the bag, you should be looking at the height of the level of the water because that's reflecting much better what kind of pressure you have in the bladder.
- So, sometimes if you're finishing your bags, you can elevate a little bit the height and have the same pressure as if you have a full uh bag laying a little bit lower. I don't know if I make myself clear there.
- So far, so good. I think uh morcellation efficiency is quite good. When you don't see the mouth of the blades, you know, like this, it means that the engagement of the tissue with the blades is quite good. So, there's not much water outflow. There's only a little bit of water coming out.
- And there's a lot of tissue coming out, so it's it's working really well. Also, I think the visibility is satisfactory, huh? We have very nice very nice visibility. The nice aspect of this morcellator is that it's a static morcellation. I I find a safe position and I uh operate in the same position. Just I I don't need to keep on moving the the morcellator to improve the engagement. You see it's uh good enough keeping the morcellator still.
- With the Lumenis morcellator, the VersaCut morcellator, you had to be going in and out like that and I think that made the procedure a little bit more risky. I have had accidents in the past uh uh one at the beginning of my learning curve.
- One during a life uh surgery in uh in Singapore. Uh I briefed everybody in the operating room about the importance of having uh water coming in during morcellation, having full bags, and there was a mistake there, and uh I had uh morcellated part of the bladder wall.
- Thankfully, we could see a little bit of fat, but we couldn't see uh loops or anything. So, uh the patient kept the catheter for a little bit longer, and everything went uh well after that.
- Of course, uh you see in a moment like this, you When when you see mucosa, huh, you you can doubt if it is bladder of or if it is a neuroma. The first symptom of bladder damage, I think, would be bleeding, you know? So, if you have a very clear urine, and suddenly you start seeing blood, you have to suspect that maybe you you cut the bladder at some at some moment. But, uh I remember some other, let's say, small mucosal lesions that I could see perfectly and stopped before anything bad happened. Um nothing else, I think.
- Uh I haven't seen really, really bad, nasty problems with morcellation. But, uh as I said, the danger for morcellation the danger of morcellation is doing things uh in a crazy way, or taking unnecessary risks, or working in an environment where people do not know, do not understand, do not follow your recommendations, and uh so, you have to be careful with that.
- Also, for example, I don't use the second inflow uh for morcellation. Many people do. I think this uh specific equipment is very well balanced in the sense that if I have a good morcellation like this, there's very little water coming out, and the bladder keeps quite full during morcellation.
- If I see that the morcellation is not so efficient, then I stop, wait the bladder to fill, and then continue. So, I'm very careful, and I always pay a lot of attention, you know? In this operation, you have to be present. You have to be present all the time. You cannot let your mind travel and go elsewhere because you need to be completely concentrated on the details, huh? So, if you're present, if you're careful, with this specific equipment from from Richard Wolf, you can work with only the uh one inflow.
- I remember I went to a congress where we were doing several operations and the different surgeons. So, one guy saw my way of doing it, and he said, "Well, maybe I can try with one inflow, too." And I said, "No.
- Keep doing what you usually do because when you introduce change in a strange environment, then you you have, you know, much more risk of having problems. Also, I haven't worked with other brands. You know, I don't I haven't used Olympus or uh Storz I used for at the beginning, but not for a long time. So, I I I cannot tell you if the second inflow is mandatory with other brands. Maybe it's a good idea, especially if you're starting your experience.
- But also, it makes things a little bit more complicated. You need a second set of bags, you know, another system. And I like to simplify as much as possible the operations. Make them simple because the more It's like using pumps, you know, for holmium. If you use a pump, you introduce another element.
- If you use uh, you know, the the double inflow, it makes things a little bit more uh, awkward and cumbersome. And I like to keep things simple. So, we are progressing with morcellation. It's quite nice. We're using a 5-L bottles from Medela.
- You can see that morcellation is starting to be a little bit less efficient. That's probably a sign that the basket is getting full with tissue. So, we we may have to stop to change the the water, the the bottle and the canister, tissue canister. And then we will resume, let's say, the the fast morcellation with very good uh, performance that you get when you have a uh, an empty canister.
- As you can see, morcellation is going well. It's bladder neck. We are in a safe position. Morcellator? Sí, se nota un poquito. The the canister's tissue is quite full, so that's why the suction is losing a little bit of vacuum. The negative pressure is not so strong anymore.
- You know, in Spain we have a lot of COVID-19 right now. One of the patients of the list from today has been suspended because he was uh in a positive PCR. So, we will postpone him until it gets negative.
- But, otherwise, we are operating normally. We are a little bit more relaxed. Um I'm not panicking with COVID, but of course we are taking all the possible precautions and everybody patient is tested before surgery as a precaution.
- I used not to wear a mask for HoLEP, but now I have to use it. So, many many endoscopists were not using masks. And now I guess all of us use a mask. But, we had uh some uh time where we had to stop all the surgical activity.
- We had some patients with catheters who had to endure. See, now the efficiency of morcellation is much lower. Sometimes, when this happens, you can go inside the fossa. Here we are inside the fossa. And the piece uh let's say tends to travel much less because it clashes with the wall of the fossa. So, when the efficiency of morcellation is diminishing, maybe it's a nice idea to the tip of the of the morcellator into the fossa. You can You can try to lure the pieces, you know, inside the fossa. That keeps the piece entrapped inside the fossa. Of course, you need a very good visibility to be able to do that.
- Also, I think it's very difficult to catch the prostatic capsule. Maybe keep at a distance. And here you see this more tendency to obstruct the channels because the suction is less strong, you see. It's We're losing losing losing efficiency. So, I don't know if this is the last piece or not. Sometimes it's better to change and continue than to lose time like this.
- So, let's change. Let's change the water and everything. I will close the inflow so I don't over distend the bladder and we should finish very very fast after that. This is the prostatic fossa.
- It's looking good. Not significant pieces in there. In the fossa. Regenerating back home again. And we're almost finished. I think I will finish this and put a catheter. I hope you enjoy these cases. They're not uh beautiful. Sometimes they're not perfect.
- They're not ideal, but they're real cases and it's important that you see that these cases before Okay. So, open the inflow again. Do I have water again? Here we are. I can see the bladder neck below the blade. I can bring the piece a little bit inside the fossa if I want, you see? Like this.
- This is intracapsular morcellation. I love it because it's uh fantastic trick when you have difficulty with the last pieces or for some reason. I think it also is quite safe. Of course, you have to be careful not to come to the apex where you could be morcellating the sphincter. But uh if if you know where you are, it's quite safe, I think. And Yeah. In this case, we will put a 22 French three-way catheter.
- We leave some irrigation, but I think I hope you won't need a lot of irrigation. And our practice up to now has been to keep the patients overnight. It's now like 6:30 p.m. So, tomorrow morning, we will remove the catheter at 9:00.
- We will wash the bladder. We will wash the fossa before removing the catheter. We will instill uh 200 or 300 mils of uh saline before removing the catheter so the patient can have a first void uh very early before the removal. After the removal, sorry. And this way they are very confident that they can pee and they can go home. There's another piece here.
- Okay. We're going to check with the resectoscope 1 minute. Because we might have left one little piece there. Maybe we can Probably nothing would happen if we left the catheter. I think we finished, but in this very large glands, I think it's reasonable to have a last final look.
- Final look, final check. And I hope this patient will not bleed again. I hope he will improve his quality of life. This is bladder neck area. That's the you wall. You see this is empty bladder. You see there's some little amount of bleeding here. That's the other you wall, so I will perf- improve a little bit the hemoglicina.
- He's a very old man and if we can avoid him from bleeding postoperatively, it's probably better, huh? So Here we are. If things are perfect in the sense that you see clear clear clear water like that, maybe you don't need to do this, but better be safe than sorry.
- This is capsule all over. You see also that with Moses you get better let's say hemostasis, but it's not it's not a cooked fossa. You see we have been working with Moses all around here.
- You can still see a little bit of red stuff. You see a little bit of So this is lively tissue with very shallow coagulation. It's not it's not a cooked prostate, but Okay. Small clot forming on the surface. You see it's a huge huge uh fossa.
- Small minimal bleeders. Apical region. Sphincter, huh? Very good. Catheter.