
Surgery
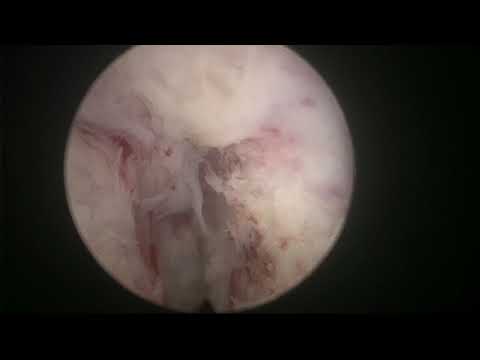
Real-life En Bloc MoLEP (MOSES 2.0 HoLEP) case 29: tricky start and a big beach ball at the end
Dr. Fernando Gómez Sancha · ICUA
Dr. Fernando Gómez Sancha · YouTube
Language: English. YouTube audio metadata.
Surgical content for professionals. Contains footage of an operation.
Playback connects to YouTube. Your search query is not sent to the player.
About this video
An unedited MOSES 2.0 HoLEP with a difficult start because of highly vascular mucosa. During morcellation, the team encountered a large fibrous nodule described as a beach ball. The description reports that a resectoscope was used to extract it when it proved difficult to morcellate.
Documented details and sources
Only details explicitly stated in the sources. Missing information does not mean it did not occur.
- En bloc
Real-life En Bloc MoLEP (MOSES 2.0 HoLEP) case 29: tricky start and a big beach ball at the end
- MOSES / MoLEP
Real-life En Bloc MoLEP (MOSES 2.0 HoLEP) case 29: tricky start and a big beach ball at the end
- Difficult morcellation
During morcellation, we found a big "beach ball" or fibrous nodule which was difficult to morcellate and so we decided to use a resectoscope to extract it at the end. Another real-life case to add to our collection. Nice concepts were discussed during the discussion of the case.
- Documented challenging case
Real-life En Bloc MoLEP (MOSES 2.0 HoLEP) case 29: tricky start and a big beach ball at the end
- Prostatic nodules
During morcellation, we found a big "beach ball" or fibrous nodule which was difficult to morcellate and so we decided to use a resectoscope to extract it at the end. Another real-life case to add to our collection. Nice concepts were discussed during the discussion of the case.
- Extraction with a resectoscope
we decided to use a resectoscope to extract it at the end.
Source checked: 2026-10-06.
Available transcript · English
Automatic YouTube captions, not clinically reviewed. Names, technical terms and numbers may contain errors.
Selected spellings of enucleation, morcellation and holmium terms have been edited. This is not a full audio or clinical review; the original captions remain the source.
They may contain transcription or translation errors; check the explanation in the video.
- okay so we are going to start with this case this is an 80 gram prostate in a patient who has bothered some urinary symptoms here we have prostate thinker edge and relatively big gland huh see if i can go in without having to do a lot of pressure see you all [Music] later uh this settings are two joules and 50.
- [Music] the fiber coming in here you can see the edge of the sphincter so i'm going to mark a little bit inside can you take them i don't like the guy guiding green knight [Music] see if we can take it out with some bleeding due to inflammation [Music] so you see when we incise the mucosa at the beginning there is some some bleeding but i don't get too stressed about it just continue demarcating the white line here we are again demarcating the white line you shouldn't get very scared with this proposal bleeding of course you could use lower settings at the beginning if you wanted but i usually can live with a little bit of multiple bleeding initial moments and then once the white line is demarcated
- the rest is a piece of cake so here i'm going to cut near the very mountain and i'm going to try to find the proper flame on this side we are this is the plane between prostate and melanoma where you can do it mechanically or you can do it using some energy here i'm going to do the same so i'm going to come down here but initially i prefer to cut these fibers to allow the scope to move a little bit laterally without damaging the sinker also you know you go to that region you can progress a little bit in the posterior plane like this and we stop here in the middle because there is a pendulum of the layer so now i'm going to cut it to try to join both planes in the midline you can see that uh and you're going to
- see how moses provides excellent dissection an excellent first pass anastasia so it's very striking to see how when you do your dissection the tissues are getting white you see because there is a further reach of the energy that will ensure a very nice first pass coagulation so here we are keeping the fiber at six o'clock i don't like to move the fiber i'd rather keep it fixed so either six o'clock or 12 o'clock here for example i just changed the fiber position and now i'm going to work with the fiber at 12 o'clock here of course you have to work carefully to keep the fiber close to the adenoma see like that try to let the energy open or cut the fibers that are keeping the surgical capsule and the anoma together
- without deepening too much in the capsule also you have to be always vigilant about anatomical information and the feedback you get from the image because you want to try to understand the anatomy not all prostates have a good plane always the plane is ideal you know sometimes it's a little bit inflammatory so it is nice to move the the scope from side to side following this line of dissection right until some of the posterior aspect has been [Music] detached let's do some hemostasis individual vessels that we might have overlooked yeah near the mukosa usually [Music] okay now i'm going to put the fiber at 12 o'clock and this is a stringer as you can see i'm going to try to detach the apex from the sphincter you see that
- the prostate is higher up from the sphincter so we need to get in there and see and try to detach the sphincter so when we try to get above the abnorma and dissect it off the sphincter like that we have some access we have some possibility of getting here without stretching the sphincter too much and without damaging its mucosa so here i'm doing the posterior [Music] aspect of the apical tissue here it looks like clearly looks like a normal so let's see if we can detach this because that will give mobility to the apex before we go more anterior you see i try to connect a lateral plane here that we are developing with the posterior plane that we had already developed okay now here i'm going to take my attention to the
- apex here you see this is this is 12 o'clock here i'm going to do an uh horizontal incision also to detach the sphincter above from the apex enough so that that i have access again and then i can go you see inside and up inside and up until i get towards 12 o'clock here usually the 12 o'clock fibers are parallel to the fiber at the beginning but when we develop this space continually here the scope tip is starting to push well just by being there starting to push the anoma downwards you see we get better until your access and also this push is going to verticalize these fibers at here you see they are becoming a little bit more vertical and then more easy to cut this is where we marked the 12 o'clock
- limits of the operation at the beginning here we can take the opportunity and cut almost towards the other side a little bit to facilitate the work from the other side there we are so now let's get to see this thing to hear this is sphincter again this is optical tissue and what i want is to fire in the interface here where there is contact of the sphincter with the apex you see i don't mind making a little bit of a cut on the prosthetic or on the surface of the abnormal because this is just detaching the anomal from the apex and now when i go inside here you see we will make sure that we remove the whole abnormal so there's no remaining dph tissue just that this little incision that i do there gives me access
- this will access here now i'm going to try to dissect the posterior tissue posterior apex let's see we can get it looks a normative this is a nodule we have to study the tissue characteristics and try to read the anatomy here maybe it looks funny now there let's see if we can connect this incision with the one we have [Music] posteriorly i'm going to progress a little bit further here and try to bring it [Music] down try to connect with the previous line of dissection here you see this this was the posterior line this is now the lateral natural line in the posterior aspect this is coming here this is the posterior line we mark at the beginning okay so now we pay attention to the ethical bit here
- again you see that i'm trying to go under the sphincter and try to separate it from the apex again i don't mind doing a small incision on the tissue of the adenoma because then when we go to look for the good plane here you know that tissue will be removed anyway but we will have better access [Music] [Music] you know this 12 o'clock tissue here white the fact that it's white lets me know that i can cut there confidently that the sphincter will not be damaged because this is what i why i call it the one time because as long as you are in the white line here there is some anaenormative tissue apparently an optical nodule see if i can take it sometimes with this small spaces at the beginning there's a lot of debris coming out of
- the prostate due to the energetic effect of the laser some of the tissue is vaporized and then of course we see the debris making the secretions coming out of the prostate and when the space is too small it's difficult for the uh exit or if it says in the endoscope to irrigate properly that's why we see a little bit more blur this is only momentarily you know and here coming up coming up we're trying to connect with the other side when we do that we are finalizing the early optical release no which is what we were trying to attempt so here that's a good plane apparently i don't know if that's a little bit of an anomalous tissue here also as long as we are in the white area i don't mind proving probing you know
- the tissue checking trying to go a little bit deeper in the capsule to see if there's a better even better plane sometimes coming from one side to the other is also a good idea because maybe you might find a better plane you know that you can take towards the other side more or less we have connected here and just being a little bit anal if you may say about being aggressive and taking it all out here maybe i didn't take a proper route or at least i'm trying to check if this is a bth tissue and then it's cut so it looks like capsule so it looks good and then of course we will have to work a little bit to make the lines connect again here we are coming from below coming from below the lateral dissection we
- started here in the posterior aspect so i have to come all the way up up and try to see if we can take this line and connect it with the other side sometimes the anterior plane needs a little bit of work you need to go back and forth like this to establish a nice antenna line you see and then of course you want to take it towards the other side so a little bit of work is needed sometimes to establish a good connection between the different sides of the prostate this was clear here we have to see and we are now starting to see how wonderful moses is for this operation because it does provide hemostasis as you go play as you go like or you know first past homostasis uh that means that when you pass
- and you dissect your line of dissection like this the hemostasis is quite efficient quite good and you don't have to worry too much about your status anymore just dissection you see i'm just following the plane around the prostate following the plane following the plane coming down here coming down here [Music] this is the beauty of false modulation i think it opens new avenues for improvement and development and i think for the popularization of polyp i think these lasers are much more attractive in the sense that probably holmium is my favorite because onion has a very high big power you know what this means is that you know if you're going to to use for example one watt and that means one joule for one second
- [Music] there are different ways to get one watt of power output you know you can do the first millisecond you can emit all the energy and then the rest of the second there will be no energy output this would mean that all the joule is concentrated in a millisecond you know and that would give you a very high peak power it means that the burst of energy is is incredibly powerful and it's only one what if you compare that to emitting the jewel constantly over one second you know that would give you very low peak power and the effect would be very different and the advantage of polyp is that with very high peak powers it produces a little explosion in the tip of the of the fiber and then of course the second pulse is
- going to travel through this uh little bubble or little cavitation bubble that is produced and we'll reach a little bit further but what i'm trying to say is that other lasers like trulium lasers and julium fiber lasers they have very low peak power so they don't get this blast effect this pressure wave this uh that is going to open you see what you do is you put the energy you spray the energy in the interface between a normal and capsule and then this explosion is going to break the links you know the break the attachments is going to try to find the path of least 36 resistance which is usually the virtual playing between a norman capsule drop when you do this procedure with a petroleum or two
- thumb fiber lasers you have to decide what you have basically it's a very good cutting tool and then you have to decide where the plane is here the laser is developing it for you so that's the main main advantage that that's why i love and that's why i choose polyp as my tool and of course with this enhanced homium you know this this moses uh system you can get an excellent first pass formulation which means that you can concentrate in your dissection and you don't worry too much about the hemostasis you know just occasionally you're going to see a bumper an artery pumping blood maybe you might you have to stop for a moment to coagulate it but in general you see when you work you you see that
- you get excellent excellent hemostasis and that allows us to cut down the surgical times enormously so we can do this relatively bulky prostate this was estimated to be 80 but it looks to me a little bit bigger maybe let's see if it was 80 it would be bulky enough i think and probably we're going to need i don't know 20 25 minutes to finish this case so here you have seen that i opened the bladder neck and now i have to do the posterior dissection and here it is even more important to keep the fiber close to the unknown area we want the energy to disrupt the plane to open the plane but we don't want the energy to go deep into the capsule that's why i keep it all the way up all the way up very up
- huh not against the capsule that i get against the adenoma and for example when i'm going in this direction and then i correct i have to go up further up you see because that will dissect the plane carefully without penetrating too much in it and then i go up again you see this keeps me more or less in the plane if if the posterior aspect is difficult and you start seeing changes in the quality of the plane that means that being that you're going a little bit deep maybe then it's a good idea to go and look for the natural lane here it was here it is so we're going to try to develop this corner here and see the plane from from the lateral aspect here you see we were reaching almost the bladder neck not yet
- it's probably safer to approach the posterior aspect from the lateral side like that you see so you come here and then you take it towards the posterior aspect and it keeps you in the right plane huh of course if you see nodules if you see around a piece of tissue that looks like vph like that like that like that you try to take them out there's always capsule beneath them you know but it can be very very very thin so you have to be careful as you know i like to work symmetrically so i went to the other side to do the same you know to progress in a symmetric way a little bit in one side a little bit in the other side so our approach to the ladder neck is quite symmetrical they were coming look at this energy that dissects the
- plane beautifully you see it's choosing the way for me it's telling me where to go of [Music] i don't course this energy to go very deep so i keep close to the ceiling of the operation close to the abnormal in the upper part here we saw an audio so i'm going to try to spray it out you see just let the laser [Music] blow on the tissue a little bit very careful keep a distance that allows me to get this effect try to go under it you see but they're getting very close so i can respect the capsule below here we are again we go from side to side if we come around to this region here is the bladder neck let's get closer to the bladder neck let's see we can get some mobility and some detachment here
- you see again trying to fire close to the abnormal close to the abnormal just cutting the superficial fibers that we want to release but not getting too deep here would be the bladder neck okay we had it already liberated check for the ureter orifice i think it's going to be around somewhere this is it you see now we have this lateral access to the posterior part it's almost done on this side let's see the other side here i'm coming trying to see what is holding you see the norma from flipping into the bladder we don't want to flip too early because if it is attached and you push you might break this posterior plane and gets under the trigon so i only flip the abnormal when i have that i can go and look at the ladder neck
- on both sides like i did on the other side i'm doing now here you see here we are reaching the bladder neck very nicely because we want to have a very small hinge you know the attachment at six o'clock should be very small and not too wide not too long you know what i mean so when i push the normal inside the bladder it's not too big not to attach so we have to improve a little bit our work here going from the lateral to the posterior there we are that's uh let's uh reach into the triangle here there's more need for hemostasis than usual that is mucosal bleeding bleeding i bet that the uo is a little bit far there so we are okay once you see the yoyo in one side you can tell more or less where is the other one you can see that
- here you could still continue detaching [Music] we have already almost uh almost already finished did you say that is that correct i'm not sure there we are so now i think we are in a position to try to flip the abnormal so what i'm going to do is i go to one side i lift the adenoma to see if i can lift it and then push inside the bladder it went in very nicely so not no big deal no big problems [Music] this is uh now some mucosal bleeding that we saw before and this is the last attachment you see here you can cut in smiling fashion like that [Music] you detach the base of the middle lobe it's a bleeder from the mucosa let's try to stop it you see this explosive nature of the hormium sometimes makes
- that's a uo sometimes makes the edge of the mucosa to to breathe a little bit then if you want to coagulate the mucosa you have to choose lower power settings i think because otherwise it will bleed more and more as you try to coagulate it so make sure before you mercilate that you try to coagulate the mucosal leaders because those are the ones that are going to bother you more when you're more selecting maybe there is a small internal bleeding in the fossa and what is going to happen is that it will form a plot inside the fossa but that will not i'm going to lower the settings this is the second pedal i use one joule and 40 hertz to coagulate the new cursor like that you see here i'm trying to get to the
- edge because we have been dissecting it with this explosive effect of the holman particularly in the mucosa it can produce a little bit of bleeding from the edges let's go up and check wonderful wonderful uh tool because you can work very very confidently and don't worry about the bleeding this is especially especially useful and where it really really shines this is moses later is when you have to do a very large very large cloud i'm going to check here this is the posterior rasp and you see how thin the capsule can be there but we were radical now we took all the abnorma out we take the catheter out the next morning irrespective of how this looks it looks very flimsy but we don't keep the catheter longer
- so this is now 7 30 pm in madrid and the catheter will be removed tomorrow morning this quality of hemostasis we will be extremely happy to take the catheter out and we're almost certain that the patient will be able to avoid okay let's go to more selection now we have the piece in the bladder this is a rough area near the oxygen i think i'm not sure here i'll coagulate this so they don't have nuisance bleeding [Music] during initiation look at this this is the beautiful preservation of the sphincters mucosa you see the mucosa goes all the way down here we have preserved the mucosa where we wanted maybe here there was a small nick a small nick is much better than a classic deep utilization of the sphincter that
- took place all around except at 12 o'clock so now i'm going to change the instruments and i will use the light there you go my nurse vanessa is helping me today with her large experience and now we're going to raise the waters a little bit the water and i'm going to start the musculation basically what i do is i i'm here ladder neck i go a little bit up and i put the most letter blade inside because if you go too close to the tip of the endoscope because it's logical it's uh you might be afraid to think if i put the blade too far i might get the bladder so you have to find a nice positioning like here typically i say that you have to see the wolf if you can because then you have the ideal situation you can see the adenoma on top
- you can see the blade you can see the two black triangles on the sides and more solution takes place in a static fashion you know i'm not moving i'm keeping in a safe position and my only concern is to see if morcellation is efficient or not if it's not efficient you know when you see the mouth open of the of the blades then you are sucking a lot of water out when the tissue is not letting you see their mouth then more selection is being good and you will take out a lot of tissue and very little water so i don't use a second irrigation inflow you know i think that makes the procedure more cumbersome or complicated you know two bags two sets two giving sets and and but i am very cautious in the sense that once in a while i
- palpate the bladder to check that it is cool and of course i keep the balance in my mind if it's good more solution like this i know that the inflow is going to be balanced with the outlaw and the bladder will keep reasonable distended if i can see the the mouth of the morse later long enough like now you see here i stop and i go back to try to reestablish the engagement without moving too much you can see that the hemistasis was amazingly good i didn't spend too much time doing complementary hemostasis because the hemostasis is happening as you go and that saves a lot of time also tonight i will go out for dinner and i will drink wine knowing that i won't be cold by the nurses because the patient is
- bleeding you know as it used to happen before when we did turp and of course open simple prostatectomy it's really a joyful operation that everybody should learn the many advantages now if you want to learn first you have a lot of videos like this to learn to learn to learn the anatomy to learn the concepts to learn the steps of the operations i think luminis has started a educational program where you can see other techniques and other prominent surgeons performing surgery of course there are much better instruments in the sense that morcellation for example now is so much faster than before so instead of taking 40 minutes one hour one hour and a half it will take 10 15 minutes 20 minutes so
- this has shortened the procedure significantly better lasers better more selectors and i think a better technique which is the and block technique with early apical release and preservation of the mufosa of the sphincter because that also improves the outcome especially the possibility of having early stress incontinence is almost disappearing in these patients and it's very very low rate and here we are witnessing a beach ball probably let's see how we deal with that here i'm continuing with the more selection of the tissue maybe i need to let the bladder feel a little bit but i can try to bring the piece ah there's some bleeding some oozing in the fossa so i would try to continue in the ladder
- let's see if we can chew the the tissue here no that's that's a a beach ball manila here i'm continuing with the marcellation yes the thing is even when you're in a safe position if the bladder deflects the bladder wall can get dangerously close to you you know because if it's collapsing you know it will get closer and closer to the most later blade so you have to be careful that's the beach ball let's see there are little instances i mean not so often you find beach walls that the piranha system cannot chew you know but let's see maybe this is one of them it can happen in in real life so here we are trying to chew there my advice is if you can do a safe trial a safe attempt it's nice to chew them
- if you can just check that the bladder doesn't empty too much so it's getting empty it's not so large but when you go in with your stethoscope to try to take it out it looks much bigger than what you see here let's feel the ladder be patient [Music] you see when there's bad engagement but this is difficult to motivate because it's tough as leather you know it's very very tough very tough tissue so maybe i will have to go and use the receptor scope to take it out of the ladders completely give me the recycle scope and we will finish [Applause] as you can see we have excellent hemostasis and excellent visibility and it's a true true joy to work with the new volumes you see now the piece looks much bigger than it was
- before i'm switching to to glycine and i'll try to see what i can do with this piece i have to make it smaller [Music] [Music] it's very very hard very very hard tissue indeed resecting this loose pieces inside the bladder is quite tricky and if i make it small enough i will try to see if it will fit in the urethra and we will say yeah i will be able to take it out here also i can try to bring it to the the fossa so it is a little bit safer to catch it like this try to bring it in the fossa and see if we can not it went again into the another now that's the porsche that's the process so we have it in the personnel see the process is so big that for a moment i thought sometimes we have no other
- possibility than to try to resect it uh make it smaller so we can take it off we'll use the instrument to remove the small pieces so this is the real-life thing there even with top marsullator top laser sometimes you have to go back to the old receptoscope iglesias would be happy to know that this instrument is still being used and see at a certain moment i would try to grab the tissue like this and see if it comes out in one piece but it didn't so let's go and try again my nurse is always ready to help me with some gel because this finger it looks wonderful here we're coming in again is the remaining piece it's a long one but let's see if we grab it from here we don't finish the cut maybe now it came out
- completely it's in my hand i don't know if you can see that okay now we'll extract the fragments and put a catheter and go home it's very hard i'm going to wash with the eleg some of the pieces are coming out relatively small and quite clear water so i hope you enjoyed the video it was a nice nucleation a nice demonstration of how moses can