
Surgery
RL En Bloc HoLEP (115 cc): A great teaching case... sharing lots of tips and insights...
Dr. Fernando Gómez Sancha · ICUA
Dr. Fernando Gómez Sancha · YouTube
Language: English. YouTube audio metadata.
Surgical content for professionals. Contains footage of an operation.
Playback connects to YouTube. Your search query is not sent to the player.
About this video
An en-bloc HoLEP teaching case in a 115 cc prostate, as stated in the title. The description presents the recording as an explanation of key concepts and practical insights, without itemising those points or providing postoperative results.
Documented details and sources
Only details explicitly stated in the sources. Missing information does not mean it did not occur.
- En bloc
RL En Bloc HoLEP (115 cc): A great teaching case... sharing lots of tips and insights...
- 115 cc
RL En Bloc HoLEP (115 cc): A great teaching case... sharing lots of tips and insights...
Source checked: 2026-10-06.
Available transcript · English
Automatic YouTube captions, not clinically reviewed. Names, technical terms and numbers may contain errors. Check them against the video; complete audio coverage has not been verified.
Selected spellings of enucleation, morcellation and holmium terms have been edited. This is not a full audio or clinical review; the original captions remain the source.
They may contain transcription or translation errors; check the explanation in the video.
- Okay. So, we use spinal anesthesia. Spinal anesthesia is quite uh not ideal because let's see if I can go in very very carefully. Trying to dilate this progressively with the tip. Otherwise, we will use a dilator. Let's see. There we are. I'm going in very gently. No, because it's always tight. Not always, no. But often we find a lot of tightness in this in this region and we don't want to do a very traumatic entry. Sometimes we cannot avoid doing a little bit of trauma. Okay, there we are. Huh. So, this is the prostate.
- Okay. So we have a lot of trouble you know when the spinal anesthesia because means fast is convenient for the anesthetist but uh it's a lot of pain for us because patients are sedated and they're not uh not helping too much. Okay, fiber laser ready. So, we're going to come down and here when as we go out I want to see the pillars of the sphincter. Okay, the pillars of the sphincter. We can see them here. You see this is this is the end of the adinoma and this is the beginning of the sphincter more or less around here. Okay. So, I'm going to mark in both sides. I'm going to mark more or
- less what where I think the limit is because I want to get very very close to the to this limit here. I'm using quagulation because I I think otherwise it might bleed a little bit. I want to mark the white line. Okay, the white line is this line that goes all around the let's say the limit between the sphincter and the apex. Okay, this is going to be a good landmark for the operation. Here we have the white line and if we go out normally we can see the sphincter closing here. You see this is all sphincter going down all the way to here and here is where I marked my my white line because I want to have a reference that I can uh always recognize during the operation. Normally here you see there's
- not very good visibility because the sphincter is closing over the drainage holes of the tip of the scope. So we need to get inside in order to allow for some outflow and then we can start the operation. Huh? Of course I'm going to try to enter the paracolicular space. Okay, this is the paracolicular space. I'm going to the floor lateral of to the ver montanum. Okay. And I'm going to do these movements from medial to lateral to enter here. Okay. Here I will do the same. Initially I will score the mucosa like this. You see connect to the white line here. And then we have everything ready to start the the development of the
- posterior plane. This is what I call the paracolicular space here. There's no need to lose time.
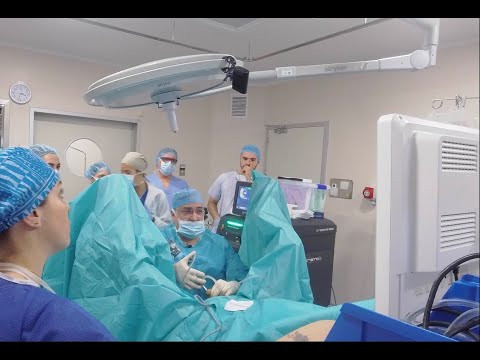
- There we are. But uh we are trying the system because we want to I I would like to have better videos, you know, more educational videos. And that's why I'm doing this idea of using several cameras and being able to edit during the operation. Okay. So here what I'm doing is I'm connecting both spaces. You see I cut on top of the venom. cut the frenolum of the vero montanum and then now I'm going to go from side to side trying to develop the posterior plane. I'm going to refer to four planes. I think of the prostate as a little box. Okay. So I am going to talk about the posterior plane, the lateral plane in each side and then the anterior
- plane. Okay. This is a simplification that I find very useful to explain enucleation. You see this would be this would be uh a posterior plane. With every plane we're going to have a line of dissection here. You see this is the dissection line in this side. So we have the posterior plane and the posterior line of dissection. Okay. Here logically the posterior plane is going to change direction. So if I continue straight, you see I'm going to go deep in the capsule. So this is very dangerous now to continue here. I would need to go more up. But the problem is that we have lateral fixations. You see this is fixed here. This is fixed here and we are trying to go under the arenoma but it's
- not letting us uh go. Okay. So I'm going to concentrate now on the aical part. Okay. So I'm going to come here. This is my white line. Initially I will deepen the white line. Okay. Like this going from six towards 12:00. This is the this is the line on the other side here. And this is the 12:00 coming from the other side. Okay. And basically every time I do an incision like that, I get a little bit better access. And I want to see the lateral plane. So I'm going to start going up and down here. See if I could go a little bit more lateral. You see I go up and down to start the lateral plane in this side. Okay. But I'm going always my dissection is going
- to be from the apex towards the bladder neck. Okay. The apex aquical. All right. Here we are. And then I want to connect the lateral line that I'm doing with the posterior line that I had done before. You see? Because for me it's very important to develop a line of dissection that is going to be not only let's say it's going to be the guide the reference you see this is the now the lateral plane this is now the lateral line okay before I continue to go up because I could try to go up here the problem is that I find some resistance because there is aical attachments here so you see here the apex is still joining the stinker. You see this is the white line again. So I'll do another cut trying to
- get some little improvement in my axis here. I can see that there is a big big nodule. You see here. So maybe we didn't take the proper lateral plane here. Also I'm clashing with the leg. Let take this out a little bit more. So you see in this in this region I want to go outside of this nodule. You see, I want to go out to find a better lateral plane that removes all the aical tissue. Okay. So, here again, I'm going to try to continue generating the lateral plane, but also I want to have a uniform lateral line because this is my orientation system. Most people who get lost during hol is because they don't carry a very nice line of dissection. And I want to have a
- very nice line of dissection that will allow me to distinguish uh and go back to that to that landmark and to help me understand the anatomy. Here I'm going up. Everything I see is white. Okay. So I know that the sphincter is not going to be damaged here. This is another advantage of the Okay. So, here I'm going up, you see. But always I try to remove the epical attachments first because I don't want to break the pull. I don't want to pull. I don't want to uh make you know in the past they taught to people who were learning hol the encircling maneuver. The encircling
- maneuver was a maneuver where you enter the plane here and then you would go all the way up to 12:00 but then when you came out the shaft of the endoscope had broken the sphincter and had removed all the sphincter mucosa from from the sphincter. Okay. So I want to be much more careful doing this uh dissection trying to run trying to look after this beautiful line lateral line of dissection that is going to serve me as a reference. You see so I can advance a little bit the lateral dissection here. Now we are coming more anterior because we already removed a lot of the optical attachments anteriorly. No. So, always I like to come out, you see, come out to see the
- 12:00 here. So, we can cut the 12:00 fibers here a little bit and we can get a little bit better entry. I don't want to leave any tissue anteriorly. Okay. So, I always try to find the most eccentric possible plane. Okay, there we are. So again I'm going to liberate a little bit more also anteriorly and you see I'll tell you the definition of hol for me is uh surgical procedure by which we progressively and strategically separate capsule from adinoma. Okay. The capsule separation from the arenoma is going to
- grant better mobility of the arenoma. As you detach it more from the capsule, the adinoma will move better inside the capsule. What I mean is you see this part of the adinoma is mobile. I can push it towards the sides. You see before it was completely fixed um to the to the lateral wall. Now we have released this this uh attachments and then when you gain mobility you gain access to places where you couldn't access before. Okay. So here we come out again. You see this is our white line now a little bit red because of the bleeding. So I'm going to uh deepen my white line a little bit. You see I'm going to do
- Okay, here we are coming up lateral posterior. We're going to start the lateral line on the posterior part here as we did before. In this case, we're seeing a very nice plane. You see, sometimes we're going to see this, I call it the beautiful plane, but the truth is that uh you don't see the beautiful plane all the all the time. You don't see it in every patient. You don't see it I mean when you see it in one patient you don't see it in the whole normally in the whole circumference of the plane. Okay. So here we are. This is our our plane. But as we go again back to the sphincter area you see we still have attachments here. So I want to follow the white line
- here. This is an access incision. Again, I'm cutting a little bit to try to get some distance between the sphincter at the and the apex. And then we will try to continue our ascension because we are dissecting mostly from six to two to towards 12. No, here in both sides. My objective is going to be to try to meet with the other side at 12. Okay. So here now we are going further up. You see trying to connect the line that we are doing now. I'm trying to connect it with the line that we already had here. You see? So we have a uniform uniform line of dissection. Okay, there we are. This looks okay. This is my line of
- dissection here. It's detaching quite well. Let's see how can we connect this to the posterior line that we were carrying before. Okay. Here we are coming around. Coming around. There we are. Okay. Now again one more time. You see we come to the apex. We try to release the epical attachments first so that when we go further up in the dissection, we don't break the mucosa of the sphincter. We don't damage the sphincter with traction from the endoscope. Okay. Here you see this is now becoming the anterior line. You see now this is anterior more or
- less anterior. So I'm doing this anterior line now that connects perfectly to the lateral line that we had before. Okay? You see my line of dissection is important because when I have a circumferential line of dissection around the arenoma, I have a very good guiding system. I don't need to stop the operation to go back and to do panoramic views in order to know where I am. You know, the line is telling me where I am. Okay, it's helping me understand much better how how the anatomy works. Okay. So, there we are. This is my posterior line connecting to the lateral line. And this hopefully is going to be my lateral line now connecting to the anterior line. Okay,
- there we are. Still, I think we have some stuff here at 12:00. You see, so now what I have to do because we have the plane here. We did that plane before and we have the plane here. So I need to do a line that will connect both. So I'm going to go from here slowly progressing towards the other side to see if we can connect anteriorly. Let's see. I'm coming back. You see I want to do the final detachment between sphincter and adenoma at 12:00. Here you see now I have my anterior line and now the sphincter is completely detached from the adenoma at the apex. Huh? I'm going to make a better anterior line because we had developed anterior
- line from both sides. But I want to make sure that we can have a long long let's say line that goes from side to side. Okay, here we are. This is the anterior line. And now we're going to progress towards the bladder neck. So basically my strategy has been to access the plane posteriorly, develop the posterior until I couldn't develop anymore and then I started ascending from 6 to 12 in both sides. Now I'm doing the specular thing. I'm progressing antidiorly. We're going to enter the bladder at 12:00 and then we're going to progress from 12 to 6
- uh in order to join again at 6:00. Okay? So, it's a specular strategy. You will understand it better when you see it better. There we are trying to go up following my circumferential line here. Of course I have to have into account this is the anterior plane. Okay, this is the anterior plane. So basically we cannot continue dissecting in this direction. We have to put the fiber down because we have to not only let's say worry about the 2D lines that I'm talking about all the time but also we have to take into account the 3D anatomy of of the prostate. So here you see I want to liberate
- progressively but look at how my fiber is pointing downwards. It's very interesting that uh when you want to enter the bladder in a patient with a middle lobe like this the endoscope goes like that to enter. If you want to cut the 12:00 with a three-loop technique the endoscope is you have to push it down to get up there. But here we are anterior to the anterior commisser and my endoscope is horizontal. And why is that? Well, if if you remember the definition of a nucleation, I said that when we detach the adoma, we gain mobility. No. And interestingly, now my endoscope is pushing very gently the adenoma downwards. And that not only moves the
- adenoma inside the capsule to let me There's a bleeder there. Let's see where it's coming from. We need to see if we can pinpoint the origin. See if we can get to it a little bit towards the base. Let's see. It's a big vessel, huh? Let's see. How can we do that? It's not easy to control sometimes the big archeries. No, we have to fire fire around do the helicopter sometimes to try to stop them. There we are. Okay. So I was telling you that uh when we push the aroma down the arenoma moves down
- inside the capsule but also the whole prostate is going to come down because the prostate moves up and down and a little bit to the sides. If you do a by manual examination you can feel that you can displace the prostate up and down. The fixation of the prostate is the pubopatic ligaments at the apex but the rest is fairly mobile in the pelvis. No. So here now we are seeing the sign. This is circular fibers and this is the this is the entry into the bladder. The vertical fibers below. This is the sign that we're going to enter the bladder. Okay, here we are bladder neck. This is the lateral line here. Of
- course, we have developed mostly the anterior part. Here we are this bladder neck. Okay. So, we have mobilized a lot here. You see, we didn't work too much in the lateral line in this in this side. So, we're going to try to
- Okay. So, here we are coming up and down. This is this would be our lateral line. No, we didn't work so much developing this lateral line towards the bladder neck. So, we need to work on it a little bit. This is probably my not favorite side. So sometimes we have this. We're happier working on the on the on the side that we prefer. No. And then we get a little bit behind on the side that we don't like so much maybe. So you can ask me questions. Say if you find a question, I'm happy to to to respond. It's different to have a conversation with you than to try to operate while you have a conversation among yourselves. That's
- why you can ask anything you want. Basically, you see I'm I'm following. Now, the next step is going to be to try to go from 12 towards six. Sometimes it looks that we go from 6 to 12. Of of course, because you see some people when they do hip, they do like this. They come down like that. They stop and then they go up again and then they come down again. You see? But you see half of the operation nothing is happening because the laser is not doing anything. It's not progressing the operation. Okay? So I like to I like to dissect always. I like to dissect and and you have to develop the skill to be able to dissect most of the time. Okay? Keep the pausing time to a minimum.
- Okay? Because this way you're going to become very efficient. Even when I move slowly. I'm not aggressive. I don't want to run too much. You see, if you dissect most of the time, it means that the pausing time is going to be almost nothing. And that means that the operation will be quite fast. Okay. Here we're reaching about 8:00 here. So the general philosophy if you understand me is to go progressively from 12 to six. That means that sometimes we will go down like this uh following this intention to go further down but sometimes we're going to go from 6 to 12 but to achieve that goal you know what I mean to achieve the goal
- of dissecting this lateral and posterior uh plane so that we can then connect with the other side at 12:00. Remember that here we saw that the plane was quite deep that what that's why I stopped and now I'm taking a much higher plane you see but now the mobility of the adenoma is much better you see I can before everything was attached so I didn't have access to develop that posterior plane properly you know so basically as I said this is a strategic uh series of steps uh in the operation you see that are going to help us uh progress in the operation. Here there's some blood. So maybe there is something bleeding behind. Let's see. You know that these lasers break stones. So if you fire against the
- clots, the clots will dissolve as well. So don't worry if there's a clot. Just be patient. Let the energy and the bubbles and everything that forms there to to dissect this plane. And here also the intention is going to be to come. You see from from the 12:00 region here we also have a lot of work to do. Of course it's a relatively big prostate. No. So here I'm going to come downwards trying to connect this with this. You see trying to decide what depth is going to be good for us. There was some bleeding there. Let's see where it's and again in this side I'm going to come downward trying to progress always towards the bladder neck. In a way this is like
- driving a car. You know when you drive a car sometimes the car is going to get dangerously close to the side of the road and then you need to change the direction of the car. you know move the steering wheel to ad adjust no the the trajectory so that you don't go out. So here is going to be the same. You see I'm doing this up and down movements. I'm moving uh trying to deepen the line of dissection trying to progress. But if I see in any moment that I'm going too deep you see if if this looks very deep the next time I don't want to come here. I want to come a little bit closer to the arenoma. You see this way? We're going to navigate the line of dissection. We're going to
- navigate the dissection to try to keep right at the capsule but not perforating. Now, of course, in this game, sometimes the road of the car, the the the wheel of the car is going to be very terribly close to the outer part of the road, you know. So in this case sometimes we're going to see minor perforations. Okay, minor perforations in in my philosophy are let's say allowed. You can do small perforations. Of course you don't want to do them. But the small perforations are telling you hey don't follow this depth. Okay. So what you don't want to do is to make a big perforation from a small perforation. Okay. This is the UO. So here at the bladder neck, what I'm going to do now is I'm going to cut the
- bladder neck a little bit towards the midline. And I want to leave this edge here so that it is this is the direction of the UO. You see this is the edge. If we cut here later, we know that we are far away from the UO. So it's going to be pretty pretty safe. Okay, there we are. There's some bleeder somewhere. Maybe around here. Let's see if we find the bleeder because it would be nice to to stop it. Let's see where it's coming from. Yeah, I cannot see it very well. Let's do some general heistasis until we find where the bleeding is coming from. It seems to be around here somewhere,
- but I cannot pinpoint the origin. No, it's a small artery. So, here maybe around here. There we are. Don't be don't panic. Okay. When you do hole, I think you need to have a technical mentality. You don't want to be have fear. You know, the fear is not a good uh companion for for for any operation. You cannot be afraid. You need to be relaxed and technical. Huh? Here I'm checking heistasis. There we have our lateral plane. We're trying to get you see here to see if we can connect below. You know that this is a deep plane. We don't want to go there. I want to stay up. But of course, we need to define a little bit more superficial plane. This is like driving again. I'm driving. I see that I'm going
- out out of the road and then I have to go back on track. Huh? Back on track, back on the on the nice depth of dissection. Sometimes when we do mechanical movements and mechanical dissection and a little bit of traction, we might break the this this deeper plane. So we need to be extremely gentle, you know, trying to avoid pulling too much because the capsule sometimes is so thin that you could break it not with a laser but with the movements of the cystoscope. Okay, here we are coming towards the side. Let's see coming towards the side. There we are. And here that looks very capsular. Everything looks quite capsular. Let's see. Let's see where the where this plane will take us here. Now we have
- progressed a little bit posteriorly. Okay. Posteriorly, we're going to experience a sudden change of direction. The plane will become almost vertical. So here also we have to be very careful with where we target the laser. Huh? We don't want to target the laser against the capsule. We want to keep at the edge. You see? And if I tell you the truth, I I like to keep closer to the side of the arenoma because you see when I fire close to the edge of the arenoma, the energy that goes to the capsule is very smooth. It coagulates but it doesn't penetrate. You see? So I'm not firing this is the line of dissection. I'm firing up here. You see I'm getting very close to the arenoma. I want to
- keep close to the arenoma because I want to make sure that while I dissect this posterior plane I don't perforate the capsule. Okay, here now we are reaching the bladder neck in this side. Let's see how the other side is doing because here you can see that we are again here you see this is the limit we marked. We know that the UO is much more lateral than that. Okay. So here you see we we we were able to reach the bladder neck very well. Let's see in this side how much more let's say work we have to do here. There's some attachment here. Again remember the fiber has to get firing very close to the adenoma because we don't want to go deep deeper than
- that. No that's already very capsular. So we want to stay you see and and uh many people ask me about the settings I use for for the operation. What settings do you have? What settings do you use? And I tell them the settings are not so important because you see with the same settings if I fire from the distance there's no effect no nothing. If I get closer I get coagulation. You see? So maybe I'm trying to dissect and my distance is not correct and I only get coagulation. You see? So you have to tailor the distance. So basically the settings are defining how the energy is coming out from from the fiber but it is the surgeon who has to decide how he wants the energy to
- reach the tissue. Okay, that's a very important principle of enucleation with laser with any kind of laser. Okay, here what I'm going to do now is I'm going to lift a little bit the adenoma so it it's resting on the edge. You see here? So when I push it into the bladder, it will go easily. Okay, normally normally it should go easily. Let's see. I think we were able to rotate a lot of the adenoma. This is the prostatic urethra. You see coming here and the prostadic urethra is now in contact almost with with the bladder neck. You see now we have put one lobe inside the bladder. This is now bringing this other lobe apart from the capsule. Now we have
- a much better access down here. You see? So this is a little trick I use for the Enblo approach where because many people tell me ah but with block many times the adenoma is wider than the bladder neck but with this rotational movement I can put you see the adenoma into the bladder. In this case I'm going to push towards the other to the same same direction. So initially I do like this and then I push the adenoma into the bladder like that. And this is the end of the of the enucleation. Here you can see that we have the six o'clock pedacle. Let's see where is the UO here. Let's see where it is. It's far away. Okay. So we can confidently cut here.
- You can confidently cut here. the last pedicle. This is what I wanted to do. You remember that when we are ascending at the apex, we joined both lines at the 12:00 region and we cut the 12:00 attachment. Now here we are joining both sides in the midline and we are cutting the 6:00 attachment. Okay. So this is the end of the enucleation. Now we're going to do hemoasis. This is the the fossa. Let's see. I'm going to use now this setting is magnetto setting. We will discuss it later. So it's really really really nice. Let's see. Because we want to morcellate with uh the best possible visibility.
- You see that when I use a lower setting, I get a much less disruptive uh let's say setting. But again, if I'm too far, there's no coagulation. If I get to the right distance, I get you see hemoasis. If I get too close, I get disruption. You see? So again, it's not only the settings, huh? It's the surgeon. The surgeon has four factors that he can say use to tailor how how the energy is going to reach the tissue. Okay. One of them is the working distance. Obviously, you need to decide what distance you're going to use. from the tissue to get the effect you want. But of course, enucleation doesn't happen if you stay in the same place. So you have to move and this movement from side to side
- is also you have to decide I mean how fast do I move from side to side. Basically we are working at two jewels. This means that the pulse has two jewels of energy and we are repeating the pulse 50 times in a second. That means 50 hertz. Okay. So basically I am firing 50 times in 1 second. If I move 1 cm per second during the dissection, I'm going to fire 50 times in 1 cm. Okay? If I move too fast, maybe I will only five like uh 25 times in 1 cm. If I move at 2 cm per second, you know, do you understand? So if you double the speed, you're going to get what is this noiseando.
- So basically you see if you move too fast there will be less pulses per centimeter and that co sometimes causes worse hemostasis. Okay. So when we do the dissection of the line of dissection, we need to move at a speed that gives us a good balance between dissection and hemostasis. So two surgeons using the same settings can get very different tissue effects depending on how you modulate these factors. The third factor is going to be the targeting. We have discussed how you can target towards the line of dissection or you can target a little bit closer to the adenoma. You see this is the plane that I reached before that looked a little bit deep. You see? So we don't want to go deeper. What's going on?
- Okay. Sorry.
- Okay, there we go. Soon I'm coagulating the edge of the mucosa because sometimes you see this the holmium laser doesn't cut like a knife. No, it cuts by disruption. We will discuss it later. And you see when you cut the mucosa often you get a very rough cut that doesn't uh doesn't provide proper hemoasis. So before morillation I always like to check check the the mucosa around the corner. You see we have to go a little bit around the corner to check where is the cutting edge. There we are. I think we have pretty
- good heistasis now to morelate. Another very important aspect in enucleation is the teamwork. You see, I I don't need to tell them what to do. They know exactly that every time I change the instrument, every time I change the instrument, I need to change the the pedal [sighs] and also as a surgeon you it's very difficult to control all the factors in the operating room. No. So for example, it's not my responsibility to check if I have water or not. You know, you have to train train your team so that they understand how
- important it is to to change the water. Okay. Okay. So this is the morcellation. Morcellation relies completely on suction. If there is no suction, the tissue doesn't want to be morcellated. Okay? So, in order to uh lure the tissue towards the morcellator mouth, you need the suction. Okay? It's like when you are in a bar with a with a straw to drink your your drink, you know, you take the straw, you put it on your finger tip, and when you do suction, the finger goes inside the straw. Okay? So here the suction is bringing the tissue
- from the prostate inside of the mouth of the morcellator and the rotating blades are cutting small pieces of tissue. These small pieces of tissue will need to travel inside the blades through the motor into the outflow. And um but you see sometimes if there's too many pieces sometimes you see there's loss of contact. Loss of contact means that for a moment the system was obstructed. The units the morselian unit has two two boxes. One box is just generating vacuum. Okay. And from that box there's a tube coming out. The tube is going to the deposit of water. So when it starts sucking the deposit has negative pressure inside starts
- sucking and then there's another tube coming towards my motor. Okay. The other box in the mossulator is the motor control unit. There we will define two parameters. We will define the rotation speed here. Incredibly, we have 1,500 rotations per minute. Okay. And also the frequency. The frequency is how many cycles left and right you can do per second. So I am working at two hertz. This means that my morcellator rotates right and left, right and left in 1 second. Okay, that's why you can see this tick tick tick tick tick tick tick tick. It's 0.25 seconds before it changes direction. Okay,
- if you if you um calculate how many rotations per second you have, you have to divide um 1,500 uh by 16. and then you get something like 24 or something like that. So every second the the blade is going to rotate 24 times. If we split the rotation direction four times it means that you will get um about six rotations for it to towards each side. It's difficult to see. It's too fast for our eyesh. But here as you can see I am morcellating the attachment of the tissue with the morcellator is good. In many centers
- people use two inflow of water. So four bags two cables with water one entering from below the other one from above. I tend to use only one inflow for simplicity. Okay. But I have to see that during morcellation I cannot see the mouth of the morcellator because it's covered with tissue. In my experience when you see that you cannot see the mouth for too long. Now we see it. You see when you cannot see the mouth that means that the tissue is blocking the passage of water. So there will be some water coming out but not too much. Okay. So in these conditions I know that I can morelate without interruption and the bladder will remain full. Okay. But if I get the disconnected from the
- adenoma I don't keep the suction going and going because if you want to suck the bladder it might take you 20 seconds to empty the bladder completely uh when you're aspirating without contact with the tissue. So you want to be very vigilant and you want to make sure that the contact is good. So in theory im morcellation will happen and the main problem is that during morcellation the visibility is typically going to be decaying is going worse and worse. So typically there's a window of opportunity of 15 minutes, 10 minutes, 20 minutes to moreellate with good visibility. Then everything becomes more blurry. You don't see so well. And
- that's why I want to be also super efficient with morcellation. I don't want to do to stop. I don't need to stop. I don't need to stop to see where is the veru for example. Is idiotic to do that. You know, we know that we are in a safe position. You see the bladder neck below. I lower my hands a little bit and I keep in this let's say the middle of of the bladder neck more or less. If I bring my endoscope down, you see you can see that we are in the middle of the bladder neck. Huh? This is the safe position. Okay. And I'll tell you more during the next cases. There we are. Normally you see there is some bleeding happening in the fossa
- and this is now the sphincter. You see this is the sphincter edge. The sphincter is covered with mucosa. So we managed to preserve the sphincter really well. Okay.