
Surgery
RL HoLEP case 44: a nice recapitulation of surgical steps after some years
Dr. Fernando Gómez Sancha · ICUA
Dr. Fernando Gómez Sancha · YouTube
Language: English. YouTube audio metadata.
Surgical content for professionals. Contains footage of an operation.
Playback connects to YouTube. Your search query is not sent to the player.
About this video
A narrated en-bloc HoLEP case presented as a recapitulation of the surgical steps. The author explains that the recording setup now captures the operation and spoken commentary together. The focus is the sequence followed in daily practice, with technical comments and tips during the procedure.
Documented details and sources
Only details explicitly stated in the sources. Missing information does not mean it did not occur.
- En bloc
This video shows very clearly the steps I follow for En bloc HoLEP. Maybe you will find some comments and tips that you never saw before. I hope it helps.
Source checked: 2026-10-06.
Available transcript · English
Automatic YouTube captions, not clinically reviewed. Names, technical terms and numbers may contain errors.
They may contain transcription or translation errors; check the explanation in the video.
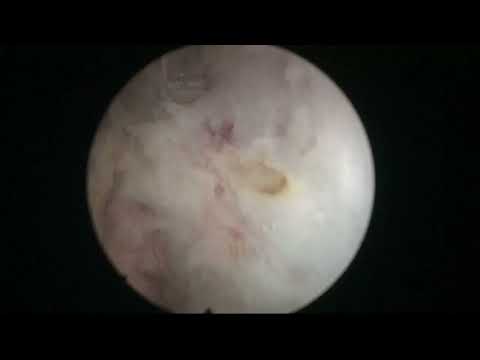
- okay okay okay so let's start this is a man with approximately 70 gram prostate he had Bome symptoms and a PSA of four and an MRI was normal so here we are you see he has a rather long prostate here ual seems to be also sorry focus is not very good because we usually try to focus on the fiber so the orice is not so uh close let's start huh it's been some years now since I published the first video so let's see how things have evolved so here when I come out I can see the Contour of the fers I'm going to Mark here and here initially you see this keeps me inside uh protecting the synor and I'm going to Mark uh the white line going down to the lower limit and this is going to be a reference for a nucleation usually it's
- very easy to see where is the landmark uh between the spinger and the Apex and for me it's a great advantage to have this uh line already marked that is going to protect the sphin mosa which is becoming an objective that more and more neologist recogniz as an important uh goal of the operation if we want to keep uh the best possible urinary continents uh and avoid uh urinary stress in prots here we are early stressing okay so you can see the CER is pretty good here now we can go you see there's little space here I go to the floor of the veru lateral to the veru here and I'm going to try to uh get the fiber to prob a little bit to to see where do we access when we come downwards like this and then a little
- bit lateral let me Focus slightly better you see this this way you should you can find a plane that is uh looks like a capsular plane as you know with this new uh modulation of the pulse uh in this case I'm using virtual basket at two juw and 50 Herz it it it gives us a very good hemostasis so it's very difficult to see the uh beautiful plane the beautiful plane that we used to see when uh we uh did mechanical enucleation so here you can see that I'm doing the same thing I'm coming lateral to the ver starting to open this space very carefully just going up and down going up and down see if I can enter a little bit this space that looks capsular here we found the the limit this is our white line over here as you
- can see so now uh I will continue dissecting if you go a little bit deeper in this in this uh situation you can always correct a little bit the aiming of the laser to to try to correct the plane but as I said we we are no longer seeing a beautiful plane which is what we would see if we continued uh dissecting mechanically most of the times and we are happy to see a capsular plane and a capsular plane to me is a plane that is a little bit white in color usually whiter than the color of the adenoma it is a plane that uh is relatively smooth it is a plane that is eybrows so you don't see cotton like tissue or you know like bread which could make you suspect that you are inside the other n so we look at
- the color we look at the you know surface you see it's fibrous in the in the surface it's smooth and also it's coherent which means that when you go from one side to the other side you know more or less you are uh at the same depth often uh we take planes that are not exactly the the beautiful PL but I would say most most most of the times when you don't see a beautiful plane it means that you might be a little bit under it so deeper deeper than the than the beautiful plane which is not a main problem sometimes and many Olive surgeons tell you that instead of an orange the prostate sometimes behave like a like an onion so having more than one you know possible depth of dissection for uh your ination so here
- uh you see the plane is getting a little bit thin which is sometimes demonstrating that there is some change in direction of the plane we're going up uh to the bladder neck so usually I develop the posterior plane as much as I can and while it's still comfortable you see I could angle the fiber and continue firing a a little bit more upward like that but then I feel the weight of the adoma on top of me and the thing is that we haven't to touched the lateral aspect so it's very heavy it you need to do pressure and the problem is that you haven't developed the lateral plane enough to allow for some mobility of the Apex so I will stop here this is enough uh posterior plane and then I will turn my fiber 12:00 here
- I have a very nice indication of it's 12:00 here as you can see we can also deepen a little bit the the 12:00 incision if we want and that's going to separate us a little bit from the area of the sphincter so here as I uh retrieve my scope we can see the mucosa we can see the white line there's typically some opical bleeding here that I don't think it's even worth it to to coagulate and often I do a little bit more deepening of the white line because I think that gives you much better access and increases the separation of the Apex from the sphincter and then of course we want to go and look for this plane you see this is the initiation of the lateral plane normally I see the the prostate I simplify the prostate
- thinking it is a little bit boxy so we have a posterior plane we have two lateral planes and then an anterior plane that to me makes it much more simple you see that now I'm doing movements going up and down what I'm trying to do is I'm trying to uh delineate the lateral line of Dissection the line of dissection will have to connect with the posterior line and to me this this uh lines of dissection are like a GPS you see I am quite fast with nucleation and that's not because I do things very fast it is because I have a reference for navigating the the the fosa and this reference is going to help me to be able to work almost continuously okay so here see lateral plane it is quite coherent you see with
- the posterior plane this looks a little bit yellow so maybe sometimes we can check if we go deeper do we find a better plane maybe we didn't remove all the Ador tissue there I doubt it because we were already uh a little bit uh uh you know deep here but sometimes it is uh the color is a good reference that uh you might be leaving tissue behind Okay let's continue with our goal our goal is to progress towards the anterior part of the prostate so here again following the white line I'm going to do now an access incision that goes a little bit horizontally here you see I don't mind catching a little bit on the adenoma because you see what happens is I get a little bit better visibility of where
- the proper plane is so I can go after the cuts there is some space and I can look for the proper plane and then try to continue my dissection I don't want to go all the way to 12:00 yet because I haven't let's say developed the lateral and anterior uh so the upper part of the lateral plane here you see I can go a little bit further up let's see you see and also so there's another concept that is I am lately recognizing and people when they watch these procedures for the first time they think that I'm guiding myself exclusively by what I'm seeing on the screen and the truth is if I stop at any moment for example now it's not very clear in this image what is capsule and what is adenoma you see uh of course if
- we have memory we can remember a number of photograms you see we can remember that we are drawing a line the lateral line that I am following up but of course when we're coming up uh I am on the uh right side of the patient here coming up of course we know that the line has to go towards the right towards our right or towards the the patient left and how do we know that well we know that because we know prostate anatomy we see a lot of MRIs uh from patients of all different kinds and I always look at the transverse sections because I like to see how is the shape of the Aloma and basically what I'm trying to say is that often I don't guide myself exclusively uh from the information I see on the screen but I
- also guide myself uh based on the knowledge I have of pratic anatomy and the shape of the adenoma uh so basically I tell uh people who come to watch the operations I tell them you look inside the image but I look outside the image so if you think about the screen that I'm looking uh you're only seeing the the the circle and the of course there is a screen I try to look uh and imagine how the prostate looks like outside of this image and I try to draw the lines you know that uh delineate the interface between a nan capsule because this let's say General view allow me to anticipate how the line is going to look like and then of course the information on the screen is going to tell me if I am right or wrong you know for
- example if I see that I'm going very deep uh on the capsule or or penetrating the capsule of course I will have to correct but also sometimes the image in the screen confirms my my suspicion you know I think the plane is going this way the line that I'm drawing uh you see with my fiber is going this way and this is how I think Anatomy should go in this patient so I I base my lines and the way I dissect more on this uh concept huh developing the lines coming around and now starting the anterior section you see when we detach the aex from the anterior Parts the aex descends and then we have a much better access to to the to Elbow tissue this is 12:00 you see it's a little bit rotated now so let's
- come out check again you see spinter mcosa so I will come here and I will make an incision I don't mind if it is I want to deepen the white line you see and it gives me a little bit better access so I can start the lateral line on this side also up and down movements more or less trying to connect the lateral line with the posterior line huh I call this phase mobilization and connection phase because I'm starting to mobilize the fex posteriorly and laterally and also I want my line to connect to the line of dissection that we had before you know on the posterior plane here you see there there was a doubt is this the proper de maybe we can go slightly deeper we can always explore this this uh doubts you see when you
- have uh reasonable doubts because of the color or the consistency of the tissue for example here you might want to go a little bit out you see when we go out we see thin capsules so probably we decide to stay in the in the same the same place so up and down lateral plane lateral line and connection connection to the posterior uh line trying to get a uniform line that we can recognize easily so if I had to give the operation to another colleague for example he would perfectly recognize the landmarks of the operation because I'm drawing with my fiber a circumferential line that is going around the adenoma and it's following this depths that we found the capsular plane depths another factor in the definition of the
- capsular plane I said it is white it is smooth it is fibrous and I say it's not perforated okay this plane looks slightly you know we are starting to perforate and uh of course we need to stop before the perforation is established uh completely know so I I used to say that the little preparations are allowed but of course you don't want these little preparations to become uh very big very large perforations here I am coming towards the Apex I don't want to continue dissecting upwards here forcing the situation because I'm going to make uh a little bit of uh traction here near the sphincter so here I'm doing my white line deepening line you know axis line again uh I don't mind cutting a little bit of this appical
- anoma here of course I'm going almost horizontal because the spinter is both us and then I'm going to look to continue my lateral line here suddenly we see a little B worse I saw a beautiful idea from pigo from Brazil he did uh improve his uh minilap uh cister scope with little holes uh for drainage of water in the tip of the in the tip of the endoscope so when you are working in sorry that's the sphincter came out when you're working in the in the very restricted spaces like this you you get better outflow and that better outlow is going to improve the irrigation because you will have the ability of uh putting water inside you know and wash which is what you want here you see when the outflow
- is a little bit compromised because the orifices of the endoscope are compressed by the sphincter and by the you know prostate and and like that the drainage of the endoscope is not so good and then you don't see so well so congratulations to phip for this here we are you see now I'm connecting anly so this is the end of the early epical release I really didn't do much at 12:00 but I think the fact that we descended the the anterior part quite well uh probably in both sides made it very easy to connect anteriorly and now the appical release is finished H we know that the mucosa the Spiner is okay you see you don't see my hands but I'm holding the scope with my fingertips I do very very gentle movements with my
- scope and uh I think if you need to do a lot of force uh in this operation is not not a good idea so you never use Force I have seen people bending the endoscopes uh during poet and even breaking the Optics and I think it's that's a mistake you need to work strategically so that you can start accessing different spaces and you you get better access by gaining gaining mobilization strategically for example here we want to go anteriorly you see that the shape of the plane is is going down now and in order to go down I have to push the anoma a little bit downwards but if I have the atoma hanging from here you see laterally it's going to be difficult to bring it down there will be no Mobility so I have to come a little
- bit lateral and try to detach these lateral attachments in order to have a good a good Mobility a good Mobility so that I can lower the aroma I can crush it a little bit or you know squash it a little bit downwards very gently with the tip of my scope to be able to come uh near the the bladder neck also remember uh you should be able to have a technique and you should develop your skills so that you can continuously work you see I I move very slowly I work mostly all the time I do very brief fores on my on my lacing because I have a good orientation I have a good understanding this is my lateral line sometimes when you develop the anterior space if you don't go downwards laterally and you don't con with the
- previous line you know you can have these little let's say discrepancies know that you have to solve as soon as possible and remember that we advance the operation by looking after these lines because this is our reference this is our guidance you see and you see I don't need to stop too often to look back to get oriented I know exactly where I am I'm trying to think how this line should go and I draw it as if it as if my fiber was a pencil you know and then of course the fiber and the pencil have a lot of similarities you know with a pencil if you have a 2v pencil for example you can draw uh that's the bladder neck you can see the vertical fibers below the the uh circular fibers in this side so here we are reaching the
- bladder neck now at this stage I'm going to puncture to equalize the pressure both sides and I don't want this mosa to to bize you know to to push with the pressure of the water so that it dissects from the anterior wall of the platter as you know here many times we have bleers in the mucosa you know that fium cuts by disruption so often there will be small bleers uh uh in the mosa and now it's a good moment to to go up there because as we are pushing the adenoma downwards the bladder neck is coming down so it's very easy to access here you see so typically I would spend a little bit of time trying to ensure that all this uh incision in the bladder has been coagulated now I'm using the Magneto
- setting you know the Magneto is a tweak of the helium laser to emit longer pulses and these longer fules improve a little bit the hemostatic properties of of this laser I think it makes it more similar to what we get with a Tulum pulse laser or Tulum fiber laser so I welcome very much this new uh ability of of the laser to coagulate you see with uh an effect that looks a little bit more like you can even see a little bit of Ching on the tissue which is quite typical of of julum lasers so it's a good moment to stop for one minute and and do a little bit of hemostasis that otherwise you have to do later and then uh we can continue huh you see we have already uh released most of the prostate here we can go in and
- have a look at the uo we saw it before quite far away there it is so we are not worried about the uo and now my next objective as you can see is to release the lateral uh attachments near the bladder neck so I'm going to come here come downwards come up again you see some people when you see them operating they do just one go with the laser they stop they go back they check and then they do another one you see but this is using probably twice as much time as if you allow if you achieve let's say a technique that allows allows you to work uh almost continuously so that's my advice work very slowly and train your skill when you do your cases try to have longer periods of uh lazing longer periods of lazing so that you can uh
- avoid stopping all the time which is going to consume the operative time uh so the slower you go the faster you progress let's say and here I'm seeing the the plane is a little bit deep let's say so I'm going to Target my fiber a little bit closer to the adomus tissue you see that when I Target close to the adenoma most of the energy remains in the side of the adenoma and I don't deposit so much energy near the capsule which is good try to avoid uh causing a perforation typically I mean you could continue posteriorly here I'm going to do a little bit I'm going to come posteriorly to see how my lines the posterior line and the lateral line can connect of course look at my fiber I'm firing up very very close to the adoma
- because I don't want to uh deepen in the in the capsule if I fired you see you think the line of dissection is here if I fire here maybe I will perforate so I need to go up there to continue dissecting posteriorly with some degree of safety sometimes the cap in this area is very very thin here for example we entering a similar vesicle we are so close or or how do you say the differential and Pula sometimes we see these things so I know that I have to go further up and remain that in place I haven't seen that that causes any postoperative trouble no it's not it's not a complaint I I have to say that I see very often I see ejaculatory ducts I see this uh openings of the ejaculatory Ula or or similar vesicles even
- sometimes and I don't see it's very very rare to have a patient complaining about let's say symptoms related to that we don't see also many postoperative uh in infections although I send the patients home with a prophylactic antibiotic for a week after the operation and just try to prevent this this this events no here posterior Line This is my lateral line on this side let's see how bladder neck is looking over here you see here we have to do more work than in the other side I'm going to try to draw my line you see I'm drawing my line I'm trying to connect the line I did before with the line I'm doing now you see try to keep long long movements I I don't like to do very short movements of the scope like this for
- example if you do like this you're going to get deeper just in one spot and then you will have a very regular irregular line so I'd rather do long lines and you see the way I try to use the energy so I I I choose uh working distance that gives me a very soft effect because if you have a soft effect on your line if you avoid contacting the tissue as uh uh just I suggested no the no touch technique um I think it's very nice because you are developing the plane slowly slowly and safely because the energy you are using is incapable of Perforating you know what I mean so even if you start a perforation you're going to be able to see that a perforation is starting and then you will have a possibility to correct your aiming get
- closer to the prostate to prevent um enlarging the perparation you see so it's minimal minimal improvements in your dissection in your strategy in your lines you see this posterior line here now I'm going to transition probably towards the lateral line let's see how it goes here's posterior again coming towards the other side here I am almost connecting to the to the other side but I will continue you see you have to very subtly very carefully you know change your aiming so that you can progress with successive passes you see of the laser that is going to give you also a very very good H stasis so you can progress uh let's say worried on the technique and not so much on the on keeping a good hemostasis here we could
- check maybe that looks a little bit yellow Maybe I could go even slightly deeper here around the corner here remove that little tissue there and you see even when I correct my line I try to devote a little bit of time to um create another deeper line that I can perfectly identify and see you know and then I'm connecting this line to the posterior line with we following here and then I'm climbing up slowly here you can see some signs of deep depths you say of the dsection so but this is how we uh slowly decide which plane we're going to follow that's that's the idea here for example it's almost a little bit of f so we need to get slightly closer to the the Aloma see see this kind of uh deepening
- is really uh significant if you are able of course to correct you see to correct a little bit your aiming sometimes the pro States a little bit sticky in some areas it's not touching beautifully it's more difficult so we get you know you are patient you try to improve and if you see that you are in a place where you cannot progress very well don't stay too long because I think often when you cannot have access in one point you cannot get much improvement the problem is a problem of mobility of the adoma so you go somewhere else you try to advance the operation somewhere else even even in a remote place even you go to the other side and then you continue the touching and then you know the general mobility
- of the Aloma is going to improve and VOA you see when you approach uh again this area where you had very much difficulty to to release H this this corner for example then you see that there is much better Mobility it's much better access then here we still have a little trouble now but it has improved significantly and now we can see the other side you see this is this corner now it's totally released if you think of the shape of the prostate this angle is usually the most uh acute angle that we have to negotiate around the adoma and again this is posterior plane see where I'm firing I'm firing very close to the edge of the adenoma so that we don't deepen in the in the capsule here I'm doing my wide
- movements to connect one side with the other side if I can and progress again when you're doing the posterior face uh the posterior uh plane here basically you do movements from side to side but when you're going to change direction basically always you have to go a little bit further up so when I'm going now to the right you see I come to this side uh then I go up again you see because we want to follow the the prostate now the prostate Mobility is increasing a lot you see that I can lift it a little bit without any difficulty that's giving me progressively better and better access in the posterior uh sides okay so here let's have a look here often we can lift the uh denoma put it on top of the
- ladder neck like I did now and if you give a little gentle push you see the prostate has rotated now and that is going to open up for us you see all this space that was a little bit um more difficult to to to to access and now I can continue you see this looks a little bit yellow this looks deep let's say so maybe it's not a worry I don't think that's a lot of tissue there but still uh you can always investigate you can always investigate and see if it was more tissue to take off or you can even use the laser to vaporize little you know remaining uh pieces of tissue I think that's deep enough I think I don't want to overdo it but sometimes you know when you see a little bit yellow tissue you
- investigate below it and then you find a nodu you see this little tissue this is nothing also this is nothing sometimes the capsule itself The periperal Zone can look a little bit yellow here we are coming up coming up and down trying to see if we can release this posterior plane now coming let see if you can connect this to the bladder neck region here up here you see this latter neck I'm coming down and around coming through here we are you see that's sometimes the recognition of the plane is a difficult there no I don't think there are two cases where you can say the plane looked exactly the same as the previous case or something like that you will see a lot of different uh aspects of the plane
- but as I said if the plane looks smooth more or less uniform maybe in some areas we got a little bit deeper but we were able to correct our uh you see pass no we correct our path this is little bit of anastasis with Magneto here so we are okay this is no bladder neck here see the U was quite far so I'm not uh say especially worried about Heating the uo when I come here in this case otherwise I would look inside still the BL neck looks a little bit high so I'm going to lower it here cut it down down following the curvature of of the bladder neck fibers you see these fibers you you you try to follow the curvature and now if we go in we can see the uo it's not too far it's not too far but it's not too close you see that
- we uh push the proed almost completely now has gone on its own and then for the 6:00 uh final Detachment sometimes I I prefer to have the five at 6:00 and then I this line it's like drawing a smile you see going from one side to the other side trying to find you see connection and trying to release the last attachment at 6:00 so I I find that enucleation has a lot of similarities with drawing and throwing these lines being able to draw these long lines that go from one side to the other and also the same way the artist has his painting in his mind and then he he draws it on the canvas or the paper or whatever we also have an idea of how the anatomy of the prostate looks like and then we guide our movements we
- guide our movements to be able to uh draw these lines there we are to me personally I think the pulse modulation we have we had with Moses and with uh virtual basket uh changes things changes things maybe when you look at the data and is there a significant difference prop Pati that is maybe questionable I don't know maybe I mean someone is very very good with his Classic 100 wat prium laser and they do a very very good job and they don't notice a lot of difference in the postoperative but I have to say that the quality of hemostasis the quality of the first pass hemostasis subjectively uh improved a lot for me and you know occasionally we still have the Classic 100 watts and sometimes we work in two
- operative rooms and sometimes we for for a practical uh reason we we we don't want to move you know from one operating room to the next with the the laser and and change it all the time so we have several lasers here sometimes I do Tulum fiber cases sometimes I do uh classic promium the cases you know and and then and and now this is the sorry this is the the Magneto setting the ual is over here so as I said um it is it is an advantage when I have to tackle you know a very large gland or a very difficult case I'm always much more happy if I have uh the virtual basket with me and now of course the Magneto huh Sometimes some especially when you follow this technique but I see because I see people uh operating maybe not so
- aggressively uh down the the capsule maybe trying to follow a much more conservative root you know sometimes even I recognize nodules uh that are attached to the to the prostatic fosa that they're going to leave behind and I I would never do that and of course this aggressiveness uh has let's say this possibility of getting a little bit deeper where we can find some vessels and to me having the the magnetto is a great also welcome of course this is very subjective maybe I don't know if it will influence the post-operative results but uh since we use it I think we are have observed that we have less patients having acute retention after removing the catheter the day after the operation so maybe there is some
- clinical Advantage we will have to see um subjectively I think uh pulse modulation has been a great M and this is my personal opinion and you know that expert opinion is probably the lowest form of uh evidence you can see that we did a nice clearance of the tissue relatively fast I didn't do anything abrupt anything you know very very aggressive andove the cotherapy tomor morning despite having seen a little bit of uh deeper deeper planes or deeper areas where you can see sometimes and if we come out you see the verom monum you see the sphincter you see that the preservation of the sphincter has been extremely good you see this is the the the landmark that I marked and this patient I'm sure that will be perfectly
- continent sometimes patients can tell you that they have a little bit of urging continent sometimes of course the the hyperactive bladders sometimes do that to the patient but uh he will not tell you I have stress uh in continence and uh of course most of our patients are dry very very fast and uh very to uh respect both uh uos now I'm going to do the final check on hemostasis you see now that I don't have the adenoma in the f I try to reach the BL sometimes it gets a little bit more difficult you know reaching out up there um this case not so much but in bigger bigger prates often we find uh this difficulty so there we are now I think we're ready to to start the morcellation there we are that's piece
- still attached by a little this one uh one thing you can do if you want is to do little cuts on adenoma try to make the surface of the adenoma more irregular some people do that I think if you see that the the plane is very smooth and there's not a lot of you know irregular uh places where the morcellation can can probably comfortably grasp the prostates uh you can do this to to make it even more irregular when you do the mation it's strange so it's been a while I think uh I'm very happy to see that there's a lot people contacting me to say how useful the videos were to them and I'm very happy to see that the many people when they teach others and when they do their own videos they use uh Concepts that
- probably heard from from from me here in these videos and happy to to to see that all these ideas and all these uh useful knowledges being used by by people here I have my wonderful nurses they are always uh helping me so well that they allow me to have very fast uh changes of instruments see when we start the morcellation often the tubing is full of air so the initial uh behavior of the mor is not so good and then it starts to grasp the tissue a little bit better sometimes it's because you need to Prime the the tubing with water if I don't get a very good uh uh let's say morcellation I try to do the upside down morcellation this is something I do more and more you know that the Japanese and the Asian
- urologists like this approach much better much more than in Europe I think but the idea is quite sound and quite nice you see the prostate or the no is between the mouth of the morcellator on the pl wall it's quite safe also the adenoma tends to float up so basically you're waiting it uh from the upper part and um you see I change in the to see what kind of uh positioning of the endoscope will will help me often after a little bit of uh upside down transation you can then go back to a more comfortable uh comfortable for me because I have done you know thousands of hours of morcellation this way but it's it's an alternative and I think it's a nice alternative to to play with a nice uh resource because sometimes uh
- as you know the BPH tissue could be quite hard and difficult to mulate and then every trick that we can pull out uh to Aid with mulation can can help so here we are now my cruising speed no it's more normal mulation you can tell the tissue is a little bit hard not not so not so flexible not so nice you know that morcellation relies completely in suction I'm going to turn off oh no I can't with this handle I can't turn off the suction but if you turn off the suction you can see how the morc lator rotates no effect uh on on the tissue my feeling is that the bladder is not so full so I'm going to wait a little as many of you know I only use one inflow of water so often if the mor is not efficient
- the the moments when the mor is not attached to the tissue I could be sucking a little bit of water out uh and then this will empty the bladder problem with emptying the bladder is that the pressure drops and then some of the bleeders that you didn't see when you were checking if the hemostasis was good before mulation uh start to bleed a little bit because the pressure has has dropped very fast and if you think about bladder physiology and bladder aerodynamics you know that the bladder uh initially fills without much increase in pressure it is at the end of feeling when pressure goes up and of course when we have a distended bladder probably there is quite a high pressure in the bladder but the moment you start sucking
- a little bit of water out probably the pressure drops significantly so that could explain why uh sometimes during more especially when more that you have uh all these uh moments where you're sucking water out you see you have to stop because you don't want to suck all the water out um you wonder you know the mulation is difficult because the tissue is harder and also the visibility is uh not so it's not so good so basically what I do I wait a little to to fill the L up although sometimes even I if I see that I have a big piece and I have to to morcate and I see that the you know morcellation is not so good I might ask for a second uh line the second line to get another couple of bucks and to
- get more inflow maximum inflow that I can get try to compensate for this uh you see water coming out huh okay also often you see HPS performed by people who are a little bit more conservative than I am and uh we probably get better hemostasis maybe maybe we can lift the pressure a little bit High because the BS as they empty inside as the back's empty you know the the pressure that you get is lower you know because these bags measure like 25 cm and if the bag is full you know the level of the water is much higher and the pressure in the bladder is much higher and then when the bags are getting empty the level of the water goes down so the pressure goes down so there we are trying to morate I'm going to ask my nurses to
- help me with the size of the mouse you see some times if if it's too open you no no okay okay that's perfect you see if you put them halfway see the quality of the suction improves and often that means that even when the tissue is harder you're going to get uh better mulation so one of the nice aspects of this moat the the pania system is that you can tailor the opening um if the opening is very small the the flow of the suction at the opening is much uh faster of course and then the tissue or the suction is much stronger so you get a little bit better attachment and probably that was one of the problems we're trying to mulate with a wide open mouth and then the suction is less maybe that's good enough for for
- softer Annas but uh not not so good for a little bit harder or more fibrous uh normas like this one thing is we can cannot predict which Nas are going to be easier to mulate and which ones are going to be difficult you never know and I don't think there's a clear correlation with having drugs before having biopsis before or having chronic prostatitis before I I doubt there is any I think there's so much varability that also if we predicted it what would we do we have to struggle with the mation anyway so there we are that's now getting better also I have to say the sucking a small piece is much easier than sucking a big piece because if the piece has a big Mass there is a lot of uh inertia maybe my
- C so when the piece gets smaller it's usually easier to lure them into the more MTH and here we are this is the end of of the nucleation you can see a little bit of blood coming down by gravity this is the sphincter and we finished thank you very much for your attention