
Surgery
RL HoLEP case 42: Small prostate, bad plane
Dr. Fernando Gómez Sancha · ICUA
Dr. Fernando Gómez Sancha · YouTube
Language: English. YouTube audio metadata.
Surgical content for professionals. Contains footage of an operation.
Playback connects to YouTube. Your search query is not sent to the player.
About this video
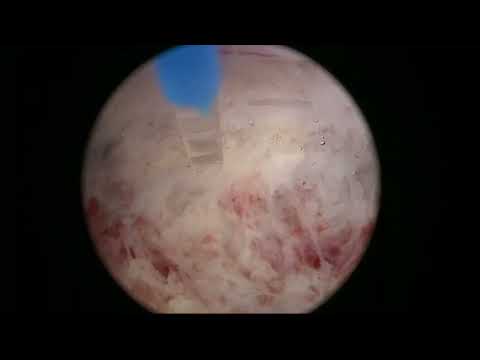
An unedited HoLEP in a small prostate with an indistinct dissection plane. The description explains the use of wide, connected dissection lines and adjustment of the laser aim toward the adenoma side. The case concentrates on progressing through difficult planes and angles.
Documented details and sources
Only details explicitly stated in the sources. Missing information does not mean it did not occur.
- Difficult dissection plane
RL HoLEP case 42: Small prostate, bad plane
Source checked: 2026-10-06.
Available transcript · English
Automatic YouTube captions, not clinically reviewed. Names, technical terms and numbers may contain errors.
They may contain transcription or translation errors; check the explanation in the video.
- hi this is Fernando sancha again and this is a case of a relatively small gland which have some interesting uh pointers I think and um it will allow me to reflect a little bit on some important aspects especially when when you don't have a very good plane as uh as in this case and as you will see in this case so this is the beginning of the procedure of course we have a look at the bladder check the uos if we can I never Force this step too much because it could produce some bleeding and here we have to identify where the spincer is one trick is to take this measure from the very upwards which seems to be quite correct most of the times in smaller glands but as you will see I will make a mark there
- but then when you come out you see the real ledge of the sphincter and there's usually a bit you see between the edge of the spinter and the Mark I did so we're going to take that that as a you know the reference of the anterior uh margin this molar prostates give you relatively low Mobility with your scope and uh I never use any Force I just need to reach very carefully uh so never force your way in I think Progressive mobilization is the the key know to what we want to achieve so having marked the white line This is the entry into the plane usually from the floor of a barrow coming sideways sometimes we enter in a very nice place sometimes it's not so nice and I insist you know you you shouldn't
- get stressed by not finding a beautiful plane just try to find a plane that looks capsular and you know that's usually a relatively smooth plane relatively white in color not so yellow and also a plane that is not excessively deep you know so sometimes we have to find a plane that looks capsular and there is no beautiful plane so here I'm joining both entries both lateral entries in the into the in the midline by cutting the Frum on top of the ver monum and here what I'm trying to do is to develop a posterior line you see that there's no good plane there's some hint you know that probably that is separating really I mean somewhat nicely for for a bad plane you know but it's it's not easy sometimes that's
- the 12:00 Mark we did here over here this was probably a case that I was performing during a visit from someone so I was explaining things in the operating room and um again this is trying to take the line you can see that there is some indication that that plane could be okay uh often when you follow a capsular plane you're a little bit below the anatomical plane in in in this region which means that we are a little bit extra anatomical you know coming a little bit deeper into the peripheral Zone than that that uh but that's that's okay at least we are we are inside we're not perating and we are um developing this this nice plane okay so this is the the steps I follow to to do The appical Liberation initially I in deepen the
- white line first a little bit and then um I try to initiate the lateral aspect see here we will have to do axis incisions when we do these incisions following the white line you see what happens you know the the tissue opens like a book a little bit you know like two pages of a book and we need to go up to the page up there you know to find the proper plan I don't know if that uh will help you understand but uh initially this inss open up the Axis they help protecting the synter and it's important to mobilize mobilize mobilize a little bit towards the lad neck because as you can see now we are transition ing from the lateral line to the anterior line and the moment the scope can you know be on top of the
- of the Apex uh and you start developing a little bit of the anterior line like that you will see how the 12:00 area becomes much more visible and much more uh recognizable and affordable so here again deepening the white line first then look for the for the lateral you know don't go up too much just a little bit and then uh mobilize the Apex by going toward the platter neck that's a little bit of hemostasis and try to connect the line you know this is the posterior line that's the lateral line there's a good connection these lines are going to be our orientation system so here again you come up you we try to keep on the white region because that tells us that the sphin is going to be okay these are initially access
- incisions and you see that we go way up to look for the proper plane so we opened you know the pages of a book and we go up you know to the upper page of this book to look for the plane and then again mobilize mobilize mobilize we need to mobilize the Apex so don't stay appical just go a little bit inside you know maybe I don't know 2 cm depending on the case here again this is another access incision again this this now is almost horizontal because we are below this F you see how these incisions change direction but then again we go up all the way to look for the proper plane and this is how we progressively release the Apex progressively detach the anterior Apex from the anterior uh capsule peripheral
- Zone and when the when the endoscope is able to descend the Apex a little bit like this we gain a lot of mobility and as you will see we have a starting point here anteriorly we see the 12:00 fibers very clearly now because the Apex has descended you see so now initially we cut also to access so it would be a horizontal incision but right away after some millimet we have to look up look up and make sure that we remove all the appical anterior uh BPH tissue we don't want to leave tissue there some people say they go inside they try to leave tissue there but I think if you if you do this appical Liberation if you score the mosa properly when you do your white line at the beginning there is no need
- to leave tissue anteriorly this this tissue can become uh obstructive over time and as you can see we have a circumferential line of dissection around the prostate we have perfect visibility and now we can go around the adoma you see the plane is not beautiful but we trust our lines you see the lines uh the lines will tell us what direction you know we have to to work and we always need to look at the quality of the tissue to see we don't want to go too deep so when I do this dissection of the lines I try to use the energy very softly so that which with each pass I get a little bit of dissection but not too deep you know so there's no chance no chance to to to to perforate to make a big hole so you want
- to progress carefully okay this is you know just taking the lines towards the bladder neck trying to to get a relatively smooth effect if you if you can of course um sometimes uh we bend the rules a little bit no these are basic principles that you have to understand and then you have to decide interpretatively how you're going to use this energy so again this is the anterior line you see now the scope is pushing the adoma downwards a little bit because we not only have the 2D you know comprehension of how the line goes but also the 3D so we know the anterior part is going to go down if we want to approach the bladder neck so we have to you see progressively dissect this line sometimes you know you might have
- trouble or you might find it difficult to to often we see this sign where you see the circular fiber of the bladder neck and Below you see the uh vertical fibers of the bladder neck and you know that you're going to enter the bladder but sometimes it's not so easy and you are afraid that you could perforate uh anterior to the to the to the bladder you know that you could go in uh too high you know and and you see that's incidentially a nodule you can see that so we always want to take this nodules out and well you see we're coming down downwards looking for the bladder neck area it's not so clear so what you can do in these cases is you can go inside again inside the pret urethra and make a small cut at the bladder neck uh there
- and it will help you localize the entry into the bladder okay so basically sometimes when you come back here you already see a little hole but if you don't see it it means that you have to keep digging downwards and there there it is you see so if you lack the confidence to enter anteriorly at the beginning of your learning curve this is a good uh this is a good trick so the interesting aspect I think of this technique is that this it is useful for any any any energy source you use because this uh construction of the posterior line the lateral lines the anterior line making sure that you connect all the lines uh provides you with a with a you know road map to to to understand anatomy and to carefully progress towards the bladder
- neck there's some instances when you want to perforate the the capsule and this is for example one of these moments you see we want to perforate that because we know that on the other side we have the bladder so in these cases often I do a little bit of contact with the tissue I try to avoid contact because contact is dangerous you know when you do contact the you can do a little hole in the in the capsule or you can do you can penetrate except when you know where you are and look at the beauty of this circumferential line here we have to interpret sometimes the plane is not very good and we always have the possibility of correcting you know if if you leave BPH tissue and you realize later you can go back and take
- it out you see but often having these lines give you gives you very good orientation and understanding you know and many times the capsule the anatomy is not helping you you know or or maybe the the plane you're following is not very forgiving or or it's inflammatory you see so carefully progress always do wide movements you see I don't do little pawns I try to always carry a nice ample line you know wide lines that go here you know usually from one side to the other but here it goes up and down and try to keep these lines Broad and and U do wide movements you don't need to rush anything just uh keep try to keep working you know speed in the operation doesn't come from from moving very fast it comes
- from um trying to be effective know work slowly but try to work constantly keep the posing time short and here you see is where we are going to use the this this principle I would say where when the plane is difficult when the fiber is perpendicular to the capsule like it is here you see you don't want to fire against the line of dissection you want to fire on the side of the atoma which means that when you're below here you need to point your laser towards the upper part of the line you see here very carefully I'm trying to avoid uh to put energy on the capsule so I keep the energy on the side of the anoma my fiber is very close to the anoma as as we go more lateral you see that I also try to stay closer to the
- adoma because I want the energy to disrupt and to cut the fibers that are joining at noan capsule but I don't want the energy to penetrate in the capsule okay so here you see also I get very close to the side of the anoma to dissect these uh relatively difficult planes you see that the energy is quite smooth so we get some dissection effect that is quite quite smooth quite careful and I don't necessarily have to advance too much with one pass I would rather do several passes uh gaining a little bit of dissection with each pass because if we see that we are deepening too much or if we see that the capsule is thinning we can always correct more right get even more close to the side of the atoma to
- try to avoid making a you know small perforation bigger and this is it it's pretty pretty simple of course you have to understand it and U and then of course you have to be able to to to do it properly no but you need a you need a steady hand you need to move very slowly and you need to control the fiber the distance you see here when I see the the capsule a little bit thinning you know we I I try to get closer to the aboral in this case and always I think it is a good practice I think to to try to get the side uh DET touched completely so you can see the bladder neck so instead of continuing dorsally posteriorly I'm going to go to the lateral aspect here you see because I was seeing that the the capsule uh below
- the the middle of area was getting very thin so it is much safer to do the sides first there was some nuisance bleeding little vessels that can bleed a little bit uh and probably I will try to do the same on the other side the other side is a little bit more developed you could see the the blad neck here you can see how the fiber is keeping up up up up close close to the anoma and you can see how this way we get away from you know deepening more into the into the capsule there and as I said later on you will check the the plane you see see how my fiber is way up way up far away from the line of dissection because we don't want to deepen into the into the capsule and that looks very very capsular with the gain in Mobility
- sometimes we can flip one lobe you see I initially lifted the the lobe a little bit and that gives us much more space you see here inside the fosa now this is the other side remember to keep up far away from the capsule so that the energy can cut these Little Fibers without penetrating into the into the capsule this is how you negotiate the difficult difficult planes carefully remember wide lines keep keep a line that you can recognize that will serve you as as a and that's how we negotiated you know uh initially or avoiding avoiding to to perforate when when the capsule is Getting Thinner of course you want to remove you want to be aggressive but always uh have in mind know that you don't want
- to to perforate too much and you see this is now 18 minutes inside the procedure 19 minutes um that's the checking the OS so you need to be systematic try to work as and focus on advancing the operation little little battles that you have to win to to make sure that you win the war at the end so small steps and again I will continue to post cases because I think the more you see and the more you the more you you understand the the easier it is to to perform this this procedure successfully so again you notice that I turn the the fiber at 6:00 for this part because I think it's a little bit more comfortable and now of course we have to check hemostasis that's bladder neck fibers and it's important if you use
- aium laser to check the fibers sorry to check the the bleeders at the edge the mucosal bleeders some times with this uh virtual basket sitting I think it's it's very nice hemostasis first pass hemostasis is quite good but um the the explosive nature of these pulses I think sometimes disrupts the mosa and you can have bleeding bleeding that you won't see until you start mulating so you need to to get inside you know the the bladder look at the edge of the of the mosa and find this little little vessels so when you look at the capsule it looks very capsular you know we we haven't left much uh I don't know much tissue maybe in some areas like there we went almost uh out you know we we we deepened
- a little bit on the anterior fibromuscular stroma but if you can correct and you don't perforate you win H this is the idea uh to recognize the deepening and to to try to and these are the bleeders I was mentioning before these are mucosal bleeders unless you tilt your scope a little bit and try to look inside near the edge you won't see these vessels and this can definitely ruin your visibility during morcellation these vessels are you know looking inside the bladder and when you look from the fosa you you don't see them you have to you have to get in so this was it uh you know 21 minutes of of operation we didn't rush it at all it was just I think knowing what to do knowing the steps of the operation knowing how
- to increase the mobility of the Apex progressively so you can reach the places um especially the 12:00 fibers without uh making big pushes against the sphincter and you will see that the look of the sphincter at the end of the procedure is quite quite satisfactory so not a very large gland but uh sometimes you know the smaller glands are a little bit more challenging because the quality of the plane is not so good so I wouldn't recommend you to start with the smaller glands if you're going to to start try to to go over 50 gam 50 to 6 60 70 not not much larger because at the beginning you will hesitate a lot and this will consume time so that's the morcellation this is theia system and it is quite reliable it's a little
- bit tricky to to set up at the beginning and to get used to it but then once you know how it works it's a very very solid uh morcellator you can see that most of the times you are static in a safety point I try to position the tip uh one or two cm above the the bladder neck and I Tred to keep the blade a little bit inside so I can see [Music] some some of the bladder and and make sure that I'm not um getting anywhere close to it that's the beautiful sphincter preservation thank you very much for your attention again and all the best