
Surgery
Real Life HoLEP #43: Surgical Trick for Difficult Cases — Christmas Edition
Dr. Fernando Gómez Sancha · ICUA
Dr. Fernando Gómez Sancha · YouTube
Language: English. YouTube audio metadata.
Surgical content for professionals. Contains footage of an operation.
Playback connects to YouTube. Your search query is not sent to the player.
About this video
Based on automatic YouTube captions; not clinically reviewed. Check technical details against the video.
Case 43 of the Real Life HoLEP series, presented as a teaching case for difficult dissections. The available automatic captions discuss gentle instrument movements, a broad line of dissection and connection of the posterior and lateral planes. The common teaching thread is maintaining orientation while limiting traction on the sphincter.
A connected line of dissection
The commentary describes making a uniform line that can be recognised and followed. It then discusses connecting the posterior and lateral lines as an orientation system during the procedure.
Handling around the sphincter
The surgeon describes deliberately gentle movements and the intention to avoid stretching the sphincter. This is a stated technical aim, without a measured postoperative continence result in the cited passages.
Documented details and sources
Only details explicitly stated in the sources. Missing information does not mean it did not occur.
- Documented challenging case
Real Life HoLEP #43: Surgical Trick for Difficult Cases — Christmas Edition
Source checked: 2026-10-06.
Available transcript · English
Automatic YouTube captions, not clinically reviewed. Names, technical terms and numbers may contain errors. Check them against the video; complete audio coverage has not been verified.
They may contain transcription or translation errors; check the explanation in the video.
- hello this is fernandoa and uh this is probably going to be the last video of the Year 2023 because uh Christmas is coming and probably I will rest but I have this uh nice video of a midsized uh prect and uh it is a nice nice video to reflect again on on some aspects of the enblock technique with early appical release and think there mosal preservation that might be of interest for those of you who are trying to learn and improve your Technique uh of a nucleation um normally when I start I do a very
- brief cystoscopy I don't want to force too much and cause bleeding and I try to put the fiber at 6:00 and and I tend to focus on the fiber that is the localization of the uh edge of the Sprinter at 12:00 and here I'm doing the the white line on the right side of the pit on this side I'm deepening it already and this is something that you can do when you do your white line and you have good visibility because many times there's mosal bleeding and you don't see very well but if you see very well you can do some deepening of the white line at the beginning it's going to ease uh quite a lot the appical uh Liberation if you do okay so like I'm doing here just make it
- a little bit deeper of course respect the mucosal Edge that you have already marked you can see this F is perfectly safe but you see you can deepen it uh along the edge of the mosa to uh make it easier to to to dissect the epex Okay so so now this is now the entry into the plane I was probably showing people uh or there was someone in the operating room and I was showing how sometimes you can do a little bit of a mechanical push to to try to identify the the proper plane although I no longer care so much about seeing a beautiful plane because often you want to see a beautiful plane and you have to settle for a capsular plane and a capsular plane is a plane that um
- looks capsular here for example the the pushing was not very effective so I decided not to push because I I tried to be extremely gentle with all my movements and all the things I do during H trying not to stretch the sphincter trying not to so it's a very very delicate manipulation of the scope now this is a connection of both spaces to try to the develop the posterior line you see here I'm more and more think thinking of the prostate like a little box you know and um so I I have this posterior line that I developed at the beginning of the operation trying to do very wide movements going from side to side you see almost like that because this is a way to construct a uniform line if you
- do very short movements you will deepen the incision in one small region but if you do wide movements like this you see you are defining a very uniform line of dissection that is is easy to recognize and that it's easy to follow here often the posterior plane doesn't go down too much so you have to aim a little bit I would say upwards almost from the beginning so when you cut the Frum of the VAR I think the plane starts uh going up a little bit if you think that you miss the plane you can always always recheck you know go a little bit deeper and re-explore the plane if when you re-explore you start seeing that you're deepening in the peripheral Zone then of course you can
- correct again but you will see in this operation how many times we challenge the plane but again always always always trying to construct a uniform line that is going to be good for orientation this is the way we you see we have a very clear landmark of where there SP is where the Apex is in this case I'm not deepening the the white line because it I already did it before but then I am starting to define the initiation of the lateral line if you remember the prostate is a boxy structure uh this would be the beginning of the lateral Line This is what I call the mobilize phase mobilization phase I mobilize the Apex
- posteriorly here you see the mucosa and I will try to stick and I will try to detach the mucosa from the Apex like this getting under it trying to make sure that we preserve that mucosa of the sphincter and we don't produce this INF famous flap at uh 12:00 so you see that we did an initial uh dissection of the lateral plane the mobilize and connect face now we are going a little bit further up I always try to connect you see connecting the lines the posterior line with the lateral line is important because you you need an orientation system and here I'm trying to go further up you see here I'm trying to find the best possible position I tried to cut initially the most distal attachments
- here you see because if you go deeper and you try to dissect uh towards the 12:00 region you're going to to stretch the sphincter but if you cut the attachments of the sphincter to the Apex apically first and then you you know dissect a little bit towards the bladder neck to gain some mobility of Apex then you're going to be very safe you're going to be very safe there we are coming up and coming down you see all the movements are quite long are quite wide because we want to generate long lines of dissection that we can per perfectly distinguished that's the 12:00 let's go to the other side this is a a little bit more deepening of the white line you know it doesn't matter if
- you cut on the Noma a little bit because we are going to then go to look for the deeper you know deepest possible lateral line lateral plane here I'm trying to define the lateral Line This is the face I I call mobilize and connect so you mobilize the Apex and connect the line that you are generating the lateral line with the posterior line mostly what I do is I develop the lateral line connected to the posterior line so the the posterior dissection I did defines how deep I I go in this face and then apically cut the attachments of the sphincter you see here there's some mosa as well so you have to remain there carefully there's a little bit of uh 12:00 uh flap for forming but we don't
- want it to be uh you know because we are detaching this Fus mosa from the mosa if if I you understand what I mean so here again coming up slowly trying to see where is the 12:00 region this is a a little bit of incision at 12:00 often when you cat these attachments there is uh there is uh the possibility of letting this thing to go backwards you know it tends to go a little bit backwards we get some axis this is what I call the horizontal AIS inition like this you doesn't matter if you cut a little bit on the Apex because then
- we're going to go and look for the uppermost plane possible there we are probably if you some incoming messages I'm sorry for that but so again what I'm trying to do is to perform an ascending dissection so I go from 6:00 to 12:00 in one side then again from 6:00 to 12:00 on the other side The Liberation of the Apex gives it some Mobility so it can descend and one the Apex desend accessing this area is much safer and much more uh feasible more more easy and I I you see that I'm going up now a lot with my dissection because I don't want to leave appical anterior tissue you see many colleagues try to preserve
- like 1 cmet 2 cm of the anterior rical tissue I Tred to you know Liberate the mucosa and then here there's some confusion there's some BPH tissue there so we have to clarify what's going on so often you see I'm not shy to explore the what's going on with the plane I try to understand and that means you know many times when you're not satisfied with the quality of the capsular plane and you think that there is some adoma uh staying attached to the to the capsular plane then you can explore you can try to go back and check what's going on try to find out you see if there's a deeper plane that you can develop in this case I was you know coming in the middle but now when you go
- from the side again I will try to connect so always looking for the uh most extrinsic most uh peripheral line that you can follow and trying to get satisfied in the sense that the the the quality of the plane is is good enough okay here you see sometimes the interior uh dissection might be a little bit confusing and um as I said I never leave anterior tissue uh close to the sphincter for safety it is very very safe to remove it all I think uh especially with this and block technique and The appical Liberation it is perfectly feasible to go all the way up and to try to remove all the anterior
- tissue that uh you could find apically and then of course progress towards the bladder neck here you see often you need to go uh sideways to to check where is the plane coming and then follow that line follow that depth because we already know uh how this Anatomy works as I said uh often you know we see a lot of MRIs and we understand very well and here you see this is an example I'm digging and digging trying to find out if I removed all the anterior BPH tissue so I don't mind re-exploring the lines and deepening my dissection to make sure that we are thorough and we are uh radical in the
- removal of the adomus tissue some planes open beautifully and you don't need to you know do much effort to stay on the on the deepest possible plane you know the capsular uh plane but sometimes you have to re evaluate reestablish and always trying to connect you know to the other side so here you see that I am trying to find the best possible anterior plane when I'm not satisfied with the depth that we are achieving now here the lines connect and I go up up up up up to stay as anterior as capsular as possible and then of course we have to work a little to make these lines connect to make
- these lines continuous by doing this broad uh dissection movements trying to make my life easier for later when you do several depths and several you know explorative uh incisions in the prostate you you need to find some order you know in the cows that you are starting to form so spend some time constructing lines that you can then recognize and follow this is this is my advice and there we are you see trying to understand sometimes you get carried away dissecting the interior plane and there's a lot of lateral planes still to develop but you see now we're getting comfortable and there's a nice line that
- we can follow you see that it is very very nice to have have this optimal visibility throughout the procedure and that is of course because uh this pulse modulation the virtual basket is very good for hemostasis it's very hemostatic but also because the enblock technique irrigates a very small space so if there is a a bleeder we're going to wash out the blood and we will keep seeing very well so this is one of the main advantages of the inblock technique there for a moment I briefly saw that I was going a little bit deep so when you dissect the plane and you see that I don't mind passing once and twice and three times I choose a very soft
- dissection effect that doesn't penetrate too much because with successive passes I can evaluate the depth you see there there was a little bit of deepening in the plane so that allows me to recognize early and to change my direction there you see there was a deepening area but I got closer to the to the adenoma I targeted closer to the adenoma so I don't continue digging in this deeper uh aspect and uh I correct my plane so this is uh fundamental you have to be totally concentrated on watching the the images the information we get is not complete in the sense that often we don't know
- exactly what is a good plane if you see one of these photograms would be difficult to know what is plain and what is abnormal but of course we have memory and we can remember what we have seen before where we're coming where we're going to and then we get these lines and the lines are very nice because we know the shape of these lines and we trust the shape of these lines to to do the dissection of course we get reassuring images like you know we see that the line is uniform the plane is looks capsular uh because it's white because it's smooth because there are fibers on the surface and everything is coherent you see the the depth of the plane the way that that the anterior line the lateral line connect
- and this way we can progress we can progress with our dissection also notice how this technique allows you to work continuously and the nice aspect of having very beautiful lines constructing these lines is that you don't need to stop too much to watch to know where you are you know the lines are telling you and this is the pneumonic sign that we're reaching the bladder neck probably here I wanted to liberate a little bit better the lateral aspect before going in the bladder and uh but you see if if we look at this video you see most of the time I'm firing the laser and every second I am detaching adoma from capsule which means
- that it time uh efficiency is going to be great I don't move very fast I don't rush the operation I don't need to rush uh rushing it too much might be become dangerous you know even when you are experienced I don't like to go very fast I I like to go slowly steadily you know but that every movement I make has a a meaning you know and has some uh sense and is uh advancing the operation so uh as we are approaching Christmas I'm going to give you a present and the present is detail explanation of how to negotiate the changing direction of the plane with a straight fiber you see the
- anterior uh plane this what we're doing is quite simple I'm just following the curvature of the of of the bladder neck you know coming downwards towards 6:00 it's interesting to point out that at the Apex we did an ascending dissection so we when went from 600 to 12 in both sides and connected at 12 and here we're going from 12 to 600 in both sides and we will connect at six so it's the opposite strategy when we are closer to the bladder neck always we we have to check the OS because they are important ideally we don't want to hit the the uos it is not the end of the world most patients that I have seen in my life where the uh you always a little bit
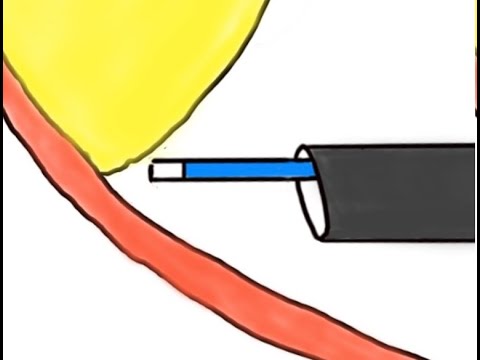
- damaged by the holum energy I did okay they didn't have any trouble with that I didn't need to put a Double J stin or anything like that but of course it's always better if if you don't hit the uo because then of course there's much less risk so this technique also offers you the opportunity to go inside and and check when you are approaching this this region so now this is the this is the explanation I'm I'm trying to to show you so in order to dissect This Plane you see that the fiber now it's becoming very perpendicular to the capsule you see we have to use a special trick and this is the idea if the plane
- is perpendicular to the fiber and you fire against the line of dissection you're going to deepen in the capsule and that's that's dangerous so when we do the posterior plane and when we approach the bladder neck we have to get closer to the side of the atoma we don't fire against the line of dissection I we fire outside and then you're going to be able to break the attachments and continue the operation with safety to the capsule so my recommendation in the first half of the operation Target the line and in the second half of the operation Target closer to the adoma it's like a motor cycle uh how do you say pilot uh when he takes the curves he gets closer to the curve you know to the to the so
- here as you can see my fiber is not targeting the line of dissection because that would be firing directly on the capsule I'm targeting a little bit closer to the adoma and with every move you see if I go towards the left and then to to the right I'm not I'm doing like a zigzag movement you see I'm going a little bit further up with my fiber to try to stay on the on the on the on the good plane and try not to perforate uh into the capsule so I think this trick is good for all kinds of lasers and um of course it works wonderfully well with uh holmium you see that I keep the fiber at 12 12:00 in this moment because I can push up a
- little bit with the tip of the scope and the fiber to expose the the line of dissection and then I try to Target excuse me a little bit further up further up always going up up up against the edge of the enoma and this is my Christmas present if you understand this you're going to be so much safer with your whole you know and with your nucleations and this is a central concept of a nucleation this is of course the posterior plane but you can use the same principle or apply the same principle on the lateral side and here you see here we are trying to get to see the bladder neck on the on the side you see
- we trying to reach that region I keep up keep my energy in the side of the anoma trying to have a smooth dissection effect so I don't perforate and usually it's possible here I'm checking the uo again of course my lens is 30° and I'm looking upside down so it's a little bit more tricky to see the uo sometimes I even turn the the fiber to 6:00 to see the uo because then the 30° lens is helping me and here again you see how I very Sly stay upwards close closer to the edge of the anoma than not firing uh straight into the the line of dissection so the idea if you can go from the sides like this check that you reach the bladder
- neck on one side and the other side then the pedicle at 6:00 is quite quite um quite uh small quite uh how do you say that not very wide and uh narrow H this is the word I was missing and and that will allow you to tilt the adoma so I try to lift you see it's not enough I don't want to make any Force so I'm gaining millimeters of Liberation and gaining Mobility to try to to make sure that I can lift this adoma without using too much force or anything just lift it once you lift it like that and and in order to facilitate the lift I'm going to cut these fibers that I can see very clearly now of course I keep close to the upper
- part and I think this is one final check because if you try to push the anoma too early you see here I can lift it and then when I push it it goes easily into the bladder you see now the prostate has rotated and I have much better access in this side you see here it is really really simple to finalize you know cutting this dissecting these attachments of course I do a very very gentle push because if these attachments are still significant when you push the controlateral side you can be pulling from these fibers you know and then I have seen capsular preparations not because the laser did it but because I pushed too hard uh from the other side and pulled these fibers and uh broke a very thin capsule now
- here I'm completing the rotational movement of the prostate so I'm pushing from from left in the camera to right to to make sure that I can tilt the anoma into the bladder the the the prostate goes inside uh rotated that's why we manage to push the atoma into the bladder many people say many people without experience with en block say with en block you cannot do big prostates because when you push the anoma into the bladder the prostate is bigger than the bladder neck but the truth is if you use this trick you know you release most of the posterior aspect and then you rotate the atoma it goes sideways into the bladder and we can tilt huge prostates without much problem if you found problems there there's always a chance
- to split it in two this splitting of the anoma would be absolutely bloodless and fast and then you can push one lob and then the other lobe uh this is not the end of the world and only only only very occasionally I need to do that again and look how the uo uh is getting closer to us or we are getting closer to the uo so we have to be careful in this final uh Detachment also you see there is a risk to go retr triagonal so uh well you see the key of this operation is to recognize things when they are not too bad and avoid making them too bad you know so if you're careful with the energy settings you use well energy settings only determine how the energy
- comes out of the fiber so you it's not the settings it's how you use this energy to get a soft dissection effect that is not too aggressive and too dangerous and there we are you know finalizing the dissection that's the end of the operation you see that we had a very nice capsular plane hemostasis has been good throughout the operation and we managed to stay in the capsular plane and not go uh too deep let's check the fosa the fosa looks beautiful the veru and when we look at the spinter it's looking really really good huh you see it's looking looking really really good we managed to keep the mosa on the on the on the sphincter so we know that this patient is going to be perfectly continent there is some uh
- tissue there at 12:00 uh let's see if we can remove it to to to make it look better and so we don't have a nodule there but of course we need to be careful with the uos and you see this is uh been uh 27 minutes it's not it's not a race you know we don't want to be breaking records but if you develop the skills and I would recommend you to try to train your skill you know to become more efficient to be able to work continuously to make sure that every second every minute the operation is is moving forward you see um you will you will be quite fast and you need half an hour for for for the nucleation of this prostate is it's not
- too bad and you see now with modern morcel morcellation the morcellation phase doesn't take too long so it it is really really nice uh this procedure and it is is very wonderful to to put a catheter there's no bleeding patients uh go home very fast and they are very happy and the procedure is durable so you fall in love with this procedure this was the change of the instrument I stopped I I took out the cystoscope to put in the the nephroscope and more SL will will start domestic video has these things you probably hear someone is uh handling
- plates in my kitchen nearby so it's part of the soundtrack of this of this video and then for mulation remember you don't want to get the the blade too close to the camera because then everything is white you see the light is uh saturating the image a lot because of this uh close um proximity to to the adoma but if you keep the the the blade a little bit inside the bladder is not dangerous and you can see that only half of the screen anteriorly is uh occupied by the aroma and the posterior uh part is occupied in the center by the blade and you see two black triangles uh on the sides of the blade or as we are seeing now we see the the edge of the bladder neck so you see my
- morat blade is not even in in the bladder it's uh probably you see 1 cm above the bladder neck in a very safe very safe position and mulation is taking place uh very very nicely I only used one giving set you know of of of water with this uh instruments but of course I'm always very very careful to see that the engagement of the adoma with the mouth of the morcellator is good because I know that when that looks like that that there's very little water coming out it's just tissue with water but not too much water and the entry of water can compensate the outflow so I can keep on uh mulating only when the attachment is not good and I can see the inside of the mouth of the blades then I'm worried
- that I'm sucking too much water if I can see it because it's because it's sucking a lot of water so I stop The morcellation Petal try to engage the tissue again and then I activate again I'm much more careful with even waiting a little bit for the bladder to refill palpating the super pubic area to check that the bladder is tense you know I can feel some tension there which means that the bladder is is full and then the risk of uh bladder damage is very very low I I was going to say I don't remember uh when I did a blad lesion but um of course you never forget but uh I wanted to say it's been a long time with without having trouble with morcellation so morcellation is very
- safe when you when you keep uh the good habits you know have good hemostasis have the blade looking up always away from the bladder keep the mor lator in the axis of the patient in the midline because many times we have the camera system in one side of the patient or the other and then if you you know even sit facing the the camera your axis could be uh wrong so keep the instruments always uh aligned with the midline of the patient so that you don't get close to the leral walls of the bladder and um and then mulation is quite quite safe quite safe it's important to develop this relaxation when you work and enjoyment you know when you when you do your HPS you need to be very relaxed and
- very happy because you need to get fresh to this uh final part of the moral of the operation the mulation some people are so anxious and so nervous and they're so afraid that when they get to this point they're already wasted you know tired so I think we have to develop this uh enjoyment you know and Technical mentality rather than an emotional mentality you know fearing that something bad is going to happen as many beginners uh see holip you know there's always I I call it the black Legend you know of holip that holip is very dangerous and something can go wrong very badly wrong and I think this is all old fashioned now and it can be a very
- very safe and enjoyable operation and I hope you enjoyed this uh video so my best wishes to all of you for the 20124 bye-bye