
Surgery
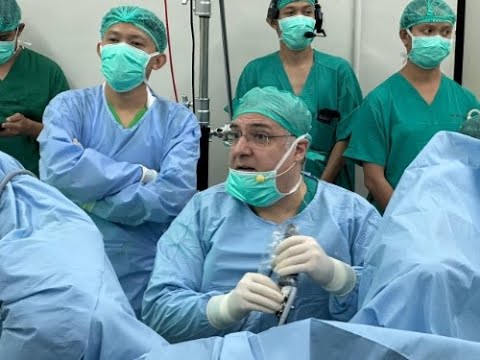
2nd live surgical transmission of an En bloc HoLEP case (155 cc) during the InaSER meeting in Bali
Dr. Fernando Gómez Sancha · ICUA
Dr. Fernando Gómez Sancha · YouTube
Language: English. YouTube audio metadata.
Surgical content for professionals. Contains footage of an operation.
Playback connects to YouTube. Your search query is not sent to the player.
About this video
A live en-bloc HoLEP in a 155 cc prostate during the InaSER Masterclass in Bali, Indonesia. The author describes this as a more straightforward demonstration of the en-bloc approach. The recording was provided by Dr Andar Siregar and the masterclass organisers.
Documented details and sources
Only details explicitly stated in the sources. Missing information does not mean it did not occur.
- En bloc
2nd live surgical transmission of an En bloc HoLEP case (155 cc) during the InaSER meeting in Bali
- 155 cc
2nd live surgical transmission of an En bloc HoLEP case (155 cc) during the InaSER meeting in Bali
Source checked: 2026-10-06.
Available transcript · English
Subtitles exported from the original-language YouTube Studio editor. Not clinically reviewed; source identity and timestamps verified, full audio coverage not verified.
Selected spellings of enucleation, morcellation and holmium terms have been edited. This is not a full audio or clinical review; the original captions remain the source.
They may contain transcription or translation errors; check the explanation in the video.
- This is Fernando Sancha and this is the second case uh for the session of this master class. I hope you enjoy. Here we are again. This is the sphincter edge and this is the prostate. So it looks again relatively big prostate in this case probably I don't see the UO there.
- This is the one. No, it's a very small Yo. Yeah. And probably here [sighs] we also have a very small Yo. Yo. Probably that one. No, there maybe. So sometimes we can do if if you have very difficult to spot uh UOS, we can do a little bit uh Okay, camera out of the way. Bravo, this is the the pedal. So in order to improve uh visualization, let's see. Let's see where is the UO here. Okay, is that it?
- Yeah. So, we can make a little mark here. Yes, I believe so. Ready? Laser ready. So, you see we found it here. So, I'm going to do a very little coagulation mark here. Okay. So, we know that lateral to the mark we have the UO. That's a little trick. Uh you see if it's very difficult to to find. So we can do just a little mark like that. Okay. So now we have the idea that the UO is lateral to to the mark. Okay. The bladder looks trabaculated. He had a catheter. No, this man. Yeah. This one is had a Foley catheter before. Yeah. Yeah. In retention.
- So you can see some of the features of catheter uh placement. Sometimes they have some the cubitus uh here. You see? So it's a little bit necrotic mucosa. So this is the edge of the sphincter.
- You can see up there and that's the veru. So we're going to do this this white line trying to understand this is the pillar of the sphincter here. So you see we're going to go from side to side. Uh this is our mark of the limit between the sphincter and the apex. And then we're going to try to come down come down down down towards the venom montanum. Okay.
- It looks uh strange. No, for people who are uh let's say used to do TURP, we learn this uh idea. You don't resect below the the veru. No, but with hip, you have to go all the way down.
- You see? And here there's still a little bit of aical adenoma. Huh? So, I'm going to come down. I'm going to come down. And this is going to be the the white line that we have in both sides.
- This is going to be the reference of our uh perceived limit of of the sphincter and the apex. Okay, if you go out, you see the sphincter is here. It's okay. And now I'm going to score the mucosa parallel to the verum montanum at the floor of the veromontanum. And then I'm going to start to to try to go a little bit under the adenoma to try to develop the the plane a little bit here in this side. This is what I call the paracolicular space. So we need to develop this paracolicular space in one side first and then we will try to do the other side.
- Okay, this is the beginning of of the operation. So that's the capsular plane. And here we're going to do the same. We're going to come to the floor of of the vermonum. Here you see connect to the lateral sort of to the to the line to the white line. That's our limit there. You see the the bigger prostates, you know, grow sometimes uh and the aical part of the of the arenoma grows lower than the veromontanum. So you need to remove all this uh epical tissue if you want to be thorough. I think with the open prostatctomy we did that. So don't be afraid of going below the verontanum to to find the the sphincter limit. Huh? because we we don't usually treat very very large glands with TRP and that's why we are a little bit uh let's say confused by this anatomy
- uh many in many centers uh TRP is not used when prostates are bigger than you know 100 120 150 grams so when you see the very large glands you see that the anatomy is a little bit different so incredibly these patients regain perfect perfect continent perfect continents post-operatively.
- Okay. So this is our uh lateral sorry posterior line. You can see these little holes here. This is probably the educatory ducts. So we normally the entry to the educatory duct is here near the veru and then uh maybe we entered a plane a little bit deeper. So this is not uh a big problem. Huh? Just we need to keep above the educatory ducts to continue our dissection.
- Huh. As you as you saw the veru was very long. It was very difficult to know where was the veru. But when we find this openings here we know that we have to go a little bit more cranial.
- Huh? A little bit more up to try to develop the posterior plane. Okay. So there we are. My feeling is that this tissue is not so bloody as as the previous case. Let's see it. It looks like a more friendly uh adenoma. Huh? More friendly adenoma. Here I'm noticing also that when I want to go below the adenoma, I have this beak on the on the on the tip of the endoscope that is bothering me and I cannot reach uh let's say as I do usually know. So that's the importance of of the instruments. You see, I want to go in here and put some tension on the edge of of the dissection line, but it's a little bit difficult because I have this big uh of the instrument that is not letting me go there very well. Okay. So we will have to now concentrate on the
- uh liberation of the aics. Okay. Okay. So here we have our white line. You see this is a very good reference. And then initially I'm going to do a little deepening in the white line. I want to go a little bit deeper. When I deepen the white line, what I get is somewhat better access here. I want to start my lateral dissection, the lateral lobe, lateral plane. I always say that I conceive the prostate as a little box. Okay? So you see that now this is a vertical line.
- So I'm going up and down and I'm trying to connect this line with the line that we had previously in the posterior part. That's yellow. So maybe we need to go a little bit more outside to remove this BPH nodule. But I want to create this line of dissection that goes you see around the adenoma and tries to connect with the posterior line. This is lateral line. Now coming down. Coming down to connect. You see sometimes we see what I call the beautiful plane. This is the beautiful plane. You see the beautiful plane uh has this um how do you say very smooth surface a little bit brilliant uh and this is what people expect to see when they do a nucleation. But the truth is that very often we don't see that plane. So we need to settle for a capsular plane and as I said before
- the capsular plane has to be let's say white in color huh it's the color is white it has to be um it has to be smooth it has to be fibrous on the surface and coherent with the rest of the depth of the dissection and not perforated. Okay, that's a little vessel. We're bound to find some vessels. So, I want to come down again, you see, to the epical part. And I want to make sure that I don't continue my dissection upwards until I have released this tissue, you see, from the sphincter. Okay. So, here I'm going to cut a little bit. This is one or two millmters in depth. I'm going to deepen deepen the white line a little bit. trying to get towards 12:00, you see?
- And then once we cut this apical attachments, then we're going to be able to continue uh ascending in our lateral line. You see, trying to follow the the plane, trying to follow the capsular plane. Uh convincing capsular plane, you see, trying to release and mobilize the aex. Huh.
- What's happening here? The water is coming out. Huh? Getting loose. Sorry. So, check check that it doesn't come out. No, it's water coming around the the seal. Uh Mhm. Okay. It was a little bit messy down here. Okay. So, here. And now I'm getting all the water on my foot. So, not not very comfortable. Okay. Here. Um, is it possible to elevate the table a little bit, please? And the water is not draining properly. So, we need to drain this because it's it's very heavy. Huh? Where is this coming? Oh, you're not cutting it.
- Sorry. Yeah, we came out. We came out with the instrument because there's some messy stuff going on here. Sorry. It's a lack of practice, I think. Let's go in again. Okay, I came out here. Now we we go in again. Let me organize this a little bit better. Now we're going to 12:00. 12:00. And here we were coming to to this region here. Uh you see that's this is a nodule. This is a nodule. So, we want to go above that, but still stay in the white line. Stay in the white line and bring everything here towards 12:00 and see if we can release the anterior uh most plane here. Uh see if we can come all the way up and see if we can continue uh having this beautiful line of dissection.
- you see coming more and more anteriorly. This is a beautiful plane as I said I said before. Look at this beautiful plane. The problem with this beautiful plane is that with these new lasers we get so good hemostasis at the beginning. You know when we are dissecting we get some good hemoasis but in exchange we stop seeing this beautiful plane.
- uh we we we coagulate the tissue to a point that you see the the beautiful plane characteristics are no longer visible. That's why we we need to learn to navigate the plane following this other definition of a proper plane. You see we [snorts] So if if you can only distinguish the beautiful plane, there's going to be many occasions where you won't be able to see it. And then what's going to happen is you will get lost. You will feel lost. But if you if you if you realize that the capsular plane has some features that are also recognizable, even when everything is white, you know, and you no longer see the the beautiful plane, then you're going to feel much more, let's say, happy and safe. So, you need to understand the features of a capsular plane. Okay, there we go.
- Trying to go up here. We have a little vessel. Sometimes these little vessels uh could cause some anxiety, especially when you're starting, but you have to know that there's only one or two vessels bleeding at the same time. So, it's a minimal minimal bleeding. Minimal bleeding. Here, I'm trying to put my endoscope on top of this little nodule that we found at the apex and try to come to the side a little bit to get some anterior detachment, anterior mobilization.
- Okay, there we are. So now our lateral line, the lateral line of dissection is continuing with the anterior line. You see? So now we have a continuous line that is telling us how how the anatomy works. Let's see. We have some vessels to stop before we continue. There we are. Okay. So I think we could probably go to the other side and try to do the lateral dissection on the other side. You see we still have some vessels but not as many as as in the previous case. Okay, that's controlled mostly.
- We spend the time we need before progressing. It's not a race. We don't want to to go too fast. We just want to go safely. Huh? Safely. Let's see. Long post. You always uh heostasis before you go to the uh to the other low. Is it correct?
- Yeah. You try to you try to do hemoistasis as you go. Pay as you go. Huh. So here we have [clears throat] here we have the the white line that we marked. Let's see where is it here. No, I think where is the white line here? You see this is the white line that we marked. So now I'm going to deepen a little bit more in this in this white line and I'm going to try to enter the lateral plane on the other side. So here we come up and down, you see, to insize a little bit the the white line. And now we're going to try to find the lateral plane on this side also. So coming up and down, you see the line is nearly vertical. That's why I talk about a box. Huh?
- You see slow movements trying to do a uniform line of dissection. But you see when I come up to a certain point I stop going up because I notice some resistance here. So when I come out you see the resistance is because there is attachments uh here. So before I continue going up I want to continue cutting this uh white line. So I get rid of the attachments between the apex and the sphincter before I continue to go up. Now that I cut some of these attachments, I can go out up a little bit more. I can go up slightly more. Always I try to compose this line, you know, keep keep good care of this line of dissection because I want to have a good uh orientation. If I told uh a colleague now follow continue with the operation uh it's very easy to go in and realize
- where is the limit between the adenoma and the capsule because we have a more or less uniform line going around the adenoma. Okay, it's a nice guiding guiding system guiding system. Okay, here we are. Now when we reach the apex again we still have some attachments. This is all white line. So we know that this sphincter is distal to us. So we can cut you see from side to side from point A here trying to go further up you know trying to do more of the anterior and here one of the nice things is that the endoscope is starting to position itself above the tissue. All right. So the endoscope now is pushing the tissue downwards. So we get a little bit more exposure of of the anterior plane. Now there is a vessel there. We need to find out where is the bleeding coming from
- to be able to stop it and then continue to see and to cross over. Well, you see we want to to check how how can we cross over from here to the other side. Here we have the other plane.
- You see this is the 12:00 attachment. So we need to do this movement now that cuts from one side to the other side and go back again. You see trying to connect the anterior part and this is the end of the early aical release. Uh when we finish this connection we know that the apex has been completely released and now the sphincter is safe uh for the remainder of of the operation. Here I'm noticing that the tip of the endoscope is causing a little bit of trouble.
- because it's too long. I'm I'm not used to that. But we are able now to connect the lateral line coming up, you see, to the anterior line. Let's see. And let's see if we can cross over to the other side. You see, now we have an anterior plane. This is our anterior line of dissection.
- Let's see if we can connect connect to the other side. There's a small discrepancy in the plane. So let's correct it here. And now you see that I am able to go all the way anteriorly to develop the anterior plane. Now we are going to progress [snorts] towards the bladder neck. Uh slowly always trying to connect the anterior line with the lateral line if we can. Let's see if it connects nicely here. This is my lateral line. I'm coming downwards and then up. See if we can have uniform lines everywhere. Huh? So that we get good orientation.
- Here this is uh our anterior plane becoming lateral. You see here. So when you're d uh for the Dissection line. Do you please speak louder? Doction. Please speak louder. Yeah. Yeah. If you doubt about the dissection line, do you try to close to the adenoma or try to close to the capsule for the laser? If you are in doubt, well, if you are in if you are in doubt of the plane, what you can do is you can go a little bit further down. I'm getting so wet. Sorry. So you go further down you know and you try to see what is the line that we are carrying you know what is the line that we're doing and then you you you try to see if this is coherent with the line that you have above of yourself you know so you need to get some
- reference uh around you you know it's not only as I said uh during my talks yesterday we look at the screen and we try to get as much [snorts] information as we can from the screen but also you need to keep uh memory you need to keep memory of the uh anatomy that you're seeing and you need to you know to get some orientation you need to understand the lines that you're drawing you see I'm drawing this line that goes around the adenoma and I'm trying to I'm trying to follow it so many times it's about getting the the orientation Right. Huh. Let's see what is bleeding here. Have a We have a bleeder. Let's see if we can stop it. Maybe coming from here. Stay there for a little while until it gets properly coagulated. And now we can continue. So you see it's not uh there's no
- system like you're asking. No. If you if you are in doubt, do you go closer to the arenoma? Well, it depends. What I do is I try to go up and down or around the area where we have the doubt to find out what is the what is the correct depth you know and then uh I will understand much better the the quality or or or the plane. Here we can see the circular fibers of the bladder neck. These are the vertical fibers of the bladder neck. So here we can confidently enter the bladder. Okay.
- So now we are in the bladder neck and now I'm going to bring the plane downwards in one side and then the other side you see like this trying to open up the bladder neck follow the contour of of the bladder neck. Now we are connecting the space that we have dissected with the bladder.
- And now you see a nucleation needs uh to know I mean you have to be familiar with the anatomy how to distinguish a capsular plane. You have to be familiar with the laser you're using. You know what is the possible laser interactions? Many many people ask me about the settings all the time but the settings only determine how the energy comes out of the fiber. And I want to stress that more important than the settings is how the surgeon decides to take the energy to the tissue. You know, because you see with the same settings, with the same settings, if I fire too far away from the tissue, there is no effect. Nothing is happening. When I get closer to the tissue, I start to see coagulation. And if I get even closer, I start to see dissection, you know.
- So basically the settings are only uh one of the things. It's like when you choose a pencil to do a drawing, huh? You choose a 2B pencil. These are your settings. But then of course with the pencil you can do different kinds of lines depending on how much pressure you put on the pencil you know.
- So this is similar. We choose the settings but then of course we need to decide how the energy is going to reach the tissue. So with the same settings I can get different tissue effects. I can get nothing if I'm too far away. I can get coagulation only. I can get dissection. I can get disruption and perforation. Okay. So we need to be careful the way we use the energy.
- Usually for dissection I look for an energy uh effect that will give me a moderate effect. You see every time I pass every time I pass there is some effect I don't want a very aggressive uh effect because if I manage let's say to perforate the capsule then there's no way back you know so I'd rather do a small perforation so when I see the small perforation I can correct my aiming I can correct uh what I'm doing so I don't uh go deeper. Huh. So, yeah, there is a tendency to bleed. Not not as much as the other guy, but here we are. Huh. Let's check our hemoasis as we go.
- There's sometimes little imperfections in the in the in the capsule, but that's quite quite okay. So, but often you need to question yourself and think, should I remove this? For example, you see it looks like BPH tissue. So then you can go a little bit deeper and maybe remove some of that tissue you know. So sometimes we go slightly more into the capsule. Sometimes we go slightly more uh let's say into the adenoma we can always correct. We just want to be to do it safely.
- No here for example I'm using the setting for dissection the 2J 50 Hz. This is now dissection but I was using it for coagulation. Huh? So you see the surgeon has a lot to say regarding uh the effect of the laser when it contacts the tissue. Let's see if we can do hemoasis here.
- Often we find this little plexus where there are some bleeders mostly near the bladder neck. So you have to have the patience to to stop the bleeders. So you can keep seeing for Yeah. For hemostis uh you just point the bleeders or or around Yeah. You have to do your best the big Yeah. Sometimes if you point because right at the bleeder it will bleed more. Huh. Sometimes. So sometimes we can do the helicopter. You know the helicopter means that if this is the bleeder we can go around the bleeder. Huh? You see this way you tend to coagulate the base of the bleeder. So these things uh are based on trial and error. You know you you have to try to coagulate the vessel.
- If you can't coagulate the vessel then you have to try something slightly different to try to get it coagulated. Um, sometimes when you when you fire the laser straight to the to the bleeder, you're going to find some uh that's there is some explosive action on the on the on the bleeder. So the bleeder opens up even more, you know. So that's why we try to fire sometimes around the bleeder rather than Now the camera is getting a little bit wet. Yeah. [sighs] If if the isolation of the sheath is not perfect, we can get some foggess and then it's it's a little bit boring. Just a moment. Just a moment. Let's see what we can do here. Now, my objective is to go around the adenoma and below it if I can. You see here, my fear now is the tip of the Let's see if
- I can work with the like this with the fiber at 6:00. Normally I use the fiber at 12:00, but this way I'm going to avoid the tip of the endoscope to to cause trouble with the capsule posteriorly. So here I'm coming from 12 towards 6:00 trying to find a good good plane. So this is very good tips because mostly we only have a big Rextocope not say again. You only have a beaked. This is the good. Yeah. Yeah. But you instead of instead of continuing instead of continuing to use a a big endoscope, you know, you need to get yourself the flat end, you know, it doesn't make sense to work with the wrong instrument for the job. You know what I mean? So, I think if you're going to do enucleation with these instruments, uh, it's not a good
- idea to adapt to the wrong instrument. I think it's much better to get the right instrument. You know, otherwise you always will struggle and there is more risk because you have a pointy pointy instrument. Huh? A pointy instrument that cut can can cause uh damage to the to the capsule.
- No, here. Let's see. This is the other side. This is the other line of dissection. Let's see if we can bring it down. So yeah, as I said, always if you're going to do a nucleation, you have to you have to acknowledge that this is not a job that you can do with the wrong instruments. Uh you need to do it with the right instruments and many people struggle with enucleation because they don't use the right instruments, you know, and then they find it very difficult and they find they have a lot of trouble, but it is because they're not properly equipped uh to do it. So you know we we need to always uh try to to work with the right instruments and um I don't know sometimes there is a problem with hospital management because every time you
- have to do a purchase it's a problem but then I don't know I would buy it myself you know what I mean because you don't want to work with the wrong instruments and risk having problems because So the instrument is not ideal. Huh. Okay. This is now a little bit more hemostasis.
- Let's see. I don't know why we don't get the good visibility here. This is bladder neck again. See, I'm coming down. Now when we go in, we should see the marks that we did to check where the position of the UOS were. Let's see if we can get some visibility here. See, it would be very difficult to see the UOS. Now, let's see if we find the little spots that I made to signal. Huh. This is the UO and the spot is here.
- Not very nice. I don't know why we don't see very well. The water is uh pressure is very low. I think because the bags are finishing. Okay, we are nearly done. Huh? The inucation is nearly finished. But we need to be able to see in order to finish the inucation part.
- Here we are. That's the Where is the UO? Here, I think. Yeah. So, we're quite close, huh? We need to mark the bladder neck carefully because we want to protect that area. [snorts] Uh what about the very big uh median lobe? Uh well, you see when when you do a nucleation in block, the median lobe doesn't really bother you. Huh? because you're going to dissect only the the capsule that is attached to the adenoma. If you have a huge middle lobe in the bladder, you you're going to go under the middle lobe and you're going to release only the part of the middle lobe that is attached to the capsule. So middle lobes are not a problem. I think middle loes are more a problem for people who want to do three-lo techniques. You see,
- let me try to go back to my normal and I'll try to avoid the beak from cing causing trouble. You see, if I want to get closer to the tissue, the beak is going to stick itself against the the tissue in the bladder. your scope. Say again. You turn the scope. I I usually work with the scope upside down, but this scope has a beak and my scope is flat. So, it's very uncomfortable because the beak is uh you know causing uh the beak is trying to dig the the tissue and the tissue is very thin, you know. So, this is a very uncomfortable instrument for for this uh operation.
- If if normally I I use it upside down, but I have to go now with the fiber at 6:00 because I want to avoid the problem with the with the beak. So this is not the way I usually do it, you know. So I said beforeh if if you have a baked instrument, try to get a flat instrument because that's going to change your life. It's going to make everything much more safe, you know. Here I have very little control of uh because one of the determinants of of the tissue effect is going to be how you use your instrument to put some tension between the capsule and the adenoma. You want to put some tension. You want to generate some separation traction and counterraction you know between the adenoma and the capsule. So
- you see you tend to go deeper when when you when you don't have the right uh instrument. Also the vision is getting a little bit foggy. So let's see. There we are. We are managing. There's only a little bit more to do here. You see this is the bladder neck. So we're now reaching reaching the bladder neck region from below. Trying to connect at 6:00 here. Maybe we should enter.
- Enter to see where is the UO. This is the mark. This is the UO. So here we can cut confidently. You see we go under the arenoma now to to try to go like this. And then often we can then push one of the loes into the bladder. You see here now this lobe is is tilting into the bladder. And now we have much more space down here. Let's see. This is my normal uh position. But you see we have a beak down below. Let's see how can we do this now to to release this posterior aspect. There's some foggess on the on the camera. Sorry, but I'll try to finish this this enucleation to uh to see if I can finish this detachment and then push the enoma into the into the bladder. Huh?
- So at the end you know you realize that there are some anatomical knowledge you need to have. Then there is some technical knowledge you need to have regarding the effects of of the laser and the and the tissue. How how the tissue interacts with the laser? How what different effects can you get? And then there is common sense. H you don't want to risk too much here. Here the visibility is very very poor. So let's see if we can lift this up a little bit. This is a retro trional uh growth. There's a nodule here. So we need to lift this up. The capsule below this one is is very very thin. H So let me remove this and clean the camera again because we are not seeing anything. Yeah, this was not helpful because a a sheath like this gets humid,
- you know. It doesn't help. Let's clean around. Clean around. Clean around. Clean around. Clean everything. Want to get rid of the humidity. Okay. Now there. Here. Here here. The other side.
- And around. Thank you. Yeah. Now we will see much much better. You see we're going under the adenoma here. And you see that's the bladder neck almost there. Huh. So we have to fire below the adenoma.
- But we have to keep the fiber looking up. You see? So that we don't go deep into the capsule, but we stay between the capsule and the adenoma. So again, the surgeon has to think every single second what distance of [snorts] firing you you you choose, what speed of movement you choose because you want to move slowly enough to get good hemoasis during your movements. And you have to choose where do you target. And you have to decide how you're going to use your endoscope to generate some tension between the you see we don't want to go there. We want to stay further up. You see? So it you need to be studying the tissue all the time and try to understand what's going on and then you see try to uh complete the dissection without deepening into the capsule.
- This is the end of the enucleation I think because we're now very close to the 6:00 pedicle. I think now we could push all the enoma into the bladder. You see now? And now I'm going to put my fiber at 6:00. You see now we have only this little pedicle. Let me check this. You see to get some some heostasis. This is the mark we did of the UO which is more lateral here. Okay, so that's safe.
- A little heistasis to see if we can improve our visibility. And now the adenoma is hanging from a 6:00 pedicle. This is the other UOO. Where are you? This is the mark. So our UOO is probably here. You see that? So that's safe also.
- And now I'm going to cut the last attachment at 6:00 and the enucleation is finished. Huh? So you see even when we move slowly and we progress slowly, the fact that you work continuously makes the procedure relatively fast. Now we will do hemoasis and we will move on to to more seellation. This was a little bit smaller no than the previous case and also it behaved better. We had some bleeders, but not not too many bleeders, huh? Not as many as as before. There we are.
- So, it's a combination of a good attitude, huh? You need to have a good attitude. Just relax. Look at the footprint. We saw a nodule here growing. You see this is the footprint in this place. The capsule is very thin, but I think it's watertight. There's no extraversation there. So, we need to remove these nodules if we want to be aggressive. If we want to make sure that there's no BPH tissue that can grow and now I'm you see sometimes we get a little bit more capsular more into the capsule into the peripheral zone. So we start to see a little bit of fibers, some more blood vessels.
- Some other times we are in a much nicer plane without so many vessels. If you go deeper than that, you start uh finding sinuses. And sinuses I think it's better to avoid them. Try to avoid sinuses because the sinuses will cause absorption of water. So patients can absorb a lot of water in a very short time. So you can start seeing that the saturation of oxygen goes down because there's a fluid overload. Huh? And also when you try to morillate during the morcellation with a full bladder with a lot of pressure in the bladder, the the sinuses are not bothering you.
- But if you suck too much water and then there is less pressure, then you're going to notice that uh the bleeding starts. Huh? So the sinuses could bleed. You have venus bleeding, bad visibility. So it's better to to progress slowly to keep in this space, you know, in this plane between adnoma and capsule that doesn't go very deep, you see. And then now we we will check heostasis before morcellation. So far so good. You see all of these looks quite quite capsular.
- Let's check if we have any vessel aically. Sometimes we find little aical vessels. Also, when you're learning, I think it's a good idea to switch now to the rectocope and maybe check the fossa for hemoistasis with your rectocope. Even the roll ball, huh? You can use the roll ball to you can use the rolly ball to to go and get a perfect hemoasis before morcellation because morcellation is not difficult when you can see very well. It's more difficult when visibility drops.
- Huh? So it makes all the sense in the world to go in with a recctocope, check the hemoasis of the fossa, check that everything is dry, there's no bleeding, and then you can morelate very safely. We still have some bloody tint. So we need to continue doing hemostasis until we can get ah you see sometimes only one of these little vessels bleeding can can be a problem.
- So we are patient. Uh yes, go ahead. Yes. Uh I I prefer to I prefer to use the finger to put the catheter. you know, if you use this metallic, I think they make the catheter very stiff and it's much more easy to penetrate, you know, retroonally if so I'd rather ask for help. Usually my nurses know that they have to push the catheter inside and I will uh push with my finger. I come here with my finger from below and I push up. So all of this is uh let's say driving the catheter towards the bladder. This is my favorite method. Of course, you have the possibility of using a guide wire. If you are used to using one of these mandrels or metallic stances, metallic uh guides for the for the Yeah,
- that's up to you. I think you have to make sure that the catheter is in the bladder and not in the below the bladder because one of the described complications of hol is that after a successful hol you put a catheter and you leave the tip of the catheter below the bladder and then you start irrigating the retroponium you know so that's a that's a complication because the catheter was not properly placed no so that's a pity you get a patient with a bloated abdomen you know all The retropetinum is full of water and this was a silly mistake but the consequences can be very bad. Huh? Here we have another vessel. You see sometimes as you get better and better visibility, you are able to spot the little vessels that are remaining. Sometimes if you see a little
- piece of tissue hanging like that, you can just try to take it out. Let's see. It's probably going to fall off at some stage, but we'll try to clean it. Now this is the trimming phase and you take your time. H maybe spending five minutes here is is really a good investment because then you can morelate from beginning to end without any trouble.
- Yes. With a finger. Yes. So, but you cannot have your right finger uh in the rectum. You cannot hold the penis and introduce the catheter yourself. So, you need a third hand, you know. So, one normally with my hand, I hold the penis up. I straighten the penis so that my nurse or whoever is helping me can push the catheter in. Okay. And I have the feeling with my finger.
- I can feel the tip of the catheter going in and I can feel that I'm pushing it into the bladder. I think this is the safest safest way here. So, yeah. Have you have you ever failed in a Yeah, sometimes I have needed a a guide wire. Guide wire you go you roll it in the bladder and then you try to pass the catheter.
- The thing is you you don't want to go uh to the recovery room with the patient if you're not sure that the catheter is well positioned. Uh normally I don't use traction of the catheter because patients don't do not bleed much. Uh so traction is not necessarily done systematically.
- I can do it if I see that there is some bleeding that I didn't expect to happen. Okay. So I do it as a salvage. Sometimes you get some you know bleeding from the bladder neck or bleeding from the apex. You put a light traction for for some time and it stops and then everything is okay. But I don't use systematic traction at the end of of the operation. Now we're going to go to morcellation. I think we have good good visibility. Okay. So here's the fiber. Now, give me the nephoscope. Mhm. Clean. This one's clean as well. Thank you. Let's connect the water.
- Okay. Now, wait a moment. You're going to pull when I tell you now. Okay. And now we're going to get in with the morcellator. Morcellator. Thank you. Pedal is on my left. Where's the pedal? Wait, wait. So, I have my bladder neck here. Yeah. So, I'm going to lower my hands so that that I can elevate the morcellator. What settings do we have? This is very slow. Is the same. No, no, no, not not yet. Wait, Dr. Gomez. Okay. Now, 1,500.
- Yeah. Okay. Okay. Okay. 1,500. We should check this before I need it. Huh? Now is not the moment to check, you know. Now it's not rotating. What's going on? The morcellating is not rotating. Check it out outside, please. So, the morcellator has to be tested before we use it. Everything has to be right. Is it not rotating?
- What's the problem? Is the connection to the blade good? Check. It's properly connected. Yeah, it's good to me. Again, you see the surgeon in this operation is with the patient. So, you cannot stop. Get out of the patient. Let me know when I'm ready. You see it's sucking but it's not morcellating. It's not rotating. So, Check it out again. Check the motor or give me another motor. Come on. There's no rotation.
- That's okay. That seems to be okay. Maybe you can turn on and off. Turn off. Turn off both. Off. Off. Wait. Off. And now again. On. You should try the morcellator on the table with some water. You need to check that everything is ready. Otherwise, you get into trouble when you need to act have the action, you know. Should be okay before. Okay, let me try it with some water in the Let's see if there's rotation. Yeah.
- Ready. Okay. Now it's working. Thank you. So you learn you learn more and moreh when you do mistakes when you have trouble when you encounter trouble and at the end you need you have to be very Now what is these settings now? This is very slow. This is one hertz or what is it? It's 1,500.
- 1,00 Okay, let's press here for some seconds. Hertz, I want two hertz, not one hertz. Okay, so let's start. Huh? Again, the camera is getting a little bit humid, so The water is open. The water is flowing. Good. Everything's good. The bladder is good. Yeah.
- Now we need to clean the camera very fast again. Let's stop. Clean. Hurry up. Clean around. All around. and yeah, thank you. Here we are again. Now much better visibility. Okay, remember that you need to push the the blade a little bit into the bladder in order to have this lower black triangles. You see what's happening here is that the light of the endoscope is shining is reflecting on the tissue. The tissue is normally white. So the luminosity is very high. So the camera reduces the sensitivity and that's why and most of the light is captured by the adonoma. So that's why we see a black bladder. No, but if if I get closer to the bladder, you see we start seeing pink and white. You see?
- So you want to see black. And to me, this is um method. You see, if I see the black triangles, I know that I can morcellate. So I don't need to have more uh orientation than that. I position myself in the midline of the patient, more or less in the midline. I lower my hands to a level that I know that is higher than the bladder neck and then I push the blade inside so I can see some kind of black triangle lateral to the to the blade and this way I can morillate safely.
- The other factor I look is I am only using one inflow of water. Uh the morcellator device the nephoscope has two two two inflows. So also during learning I would app I would recommend to use two inflows to have the maximum possible inflow into the bladder to try to avoid the bladder from collapsing and causing I mean facilitating the possibility of a bladder lesion. No. So, but I'm [clears throat] always vigilant to see that I cannot see the mouth of the morcellator. You see, when I look at the mouth of the morcellator, I see that it's covered with tissue. And that means that the tissue is not letting the water come out so much. So, we are taking out tissue and water, but a very small amount of water. If the tissue separates from the blade and I can see the mouth,
- then I stop the suction because I don't want to empty the bladder. If you see now I'm seeing the mouth for a moment. I don't want to keep uh sucking with the mouth open with the mouth visible for a long time. If if we go into a full bladder and I try to suck the water out probably in less than one minute in 30 seconds the bladder is going to be completely empty you know so the this device sucks a lot of water so I need to see that the contact is good and it's preventing the water from going out also once in a while you can touch the bladder to feel that it's full okay and of course you have to have your eyes looking at the screen. So, normally you cannot spend the time to look at the bags to see if they're full because you take your eyes away from the screen. But of course,
- you can ask uh so I always ask how is the water doing? Do I have water? Huh? Also, you know, when I say that this is a teamwork, it's very important to have a team that is conscious about what we're doing and the team has to respond. So, the person in the water has to be responsible and keep the water flowing. uh because if you don't let the water flow during morcellation you can have a severe accident you know and the patient can be suffer terrible complications if the water person is not doing the job properly. Okay here bladder neck again I will catch the tissue with suction and lower my hands get to a safe position and then again continue with the morcellation. You see now that the visibility is starting to decay. This is typical and that's why I want to morillate all the
- time because I want to be as effective as possible to finish the morcellation, put a catheter and go. Okay. Also, it's important the ergonomy, no, of your movements. Some people operate standing. I cannot understand it. I prefer to sit down, you know, so I'm comfortable. If the operation is long, I'm not fatigued, you know. Yeah, I think the Brazilian guy standing. Yeah, there is a Brazilian guy who stands up, but this is because he used the trigger for, you know, and then he was having a lot of shoulder problems. So when he stands up he can hold the endoscope without pain in the shoulder. That's why ergonomy is important because if you do hole initially you will have some patients but then you know when these patients go home let's say tomorrow the
- neighbor is going to say ah why didn't you have your operation no yes I had it how is it possible my father went to the hospital and had to stay for 10 days you know how is it possible that you're here no they did a laser operation so the mouthto-mouth uh promotion of This procedure is very potent. So most of the hole surgeons who can work well, have good results, they get to operate, you know, hundreds and hundreds of patients every year because the demand is is quite high. So you need to prepare yourself to have good ergonomy so you don't get hurt, you know, by by this operation. No, you're going to have to do many many every day and uh at the end if you don't have good ergonomy, you're going to have pain. Terrible shoulder pain.
- So, you see the the piece is getting smaller and smaller. The visibility is also fading. You see decaying. That's why we want to be as efficient as possible. We don't want to lose time because you saw before that the fact that we had to go in with a rectocope to do additional hemoasis was was a problem. It made the procedure longer.
- So the only way to achieve very good coordination, very good uh turnover, uh very good fast procedures is if you have the right instruments, if you have the right team that can help you very well and you work out solutions for these common problems, know like the fogging of the camera. We have a special um camera sheath that has an elastic uh closure that uh seals the camera from the water and even when the water is coming around the region that it's not it's not fogging the camera. So when you when you finish with these problems you don't experience them all the time. You know what I mean? So you need to find solutions. So you are working in better and better conditions until you can have a very very polished
- uh teamwork to do this operation fast to finish fast to be able to do many in the in one morning. I remember I went to Poland uh to teach Mik Vasi. He he was here last year I think. Yes. Mik Sawaskki. Yeah. And Marik is a very clever guy and they had a very busy practice with stones but they didn't do hole. So they said can you come with us every month so they would give me the difficult cases and they would do the easy cases and I went there like 10 months uh for for two days one day and once we did 14 holyps in one day water getting full say again the water is getting full for the suction. Oh yeah. Let's change change the water. So that's my record. 14 holps in one day.
- Hol. Thank you. Again, you see these changes. So normally we have the mosator closer to the floor. Ah we worked from 8:00 in the morning until 10 p.m. at night, but we did 14 hole in one operating room.
- The anesthetist was a very impressive guy. He did spinal in two seconds. It was like finished. Okay. You see the visibility has decayed a lot. Huh? Say again. Can you repeat? 2 kg [laughter] maybe crazy work for the pathologists. So now we are starting to suffer a little bit uh because we don't have good visibility.
- I believe I am probably inside the fossa still. It's quite safe. But uh let's see if we can finish or if we have to go back again to do additional heistasis. And remember if if you come to a situation where you feel it's not safe to continue then it's better to stop. uh you put a catheter and you tell the patient you're going to bring him back maybe tomorrow. Tomorrow the urine will be clear, the visibility will be excellent and the tissue is much softer because it starts rotting inside the the bladder. Okay. So I think I am inside the fossa and these are uh fragments. See this is the fossa.
- Now that's the bladder. There's some floating piece. And I think we're finishing now. Huh. This is the end of the operation. I think this is bladder. Inside of the bladder. I don't see any piece here. There is a little bit of accumulation of of of blood. That's a little piece maybe. Yes. So you push your foot intermittently to suck. Uh the pedal has two sides. In one side you only get suction. So the suction allows you to engage the piece and then uh when you are in a safe position to morcellate you change to the other side of the pedal and that activates the rotation. So you can suck only and suck and rotate.
- It's a little bit low visibility. The problem it's not a problem with heavy bleeding. You know the the patient is not bleeding but the problem is with uh visibility. Let's see. No, the bladder seems to be full.
- That's a piece inside the fossa. We can always go in to have a final look with our setocope and check that we didn't leave any with bipolar. Wait, let's wait. I think if we can finish and I don't find any more pieces, we can just put a catheter and finish. Okay. But as I said, this this requires a lot of expertise, you know, and confidence. But uh for most for the beginners I would I would always recommend to keep good visibility. So you can go back and do hemoasis with a rectocope or you can finish a nucleation and go in with a recoscope. Try to get the best possible hemoasis that might last a little bit longer. No. To be able to do the morcellation in in peace. No.
- There we are. It's coming along. I think normally we we get better visibility. I think the problem with the big is making the capsular plane a little bit rougher and uh you know but there's a little piece somewhere. See if I can find it.
- sphincter. Veru maybe it came out. Let's see. This is the bladder. Let me empty for a moment and fill again. Okay, it's not too bad, but it's enough to make the visibility worse.
- Now, let's fill let's fill the bladder. Uh, it's minimal. So, there's no piece in the letter, I think. Yeah, I think it came out when you probably came out. No, with with a small piece. Now, when we come out again, this is the area of the sphincter. You see, we have a nice epithelialized sphincter. Huh. We don't see the 12:00 flap. We see a perfect sphincter. So, he's going to be fine. Let's put a catheter. Jelly.