
Surgery
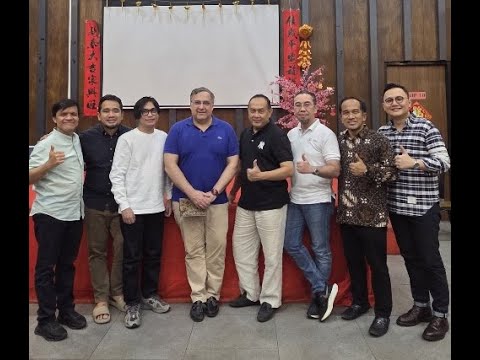
Live transmission of an En Bloc HoLEP (195 cc) during the InaSER Masterclass in Bali, Indonesia
Dr. Fernando Gómez Sancha · ICUA
Dr. Fernando Gómez Sancha · YouTube
Language: English. YouTube audio metadata.
Surgical content for professionals. Contains footage of an operation.
Playback connects to YouTube. Your search query is not sent to the player.
About this video
The first of three live en-bloc HoLEP cases performed during the InaSER Masterclass in Bali, with a prostate of 195 cc identified in the title. The description reports persistent bleeding from the dissection plane. The author partly attributes that difficulty to using a pointed instrument beak instead of the flatter version normally used.
Documented details and sources
Only details explicitly stated in the sources. Missing information does not mean it did not occur.
- En bloc
Live transmission of an En Bloc HoLEP (195 cc) during the InaSER Masterclass in Bali, Indonesia
- Documented bleeding
k place in Bali, Indonesia. In this case, a quite big prostate, we found a plane that was bleeding all the time... In part due to the fact that I was using a pointy beak of the instrument, rather than the flatter version I usually use. It was a great meeting and the Hosp
- 195 cc
Live transmission of an En Bloc HoLEP (195 cc) during the InaSER Masterclass in Bali, Indonesia
Source checked: 2026-10-06.
Available transcript · English
Automatic YouTube captions, not clinically reviewed. Names, technical terms and numbers may contain errors.
Selected spellings of enucleation, morcellation and holmium terms have been edited. This is not a full audio or clinical review; the original captions remain the source.
They may contain transcription or translation errors; check the explanation in the video.
- Hi, this is Sancha and this is a live operation, one of the three cases that I performed during the NASA master class and workshop celebrated in Bali. It was a man with a big prostate, 196 cc's and a catheter and some um relatively high risk uh as a patient for surgery.
- >> Thank you, Santi. >> Mhm. Mhm. Like that. Yeah. You can use a smaller syringe also like um so let's have a look inside. Let's see what we find after uh four months with a catheter.
- After four months with a catheter, we can see that the there's no problem going in with the and you can tell it's a big prostate because you see that the veru is the veru is quite uh the frenolum of the ver is quite long and this is the edge of the sphincter. And now we try to go in. Let's see. So it's a pretty pretty large uh prostatic gland. Huh?
- This is now bladder. Bladder and probably the UOS are here, here, and here. Okay. So, can I have the fiber, please? >> Fiber tip for me. >> Thank you. Thank you. Thank you very much.
- There we are. This is the This is the fiber. Okay. >> So, let's get ready. Yeah. >> Ready to start? Is it possible to stop the pum pom pom pom the noise? Is it going to be all the time or is it uh Thank you. Thank you very much. Thank you.
- I'm getting old, you know, and I get an anxious with the noises. So, ready? Can you turn off the green light? >> Beam off. >> Yes. Thank you. Thank you. Okay. So, I'm going to start. Ready? Please. Ready?
- So here we are trying to uh establish the limit of the aex and the um sphincter. You can see this is here's the sphincter. Huh? And this is uh where I feel the limit of the sphincter is. I'm going to come down.
- Bleeding quite a lot. This mana he has. Okay, coming down here and then I'm going to try to uh move on to the paracolicular uh space. Huh. You see this is the this is the white line.
- There are some little bleeders. Sometimes it's better not to not to worry so much about these little bleeders and but I want to mark the limit of the operation with the white line. Okay. So here we are big vessels and um now I'm going to get here to try to look for the plane at the paracolicular uh space. Huh. So, I'm going to come all the way here.
- Thank you. >> Well, you need to find the limit of the of the sphincter at the ax level. You want to find the what I call the pillar of the sphincter. The pillar is the this you see this is the pillar of the sphincter uh on the side and then I go in 1 mm and start my mark.
- There we are. So I'm entering the other side now. You see we can see that there is some tendency of the adenoma to separate from the from the capsule and you can see that uh this uh laser produces these pulses that are trying to expand all the time. So they are helping me find the right plane between the adenoma and the and the capsule. H there you are. This way I can establish the plane on both sides. You see this is one plane. This is uh in here. There is the other plane here. And now we need to connect both. So I'm going to cut the frenum here of the veru and try to connect uh posteriorly so we can develop the posterior line of dissection. Normally I think of the prostate as if it was a box.
- So I'm going to discuss a posterior plane uh two lateral planes and one anterior plane. Okay. And you can see that I'm going to uh center my lens [snorts] with the line of dissection. So this is my line of dissection here. I'm going from side to side.
- Let's see. That looks a little bit of a denoma. It's a little bit yellow. Let's see. And I want to develop this line that goes from side to side. And the camera is going to center with the line of dissection. So we can always have some view of the capsule and some view of the adenoma. Okay.
- Here we are developing this line of dissection. Okay. There is some little bleeders coming mainly from the mucosa but it's sometimes very difficult to stop them. So we just probably go on uh with the operation here. I'm going to see how far can I take the dissection of the posterior plane. You can see here uh in the mid in the midline when we get to the midline there's a little bit of deepening in the capsule. You see? So that's probably not the good plane. We need to go further up.
- But the problem is that sometimes as we progress in the posterior plane, we find that uh there's not so much access anymore because we have uh fixations on the side on the lateral lateral fixation. So now I'm going to put my my fiber at 12:00. My fiber is now at 12:00. And here is my my white line. And I'm going to try to see if I can um let's say deepen the white line a little bit. This is the mark I did before. And I'm going to try to come up and follow this this white line to see if I can start climbing up uh developing the lateral plane. Okay. So this is going to be my entry into the lateral plane posteriorly coming up and down and connecting with the posterior line.
- So you see always developing this line of dissection that is going to guide us during the procedure. This is going to be like our GPS. Okay, there we go. Slowly progressing. Uh we are not in a hurry. But you see that one of the advantages of of this operation is that you can go very slowly, very slowly. But you need to develop the skill to be able to work all the time. Okay, I'm not doing this. For example, coming down, stopping, going up, and then coming down again. This would be losing a lot of time. So I want to go and dissect when I go up and I want to dissect when I go down. Okay. So this is now lateral line posteriorly and I want to make sure that the lateral line connects to the posterior line. Okay,
- there we are coming up here. I'm not going to continue with my ascension because I want to pay attention to what's going on at the sphincter level. You see, at the sphincter level, there is still attachments here. So, I want to be able to cut these uh lines deeper. This is what I call a line of access. And then we're going to try to continue going up and down. But I only uh progress anteriorly with my dissection of the lateral plane when I have already cut >> attachments.
- Okay. So here I'm going up and down. You see trying to always follow the same plane, the same line of dissection. Coming up and down. You see this is my line of dissection on the lateral line. Look how the endoscope is looking at the line. So the line is in the center of the image and that way we can uh we can always see a little bit of the side of the adenoma and a little bit of the side of the capsule. Okay, in this case the line is more vertical rather than horizontal as it was before.
- So there's some bleeders. Let's see. We need to be careful and progress carefully trying to do hemoasis as we go. So it's it's called the as you go method. Huh? We want to keep keep a good heistasis because if you continue to accumulate bleeders then you will have uh difficulty with visibility. In any case, if you think about this end block approach, you know that we are irrigating this space.
- Is it not possible to stop the noise from the machine? Huh? Is it possible? >> Not possible. No. >> Oh, please stop it, please. It's too much noise. Huh? The laser is noisy. Everybody is noisy. Let's see. Okay, so there we are. So we we have a visual of of the plane. Let's do some more more hemoasis. I'm going to use this uh lower setting one jewel and 30 hertz. You see when we use this setting with a long pulse, it's very heostatic and it's not so disruptive. Huh? So I'm going to look after the hemoasis. Not all prostates are the same. Sometimes we can we can operate and not worry about hemoasis because there's no bleeding. Sometimes there's a little bit more bleeding. So we need to check.
- Okay. So and again you see when I come out uh to to see the aexics you see here there is the sphincter. This is the sphincter up here. This is the white line that we marked. And I want to be able to release this aical attachments before I continue with my dissection because I don't want to pull this area.
- I don't want to deepithelialize the sphincter. And if you want to maintain uh continents, you need to be extremely careful here. Uh this is the early aical release. I'm I'm working my objective is to release the apex from the sphincter.
- Thank you. There we are trying to go further up. You see now we become more anterior. coming up up up and trying to continue with my line of dissection. You see this was my lateral line of dissection here and I want to go up. You see now trying to become a little bit more anterior.
- Okay, there we are. Coming up. Coming down now. It's a it's a big prostate and it's a bloody one. It's it's uh not so gentle, not so sympathetic. So that's why uh when you start hol you need to choose very small prostates because at the beginning you're going to be slow, you're going to be hesitant and uh if you have to do a long prostate, a big prostate like this, you need to be able to work nearly continuously. You see, this is the only way to make the operation in a reasonable time frame. Okay. So here we are coming around following the line of dissection. You see connecting the line.
- So we always uh follow that uh that path. Huh? Look uh I the distance I choose to do the dissection gives me a very soft dissection effect. So you see it's not aggressive. So the idea is that every pass I do with the fiber I get a little bit more dissection.
- But very very gently. And if you saw my hands, I'm using the endoscope with minimal minimal force. I'm not doing any force. I want to be extremely gentle. Move slowly like in slow motion and progress with my dissection. Water.
- Yeah, it's good. Okay. It's it's um one of the things that is fundamental from this operation is that it is a teamwork. It's not the surgeon operating is the surgeon operating but the assistants have to be present not only in the operating room it's not enough they need to be present in the operation you know they need to be looking at the water they need to make sure that everything is working uh and they are ready to help the surgeon if if we have to do something let's imagine I find a very big artery for example and it starts pumping blood into the surgical field and we don't see very well and we try to control it with the laser. Is it possible to lower the volume of the laser like the noise cuz it's very loud.
- Huh? Go to the Yeah. settings or whatever. BPH. This is already set. There must be where you uh device settings. Audio audio audio. Low low. Down. No, no, no. audio the key sound. Yeah. Key sound. Key sound. [snorts] >> Everything down. Yeah. Let's see.
- Okay. Okay. Let's see if we have a more comfortable. Ready? >> Oh, it's getting ready. Sorry. Ready? >> Now it's much better. Don't you think? Why? Why do we have to have this noise in the operating room? Huh?
- >> It's crazy to all the time. Huh? It's much nicer. So much. >> Yeah. Okay. So, let's go back. Sometimes when a clot forms, you see this laser is able to break stone. So, you can fire against the little clots and they will go away. And then you can uh let's say work on the hemoasis. We want to have good hemoasis and we don't want to progress until we have done uh pretty good hemoasis. Okay.
- So here we are. This is now we're getting closer and closer antiorly. We're getting closer and closer towards the 12:00 region here. That is looks like 12:00. And there is like a piece of tissue there. I'm using the coagulation. Sorry.
- Sorry. Sorry. Yeah, there we are. So, I'm going to move on to continue with my anterior dissection. Let's see if I can get all the way towards 12:00 in this side and we can get anterior and we can do the anterior detachment. You see yesterday I I did a definition of holip where I I said that hip consists in mobilizing separating the capsule from the adenoma progressively and strategically. So we gain more mobility of of the of the adenoma. As we release more tissue from the capsule we get more mobility. when we get more mobility, we get better access to places where we couldn't access before. So this is all an strategic uh let's say strategic uh steps and again this tendency to bleed from this patient is amazing. H normally we
- have much much better control of the hemoasis when we do the first pass. Okay. So there we are. This is quite anterior. There's a little vessel here. Let's see if we can control that. And maybe up here.
- You see it's a very very vascularized prostate. Huh. So we do we need to do extra extra coagulation work. Huh. There we are. So it's looking better here anteriorly. Let's see if we can check what we have done. I think now we can go to the other side and we will make a similar ascension towards uh 12:00. Okay.
- Because there we are. >> There is a question. How do you know that she wants to go to the How do you follow the line? >> Okay, so how do I follow the line? Okay, this is my white line. Okay, this is my white line here. This is why it is so important because when you are advancing the operation, sometimes it's difficult to tell what is sphincter, what is not.
- So the first thing I do in the operation is to have this landmark because this landmark is going to give me the information I need when I cannot see it you know very well uh during the operation. So the idea is that when you do this line of dissection, you see I'm starting now the lateral line. Okay? You have to look at the anatomy and you have to look at the quality of the plane that you're leaving. In this case, the adinoma is in the left side. The plane is in the right side of the patient. So I want to see that the right side leaves a continuous let's say smooth surface smooth surface more or less fibrous on the surface white in color and then when I am driving when I'm driving the car you know trying to
- advance uh towards the bladder neck I try to uh decide where should I target with my fiber you see there are three places where you can target you can target against the line of dissection.
- You could target outside or you could target a little bit inside. Okay. So, as I progress, as I progress with my dissection here, I want to see also that my lateral line is going to connect with the line that we developed posteriorly.
- You see here posteriorly, we cannot see very well because there's a little bit of blood pooling there. You see, I want my lateral line to connect to the posterior. Okay? So you see, I can correct my aiming in order to try to stay in what I think it's a it's a good plane. Some prostates have a very very nice, very recognizable uh plane, but some other prostates will not give you that. Okay? So you need to be able to read, you need to learn how to read the the depth of the plane, how to try to advance the operation by going, you see, up and down and always deciding uh the factors that we discussed yesterday. Uh we need to choose what distance of of work is good.
- I want a distance of the fiber that gives me a smooth effect of separation of the plane, not very aggressive. because if I start seeing that I'm penetrating in the plane too much then I will be able to correct the depth of dissection. Okay. So here you see I'm coming downwards. This is probably a little nodule here. Let's see this is like a little nodule there. And let's see where where was our uh posterior plane here was the plane here. We were finding that this plane was a little bit deep. So we want to stay a little bit up from that. So this is now my lateral line coming up. And remember that I don't want to go up all the way because we have to think that we are looking inside in the prostate but we have to
- think what's happening with the shaft with the shaft of the endoscope near the sphincter. Okay. So here you see I'm going around but when I look out when I come out you see there's still attachments here. So I don't want to go and break these attachments with my endoscope. This is the this is the white line.
- There's a little bit of blood everywhere. H it's not so forgiving this case. Let's see. So I want to go and deepen the white line a little bit. Trying to go up and down. Water is good. Yeah, still have water.
- Okay, >> thank you. Thank you. Now going up and down and continuing the dissection. But every time I want to go further up, I'm going to try to go make sure that the aical attachments have been cut so that when I go up with my endoscope, I'm not pulling the sphincter. Huh.
- Now I have to say this is uh behaving a little bit uh bloody this case. So not not so friendly. Huh? Not so good. You you will see me uh let's say struggling a little bit to keep a good heistasis.
- Huh? But the thing is you know you need to understand the anatomy. You need to understand the steps of the operation. You need to understand the laser uh tissue interaction. Okay. So you can use the laser effect to do what you want.
- No, in this case I'm using it to develop the plane and not to be too aggressive because in in in this morning I mean if if we do three operations I'm sure that we're going to see at some stage that we go deeper in the capsule and then the idea is if you can do a small perforation I mean if you do a small perforation what you want to do is you want to recognize it and you want to prevent going deeper. Okay.
- So you see this is a plane that looks smooth that looks fibrous. You see it looks coherent. It means that when when I look at this plane and I go down it looks as the same plane. You see when I go down it looks as the same depth more or less. No here we were going probably slightly deeper down there. We will have to clean this because there must be have been some bleeder there that uh has produced that little clot. But here we are approaching now the 12:00 uh region here. Okay. And this is uh also white line here. So I'm going to try to liberate the apex completely.
- Let's see if we can do that and then we can try to focus in doing heistasis and continuing. I when the moment that I go around here and I connect to the other side at 12:00 in that moment we have managed to separate the apex from the sphincter completely. Okay. And that is going to uh ensure that the sphincter is uh safe for the remainder of the operation. Okay. So here now this is some of the anterior plane. some of the anterior plane when I come further back you see we're going to try to connect this side now with the other side we we had a good plane on the other side I think here we are connecting now you see this is the last last attachment at 12:00 last attachment at 12:00 here you see so now we can try to
- develop the anterior line of dissection The anterior line of dissection has to be also continuous. You see, I'm moving from side to side trying to follow the shape of of the anterior plane and trying to progress.
- Huh. But I'm very happy now because I know that this patient will have probably normal continents. Huh. There we are. You see, every time I open something, there's a new bleeder. So we will have to spend a little bit of time trying to control all these bleeding points because otherwise and this is the moment when you see now we can just go around the around the adenoma around the adenoma here we need to connect a little bit better I want to have a continuous line that goes all around the adenoma I'm sorry because normally we can get much better you know dry hemoasis not so much blood everywhere. So, here we're probably uh getting closer to the bladder neck. Let's see.
- There we are. So, you see, you want to progress slowly. You want to make sure that every minute of the operation you're doing something that is bringing you closer to the end of the operation. You see, we are trying to progress carefully. And here we have to decide where to go. No, for example, here I could fire outside, but then I would go deeper in the capsule. I can fire against the line of dissection and uh I I have to find a balance to be able to approach the bladder neck more and more and uh you know carefully stay within the capsule. Huh? That's that's the thing.
- Here we are coming up and down again. Another vessel. Uh we need to go back to make sure that we stop the vessel. Thank you very much. And let's see what we find here. So here in some moment we will find that uh we can enter the bladder neck anteriorly. Now my endoscope is uh putting a little bit of pressure against the adenoma. So the adenoma is moving downwards and if you looked at my hands I don't know if you can see them. My endoscope is now uh above the anterior commisser above the anterior commisser.
- And it's still uh totally uh parallel to the floor. It's horizontal. You see? So here I think we are reaching the bladder. You see this is the bladder now. So we have advanced very fast from you know developing the anterior. You see and now we are reaching the bladder neck. This is the bladder neck. Bladder neck here. You see this is the bladder.
- Now we could go also around and continue opening the bladder neck around anteriorly and then try to go. So as I said yesterday if you were listening the talks this is a simple strategy.
- Initially we develop the posterior plane then we go up from 6 to 12 in both sides until we can connect at 12. Then we do the anterior dissection and then we are going to go down from 12 to six to see if we can meet under the the adenoma. Here is my hemoasis of the anterior uh anterior plane. Okay.
- Can you can you speak a little bit louder? >> Uh do you always do open? >> It's It's a very safe It's a very safe place. It's a very safe place. Yes. I try to open the bladder neck at 12:00.
- Sometimes when you're doing your, you know, ascending dissection, when you ascend from here, you know, lateral plane like this, you're going up, you're going up, you're going up. Sometimes you will enter the bladder neck a little bit more lateral. Uh, it's possible, but I don't try to go below. Uh, I think the bladder neck shape, you know, the bladder neck u change of direction makes it very difficult to enter the bladder from below. I think it is much easier to to come up anteriorly. Let me do some hemoasis. I'm going to spend some time to see if I can make a little bit more perfect hemoasis because there is a tendency to bleed that it's quite unusual. I don't I mean there is a lot of variability from
- patient to patient. That's why you know when you do a nucleation you have to be really really calm, relaxed and concentrated and um provide technical solutions to the situations you encounter. You know if you encounter bleeding of course you need to do hemoasis. No.
- And also progress slowly and carefully. You see, because now we are starting to see a little bit better. You see, once we have this um cavity here and it's very interesting that while the arenoma is in the inside the fossa, the water flows very fast between the capsule and the arenoma. This is what I call the um laminar flow. We have a very good flow of water that helps us wash out the bleeding very well. The moment we tilt the adenoma into the bladder, if you have four or five bleeders going on at the same time, you're going to stop seeing. Huh? Because uh so here I'm just just doing a little bit of heistasis. Sorry. Yeah.
- Say again. general anesthesia or spinal >> in this case it's a general anesthesia we were discussing it yesterday and we thought that maybe it's uh better maybe it's better to have general anesthesia for a life case like this because if we normally I use spinal in my hospital they use spinal the spinal has many problems because often they combine the spinal the anesthetist combine the spinal with some sedation so the patient is not very helpful you know, you cannot tell him stop moving or stop coughing or you know, and then uh you you might get into trouble because of that. Okay, this is the posterior plane. You see, it was looking a little bit deep. So, I want to find a way to correct this. So, go down
- to the posterior plane without let's say entertaining that uh depth. Just uh looking for a a little bit higher plane. Let's see if I can achieve that. So here I'm coming uh also posterior but I'm trying to stay up with my fiber. Let's see if I can mobilize this. Still too attached.
- Let's see if I can mobilize that. That looks like BPH tissue. You see you don't want to go through the BPH tissue. But the truth is that sometimes some of these nodules grow inside the capsule.
- All right? So when you try to take them out they are very very um deep in the capsule. you know the capsule also has been thinned by the let's say growing of of these nodules and then when you try to go under the nodules you find a very very flimsy uh capsular plane also I think the instrument is behaving a little bit different to what I'm used to because I use an instrument that has a flat tip and this one has a pointy tip and uh now when I turn the the endoscope upside down the point of the of the instrument is looking down. So maybe you see the point is trying to get deep there instead of uh you know respecting the the plane a little bit better. So I'm finding a little bit of difficulty to work as I normally do because the
- instrument is not exactly the same. Uh this is yesterday I was recommending not to use this kind of uh internal sheath with a with a but you see because the beak is interfering with the posterior.
- Now I now I realize that I'm a little bit more uncomfortable there because of this instrument. Okay. So it's not not the right instrument for this for this operation. Okay. There we are trying to come up. You see in progress.
- Huh? I remember that I told you that now the general philosophy is that we're going to try to go from 12 towards 6:00 in both sides of of the of of the prostate to try to meet below the adenoma at 6:00. Okay. So here we are trying to get down here. You see down there maybe I can try to work I don't do it normally but I can try to work like this and then I get less interference with the tip.
- So this would be posterior plane trying to continue the development of the posterior plane. Let's see here there is some adenoma. Let's see if we can get down here to define a a posterior line that we can follow without much trouble.
- That looks slightly deep, but uh I'm quite happy with that. Okay guys, can you go out to talk? Go out please. Keep keep the conversations outside. Okay. So there we are. H progressing slowly, carefully. This is the only thing you need to do. And of course you will you try to avoid uh stopping for too long. H because You try to avoid stopping for too long >> in case of what?
- >> Yeah, here I think the beak of the systocope was trying to go down because I I use the endoscope upside down. So I I normally use a systocope without a beak, you know. So I I I was noticing some difficulty, but I didn't couldn't explain it. And now I realize that this might be the case. Now I'm using the fiber at 6:00 which is something I don't usually do trying to avoid. You see this is where the capsule starts looking deeper. Okay. So in this case you see I I I try to I try to keep my fiber anterior. You see? So you have to target you have to target away from from the from the deepening in the capsule. You don't want to go deeper and deeper.
- Okay, there we are. [sighs] You see we are progressing very slowly. The the the speed in the operation doesn't depend on how fast you move yourself. I think the speed is more related to the continuity.
- If you're able to operate uh let's say continuously huh working continuously then the surgical time will be very reasonable. So you don't want to run. You don't want to rush. Okay?
- You don't want to rush, but you want to keep working, keep working slowly, steadily to to to do meaningful, let's say, uh, improvements. You see, 1 millm at a time. 1 millm at a time, but progressing. Now, this is posterior line. Now I'm trying to see if we can get closer to the bladder neck area here.
- We're getting closer and closer to the bladder neck area. This is now all the posterior plane. This is now coming to the other side. And here again, you see if I target here, I will go deeper in the capsule. So I keep my fiber close to the adenoma. This is the way to make sure that the energy doesn't penetrate on the capsule. So most of the energy is going to be absorbed by the side of the adenoma. This is something that fell on my face. A little bit of pus. I think we open a little pocket of pus or you see there maybe.
- Now let's look at the You can aim towards the adenoma. Yes, I think it's very very safe >> to to do that. Huh. Sorry, the fiber is broken for a moment. Let's uh just put it in a little bit more. So when we come here, we want to enter and we want to check the position of the UO. I think they were quite far.
- Here is the UO. You see this is bladder neck. now. So, let me put the fiber in again and try to get some little heistasis. You see this is now near the bladder neck. I'm going to cut.
- You see, we want to meet at 6:00 in both sides. So, this is one side. I'm cutting here to try to reduce the the pedacle, you know, at 6:00. This is also some attempt to to coagulate a little bit more.
- Let's see. There we are. And if we go to the other side, we are going to find also that the UO is is very far away. Where is it? It was coming up here somewhere. I don't see the UO.
- And this side maybe. No, I don't think it was so so close here. I think it was more more anterior and in front of us. No, we saw it on the other side here. There it is. It was covered by that little piece of cloth.
- So this is bladder neck. Now we are quite safe again. You see? And I want to check that I can connect when I come down here. You see I can connect uh very nicely to the to the bladder neck up here. Let me do hemoistasis of that.
- So this this um operation is very sensitive to the instruments you use to the laser you use. You know the moment you work with the wrong instrument or something things change a lot. And I think you need to find the best equipment for yourself. you know, get used to that, work with it, and try not to change too much because [snorts] it's it's very sensitive to all these changes. Huh. Here, just using the little wrong u internal sheath, you know, makes a difference and uh changes the situation.
- So there we are. You see, now this is the posterior plane and now I think we can start lifting the arenoma a little bit. So maybe if we have very good mobility of the adenoma, we're going to be able to bring it up.
- Bring it up. Let's see. And let's see if we can push uh this arenoma into the bladder. Let's see. I think it's it's mobilizing very well. It's lifting. And now when we go to the posterior aspect, we have much better visibility. H. So you see this is just the posterior posterior aspect. Here I would like to to use the fiber at 12:00 like I usually do.
- And there's only a little pedicle of tissue here holding the adenoma before we finish the the enucleation. Okay. So that's just the final attachment. Let's see if I could mobilize it more. Huh? Let's see if we can really flip it into the bladder because that will give us here more space. Yeah, I think this this lobe uh was moved was moving towards the bladder. Let's see.
- [snorts] Now it's moving more. And this is the other lobe. Now we have much more space down here. We have much more space and we should be able to see what is holding the adenoma to to the to the capsule. But so this is uh this is the bladder neck and we're trying to go down to finalize this dissection.
- This the beak I'm using is the beak that is used for to you know for the rectocope. But when you want to use the instrument for enucleation, you have to have this flat flat idea. Now the prostate has moved. I think has lifted.
- And if we come to the bladder neck, you can see the moment we take out the adenoma from the capsule, we start seeing uh bleeders. Huh? You see, we start seeing that the visibility uh decays.
- It's not so good. But we finish the enucleation. Okay. So you see it's a progressive effort. Uh we go slowly slowly trying to get improvements in the dissection and the separation.
- And here we finished. And now of course I need to pay attention to the fossa and see now I think much of this uh irregularities has been caused by the beak of the endoscope you know when I was trying to to dissect because it's a very irregular posterior plane there is some deepenings it's not not a worry I think patient will be fine but now we need to spend a little bit of time uh let's say doing hemmoistas you see there is some some depth in some of the posterior aspect you have to realize that we see everything with a lot of uh magnification you see the the fiber measures half a millimeter so our entire field of view it's only like 5 mm. So if you look at this this is a little bit entry into the plane deepening into the
- into the capsule but it's only 5 mm. Huh? So it's not not so not so not so important. Let's see. We need to review the fossa because we need very good visibility if we want to morcellate safely.
- And normally the hemoasis should be a little bit better. Let's see if the next cases we can have we can have better hemoasis. Thank you. So thank you for keeping silent. I I really appreciate because I need the concentration if I need to operate and talk at the same time and all the noise in the background is is very very difficult to to stand to integrate. Okay, there we are. So you see it's a careful operation. You have to be patient.
- Normally we are using saline as irrigation fluid. So the patient is mostly safe. I would say there's not much bleeding. Yeah. >> Say again. >> Yeah. Yeah. We use saline always. Huh.
- And uh which means that there's no blood there's the the homeostasis of the patient should stay quite quite good. Huh. Of course, if you do open uh senos and you are the patient might absorb some water, but uh normally if you are uh let's say able to work continuously, if you're able to if you're able to progress continuously and fast, then uh the patient's going to be okay. I think you shouldn't go for more than two two hours, two hours and a half. I think it's uh you have to consider to to do a second stage.
- Some people do very long operations but some people do >> say again >> I think I think the question >> okay so we are starting to see a little bit better let's see still some not so good visibility let's check the mucosa here I'm going to go with the coagulation see if we can get some better visibility to move on to morcellate here. These vessels are always a pain, huh?
- Vessels from the bladder neck and the bladder mucosa. Here we want to spend a little time coagulating. So if there's any question I'm I'm happy to have some some questions here. This is important to to have good visibility because if we start the moreation and we don't see very well then we will uh feel you know that is not very safe. I I think we have better and better visibility as as we spend some more time we can pinpoint if there's any you know bumper any bleeder the laser coagulates really really well also I have to say this this patient maybe when we see the other patients we can compare this patient was had a tendency to bleed a little bit more than usual more than we are used to. Okay.
- And if we come out, we come out, you see this is the frenolum of the veromontanum. And when we look up, you see this is the sphincter. Huh? We have been able to we have been able to respect the sphincter really well because we marked this this white line.
- So I hope this patient will be perfectly continent from the very beginning. Huh? And if you think about it, often these patients uh we keep them with a catheter and some bladder irrigation overnight and then the next morning the catheter is taken out. We have a protocol to remove the catheter and the protocol consists on washing out the clots from the bladder.
- Then we wash out the we take down the balloon of the catheter, pull the catheter four cmters and then wash out the fossa because sometimes you see there are some little bleeders around here and there will be some uh bleeding in the fossa and then if you take out the clots in the fossa it's much less likely that the patient will have a retention. Sometimes patients can pass clots but sometimes the clots form uh a stop and he cannot be because of a clot retention. No. So we do the thorough blush out wash out of the bladder the thorough wash out of the fossa and then we put in the bladder 300 ml. So when we withdraw the catheter, the patient already has content in the bladder and with that uh he can pee very
- fast. Maybe five minutes after removing the catheter he wants to go to pee. He does the first void which is usually bloody. I tell them the first void is bloody, the second void is red wine, the third uh void is rosé and then the fourth is a usually white wine or something like that. So here we are. Ah, we are getting much better hemostasis.
- We're getting ready to the moment of the morcellation. Let's see. I don't know which kind of blade we have. There are two kinds of blades with the piranha morcellator. One is the reusable blade and the reusable blade is quite slow. And then we have the modern uh V-Max blades. These are much faster.
- So, let's see how it behaves. I think we have better and better visibility. We're almost ready to change the instrument and go to to the morcellation phase. Let's see. I don't want to leave any obvious active bleeder because that will make it more difficult. Sometimes it's better to stay here one or two more minutes, you know, trying to improve the quality of the hemoasis and then move on to to the to the morcellation.
- Some some of these bladder neck vessels are a little bit resistant sometimes to to the hemoasis. So we need to insist to keep them under under control before more solution. Otherwise the visibility decays very very fast you know and then you have to stop and go back and try to do more hemostasis before we you continue with with the more solution. So there we are.
- So UO's are safe. Huh? This is one. This is the other one. Huh? We are at a good distance. Mhm. Small bleeders. Uh they are a pain in the US. [laughter] >> Okay. Thank you. Thank you very much.
- Everybody in the operating room is really behaving very well because we like to talk. Huh. But keeping silent is not easy. And uh they're doing a great job. Okay. Now, fiber >> fiber out.
- >> Out. Fiber out. Now, I'm going to ask you to give me the nephoscope. Nepheroscope. Give it to me. Okay. Now, let's let's wait a moment. Wait a moment. Wait a moment. Listen to me.
- >> Okay. Bravo. Now I'm going to release this instrument. So you're going to take it out carefully. Okay. Like that. And I'm going to do the change relatively fast. And now I need the morcellator and the pedal. Where is the pedal? This side.
- >> Left. Left and right. Okay. What is the setting again? Check it out. It's 750 each side. Okay. >> Two hertz. Yeah. Yeah. It's perfect. So for more seellation now we need to be patient. Basically what I did was to localize the bladder neck below the blade and then I would um I would then lower my hands so that I can elevate a little bit. Uh when I lower my hands, I get some distance from the bladder neck. You see, I go up and I try to find the the tissue here.
- I think these are the standard blades. No, >> this is the reusable >> the reusable. No. So, it's much more it's very slow compared to the to the V-Max blades. And also I think this blade has been reused. So the blade is not very sharp. So normally for a big case I would usually use a new blade because you want the best possible efficiency of morcellation. You see? So if if you do a reused uh uh if you use a reused blade then of course the teeth of of the blade are not so sharp anymore and then the moreation will be a little bit slower.
- No, if I was the manager of a hospital, I would put this um policy to to try to have a safe environment in the operating room regarding the noise. Some of these lasers are very noisy. You know, uh some companies they produce lasers.
- Some lasers even uh have a noise when you activate the laser. So you are operating and it goes ding ding ding ding ding. And you have to spend hours every morning, every day. Yeah. Ding ding like that. It's crazy.
- So here it's important to have water coming in all the time. >> Say again. >> But some Can you speak louder? I cannot hear you. I cannot hear you. >> Yeah. >> Repeat. >> You do theation.
- >> Yes. >> Yes. >> Yes. >> Well, I would start doing this as a safe safe way to morelate. I think um the problems with morcellation come when there is um people start rotating the morcellator to the sides. You know, you have to keep the mouse looking up. Also, you know, if you want to put your morsel above the adenoma and the adenoma is very big. Many times it's very difficult to go up above the adenoma.
- The the camera is getting wet. So, we need to take it out. Clean very fast. Okay. So, let me stop for a moment. Clean. Clean. Both sides. You see it's it's wet there, huh? It was wet maybe. Or still wet. No, it was fogging a little bit.
- Yeah. So, uh I think uh I would start with uh this classic technique, let's say. But then uh it's very easy to learn to do the upside down morcellation. I think it's a very useful very useful resource uh to have the possibility of go uh up and look down. Both are very safe.
- You see the problem is that people tend to morcellate like this because they are very afraid of putting the blade inside the bladder. And look what happens when you have the blade close to the lens.
- You cannot see anything. You only see tissue. You see? But if I put my blade a little bit inside, okay, like this, I can see the adenoma on top, but then I can see two little black triangles on the sides. And these black triangles are telling me that I'm not anywhere close to the bladder wall.
- Okay? So, I try to position myself like that. Also you see the lines that I have showed you. I started doing the posterior line then I went lateral in both sides. Then I went anterior and then I had like a circumferential line of dissection around the adenoma. This line for me is a method that allows me to orient myself very well during the procedure and I don't need to do panoramic views of of the prostate. you know, I don't need to stop to to do these panoramic views. So, I I use the line as my GPS, my orientation system that allows me to work most of the time during the operation slowly but continuously, okay, without stopping.
- With morcellation also we want to be efficient because if during morcellation there is some water going in but there is also water going out but not as much for example as if you use a rectocope. I'm I'm sure if I'm with a rectocope in this in this fossa I can see continuously for two hours if I want because the amount of irrigation is very very much here. the amount of water going in and out is very small. That means that the tendency during morcellation is that the visibility is going to decay. So if we have a decaying visibility, of course you want to do the morellation and finish as soon as possible. You don't want to go see the ver where is the ver where is you know you want to have a landmark. You want to
- have a safe you see the the visibility is decaying. Uh so that's why you want the fastest blade you can get, the fastest morcellator you can get because otherwise uh you know it takes too long and then the visibility will drop and then we will have to change instruments again do extract the clots from the fossa do more hemostasis you know and then it becomes a painful painful operation you know whereas if you have let's say the right equipment if you follow the steps you know then you can make it very fast. You can have a fast enucleation and then you can have a fast morcellator morcellation.
- You don't need to go in again to do additional hemoasis, you know, and then everything is very fast. But, uh, here we have a reused blade and it's a slow blade. Uh, so it'll take much longer in a way. When you when you do that, you are setting yourself for failure. You know what I mean? If you choose a cheap and uh slow morcellator, you're going to struggle in all your cases, you know, whereas if you have a fast morsel and you have the optimal conditions, then you're setting yourself for success.
- There's some fogging again, but also I think the visibility is is decaying. Huh. So there is a question about how can you explain more detail about how fast and how slow is the question from the audience.
- >> Yes. >> Yeah. Yeah. There are some published studies comparing the morulation speeds of different systems and um we know that uh some morillators are better than others. You know here you see I'm losing a little bit of the visibility. Let's clean the camera again. Yes, >> okay. So, >> wait a moment. Let's do a little bit more because otherwise we want to make sure that we continue with the morcellation until it doesn't morelate anymore.
- Water is open. We have water. [sighs and gasps] So really I think um despite it is feasible to do an enucleation with a low power laser you know the instruments you find around to try to work with them the cheap morcellation you know from China whatever I think uh it's best to try to get the best possible laser the best possible morcellator because you know sometimes s the bad bad instruments make you look bad as a surgeon. You know, I'm pretty sure that we would be much more uh advanced now in in morcellation if if we had a faster blade for example the V-Max the single use blades you know they sell them as singleuse blades but the make is exactly the same as a reusable so you can reuse them. The problem is in
- Europe, you know, there's so much bureaucracy that if the company says single use, the hospital is obliged to do single use, you know, but the truth is they are exactly the same. The only change is that the inner blade has a bigger mouth.
- Still more, huh? So, let me let me finish. Thank you. But let's let's stop and change. Okay. Change as fast as you can, please. Stop please. >> Okay. And change the basket as well.
- So this is it. Huh. That's why that's why people find difficulty in learning hole. Yeah. Go ahead. >> So you change the the basket because the water is full. >> Yes. We changed two things. We change the canister that uh gathers the water coming out. These are small uh capacity.
- So often they get filled during the during the operation. Okay. >> Continue. So I I also like to change the can the tissue basket because if you change the tissue basket then the suction will reach much stronger at the tip of the at the tip of the morcellator. Okay. So ready so it's a way to optimize optimize the let's say behavior.
- Normally the pirania is my favorite. This this morcellator is my favorite morcellator. But we saw a big change, a big step forward um when we started using the V-Max blades, the high-speed blades, the single-use blades rather than the reusable blades.
- The problem with reusing the blades is that these um blades of course come with an edge, you know, cutting edge and the cutting edge sometimes uh gets uh water is coming. Yes. Gets a little bit less edgy, you know, and then they don't cut the tissue. So well you see we're losing some of the visibility we had from from before.
- Let's see if we can see better. You see this is the problem. We should have finished more solation by now but as we don't finish the visibility gets worse and worse. There's water going in. Yes.
- >> Yes. And also for a life operation, I think it's it's a good idea to have new blades and new stuff rather than used instruments. >> You see, we're losing visibility and then morcellation becomes a little bit more risky. You see, because you might make a mistake and start morcellating the bladder wall. So sometimes uh it's better to stop go in with a rectocope. Do we have a rectocope ready? Is the patient had has an electrode in case we need to go in?
- The patient has a Yeah, it's a bipolar system >> because bladder is full. Yeah. >> You see now we're more slating with little visibility. Also, I mean, if if there's someone from Richard Wolf here, normally when you do a live case, you want to show your products and you want to show the best face, not the not the bad one. You know what I mean? So, bringing a used blade, it's not very clever. Let's empty for a moment. I'm going to empty and try to fill again. Let's see if we can get rid of the blood and we get a second chance to see something.
- Let's feel the bladder. We have to wait a little bit. So these are the these are the problems with morcellation. Sometimes you see it's a little bit tricky and uh you have to be extremely careful.
- Let's see if the bladder fills up. Not yet. That looks at a noma to me. >> It's getting fuller. No, >> sometimes we empty the bladder and we take out the blood and then we feel fresh again and then we can continue a little bit.
- So every operation has its own uh let's say details and uh attention to detail is important in this. So you try to get your best possible instruments. Try to get you know because then you will run into much less trouble.
- But still um if we are able to proceed safely the patient will be okay. We'll be able to pee tomorrow morning hopefully. [clears throat] You see the the adenoma is like a like a peach h there. It has some soft components and some of the BPH nodules are a little bit hard and then the hardest tissue is the one that uh you have to morcellate at the end. Let's clean again. It gets um >> foggy >> foggy >> and we cannot see it. So we sum up the bad visibility with the foggess of the let's see uh we need to be patient.
- There's not a lot of bleeding but the problem is that the visibility gets foggy and difficult. So it's becomes much less safe to to to continue. So I I don't know if I'm showing you the right thing to do now.
- Of course, I was trying to see if I could finish, but uh probably the right thing to do when you have bad visibility is to go inside with the rectocope and uh do some additional hemoasis and then try to finish with the the morcellation.
- Let's do that. Let's change. So, I show you how it is. >> Give me the bipolar instrument here. Okay. And now we change the light source. And then we do another change like before. Huh?
- >> What which one is the pedal for the bipolar? What pedal? >> Open this one. >> Which one is the pedal? This one. Okay. So here we have the fossa. You see when we get in with the bipolar, we can see probably a little bit better.
- Let's do some additional hemoasis of the fossa and then when we get a good visibility again we can then go back uh to morcellation. The all these bleeders are usually venus bleeders. So if we put a catheter probably There's not much bleeding but we are distending the fossa. You see we are distending the fossa.
- >> So you change to the bol because you want to do hemostasis or >> yes I want to have better hemoasis. I was morcellating in bad conditions of visibility and then of course it could become more dangerous. There's not much tissue left to morsel. So we are going to finish fast but you know you have to do it safely and I want to show you what to do. I mean if you start I can morcellate with bad visibility because I have morcellated thousands of cases. Huh? You know I have a lot of experience and I can work even with bad visibility sometimes. It's not very nice, but it's possible. But I want to show you what to do if if you're going to do your enucleation. Uh you you need to be you need to have good
- visibility. Okay. So there's a piece here that fell into the into the fossa. That that's very common. Uh so we're going to go through the capsule, try to get a little bit better better heostasis. Sometimes incredibly even when we use a very nice laser, very good laser, we get some little bleeder.
- Sometimes what we find is that there is there is one one artery pumping somewhere that we couldn't find before, you know. So, but let's see. You see, when we stop this little vessels, we we get better better irrigation, better visibility.
- the blood comes out and then we can change back to morcellation very easily. Huh? So you see instead of panicking or instead of suffering instead of there's a bleeder here that's that's what was causing the trouble I think.
- So instead of panicking, instead of uh doing silly things, we need to to go in and do the technical take the technical solution. You know, you have bleeding, you don't have visibility. Of course, you need to go back and have some more hemoasis. Huh?
- This is a clot. >> Why you choose bipolar not using laser for theis? Well, we could, but often uh during often during um during morcellation, if there is bleeding in the fossa, you're going to find a lot of clots. And then I think it's more practical to enter with a loop. You know, it allows you to move around the clots and maybe extract them even.
- But you can you can go back with a laser. Huh. It's a it's a possibility. Huh. But this is what I usually do. If I go in again, I use I I I don't have a bipolar because I have a monopolar. Uh so we have to change the water inflow to sorbital or glycine.
- You see we do five minutes of additional hemoasis and then we can go back and try to finish the morcellation. Okay. So now we have much better visibility I think. We don't need to make this very long.
- There's a piece in the fossa and there's another piece in the bladder. Now we can see much better. So let's change again. Initially we change the camera. Clean. Very good. Now we change.
- The camera should be not bothering me with the cable. So get get the cable to the floor if you want. Okay, now we [sighs] remove this one. Enter with the nephoscope again and give me the morcellator again.
- >> So you see now it's going to be morcellator. It's going to be a pleasure to to morulate this because we have good visibility. Thank you. There we are. The bladder is getting full. You see we're now in the fossa.
- Where's the pedal? >> Here. Here. You see? Now this is intracapsular morcellation. You see when you are when you have good visibility inside of the capsule you can then stay in the capsule and morcellate.
- So it's even safer. Huh? So you see you have to keep your cool. You have to be cool. You have to be relaxed and do what is necessary technically to Water is good. Do I have water? Water is good. Let's see. This is was the piece that we had inside the fossa.
- There we are. Pressing that button, please. I'm aware mother used to say that have to spend money when you go to the doctor and when you buy shoes. You know, it's better to buy good shoes than to buy cheap shoes because the good shoes will serve you for a long time.
- And it's the same for for nucleation. You need good equipment, a good high power laser, a good morsel. And then of course it's it's important that the team uh understands you know if you do your first cases yourself in the hospital the anesthesia team are going to be oh very bored they will think this operation is not so good because it takes too long at the end you have to convert but uh when you when you can see uh a good I mean if you want to introduce it into the hospital you you bring in someone who can do it very well and then everybody's convinced because the patient blood loss is minimal. He goes to the recovery room, he's fine. Uh he goes to the room, the nurses in the warts are very happy
- because they don't need to be washing clots all the time. And and then the next day the patient goes home. So the manager is happy that there's more beds for oncological procedures. So but then of course when everybody has seen the potential of the technique then they they need to support you during your learning curve because there will be some learning curve. Initially you will do one or two cases.
- In my hospital we do five cases in one morning or five cases in one afternoon. So but we work very very fast and we try to be very efficient and this is something that you need uh with a motivated team and also I think this this uh this operation needs some initial dedication.
- No, you cannot do just, you know, I do a laparoscopy, I do reconstructive, I do everything and then occasionally I do a hole. Then that that's that's not going to work very well. I think you need to do many holyps. Maybe you know like always once you What's the problem with the vacuum?
- >> The vacuum is not correct. >> Okay. Change again. Stop the inflow and then we check and finish. So I think it's better to go through a period of time where you get very good at hip and then then maybe then then you can do many things know and uh still because it's like learning to to to to drive a a bicycle you know you never forget but it's it's a sophisticated operation that needs >> need to do it consistently. Come on. It doesn't matter if you don't change. It's all We're finishing. So, >> hurry, hurry up. Hurry up.
- >> We need to do a fast change. Fast change. So, you see it's a teamwork, huh? If they help me with the instruments, if they don't help me with the morulator, everything is uh gets more clumsy and more difficult. So, let me know when it's ready.
- That's why doing life cases in with Philip it's a little bit uh challenging sometimes because you go to another hospital you use different instruments probably you know so there is some uh possibility that things can get let's say more messy or something no do we have a catheter I think we Finished, huh?
- I think we finished. Let's put a catheter. There's a little piece. If you leave these uh pieces behind, they can block the catheter and sometimes they can block the patient. Uh because I've seen some patients postoperatively they pee very well they go home and then they tell you you know I'm peeing and in the middle of the stream everything stops suddenly you know and uh and then that's the that's the problem with uh that's a sphincter region very nice okay catheter jelly off take this thank you bravo thank you very much is there any other question.
- >> Let me uh push the catheter to yourself. Let me put the finger inside to make sure that it goes in. Wait a moment. Okay. Push. Now it went in. I think >> it's good. How much balloon does it take? This one.
- >> I don't need a big balloon. But let's get the irrigation flowing. Let's see that it's positioned properly. That's enough. Let's see. >> Okay. >> Okay. It's coming through. Thank you very much. Hh. Thank you for keeping silent. Sorry. It's my obsession and I'm I'm terrible. I'm terrible. I'm sorry.
- Went really well. It was not easy, but it went well. Thank you. >> Okay. >> Bike. >> Oh, okay. Okay. So, is the patient doing well? Yes, >> it's feeling well. Okay, thank you. So, >> uh thank you. There is a question about the how much the how the setting of the laser.
- >> Yes. >> Yes. Maybe the camera can can show the settings. Can you show the screen? >> The water is coming out from here. So, this this should be stopped. This one. Stop. Mhm. Thank you. So, you see this this screen? You see this screen?
- Okay. So, we have two pedals. We have we have two pedals. One pedal here is for the settings for dissection. And I'm using two jewels, two jewels per pulse. This is the energy of the pulse. And this is the repetition rate. It's 50 hertz. So, we're going to have a pulse of two jewels 50 times in one second.
- And I'm the setting I'm getting is virtual basket. Virtual basket is this pulse modulation similar to MOSES that provides two con consecutive pulses every time. So we have 50 times two pulses to get the virtual basket effect.
- And for coagulation I found I I chose one jewel and also so much less energy per pulse and 30 hertz. And I chose the longer possible pulse because for coagulation we don't need a very short pulse that is very disruptive. We need a long pulse that can deliver heat to the tissue. But the settings are one thing and as I said yesterday the operator has to decide how this energy that comes out for from the fiber is going to reach the the tissue.
- Okay. If we look at the bag now, where's the bag? Do you do you see it here? Yeah. If you look at the back, the water will be flowing out, but you can see it's uh it's very clear. You see this is the outflow after hole.
- Huh. So, the patient probably lost a little bit of blood during the operation, [cough] but it's it's very minimal. Huh. Okay. Thank you. Thank you very much, Santi. Thank you very much. Thank you.
- Sorry to to to Great. Um, magnificent job. Uh, it's we're it seems like we're looking at your one of your >> videos. Yeah. Yeah. [laughter] >> Yeah. >> So, your I noticed your technique is uh the same. You always uh how you access the plane and how you flip the laser on.
- >> Let me show you something. >> Can I have the the this sheath the internal sheath? This one? >> Sorry. Sorry. you I I interrupted you, but I wanted to show you. You see, normally normally we use a flat instrument.
- Can you point here? Yeah. >> Normally we use a flat instrument. So this is the this is the position with the fiber at 6:00. But when I turn the instrument to have the fiber at 12:00, we have this beak on the on the on the bottom. So the beac going to has been trying to go into the capsule, you know, and that's why the the lower plane looked a little bit rough because I didn't notice that this was the case.
- But so so all these little details are very important in order to to to work safely. Uh so but it's very easy to confuse, you know, one. >> Go ahead. Go ahead. >> I we do apologize. Uh we I think we overlooked that that detail. Uh professor. So >> no no it's okay. I'm not I'm not >> for that. Well >> I'm just explaining I'm just explaining >> but but it's it's very important. It's very important. I think if you if you're going to take one concept home you know if you're going to do hip in the hospital things will change a lot for the better. Instead of doing open prostatectomy instead of doing TRP that bleeds a lot sometimes you have bleeding and uh excessive bleeding. Patients stay several days. Sometimes you have to take
- them back to the operating room. Transfusions. You get into a new world of patients who go to the room and have clear urine most of the night and then the next morning you remove the catheter. They're happy.
- They go home and you don't need to do transfusions. You don't need to do much. But in order to do this and in order to achieve this, of course, you have to learn properly, but also you have to have the right equipment. And I think you cannot be cheap about that. So when you talk to your manager, when you go to the manager of the hospital, I think you need to to be very picky about what the instruments you use. And also similar to robotic surgery, if you if you if you see the robotic operating room, it needs another level of uh help from from the nursing team, you know what I mean? It needs a very proper organization and very organized and the the nursing team must be proud that they can work to such
- level of of proficiency. You know what I mean? So instead of being in the operating room where everybody's talking, everybody's well, you know, some someone enters with a phone and talks in the operating room, you need to push to to be very professional. And I think this is the way to achieve excellence, no, with the patients. And the the the only beneficiary of that is the is the patient at the end. Huh. And that's uh >> thank you uh for your two cents. Uh professor, one probably one question before we move on to the to the second um case. Um so I noticed uh what's different in in in this case with the videos you have uh in in your YouTube is that the prostate here is quite vascular. I noticed and again reflecting
- to to what we do here in in Indonesia, we we found a lot of prostate is like that. Um I have two questions. Uh what do you think that is? And um what what kind of um you know preparation pre-operatively we we can do to mitigate that vascular um process?
- >> Well, I I think there is a lot of variability. Uh let's do the experiment today. We have two more cases. Let's see how they behave. My bet is that they're not all going to be like this. So, sometimes you get prostates that tend to bleed more sometimes. So, if you find that this is quite usual, I don't know, people have tried to give um finasteride or dutestasteride to patients to lower the bleeding, but at the end I I don't think that that makes a huge difference.
- I mean, you are the technical surgeon who are going to face the case. So you just need to be a little bit more careful. Take it a little bit more slow and uh this laser seostasis is brilliant. It's really good. So bleeding is no longer a problem.
- Probably this has been a discussion going on with TRP. Should patients have finasteride before TRP because they bleed less there less postoperative blood blood loss. But here the quality control of I mean the bleeding control is so good that I don't think you you should bother so much about that. I mean bother to to become a good surgeon, bother to you know do the effort to to get good at it and then you can tackle any case irrespective of how bloody or difficult it is.
- >> Okay guys, >> let's get ready >> for the next we'll we'll be seeing you in the next uh >> Okay. Thank you. Thank you. >> Still good. No. Yeah. Pinky urine. Very little. Pick. Good. Good. Good. Very good.
- Thank you. Thank you guys. Thank you so much. Thank you.