
Surgery
Real-life En Bloc HoLEP case 28: Re-do after GreenLight vaporization
Dr. Fernando Gómez Sancha · ICUA
Dr. Fernando Gómez Sancha · YouTube
Language: English. YouTube audio metadata.
Surgical content for professionals. Contains footage of an operation.
Playback connects to YouTube. Your search query is not sent to the player.
About this video
An en-bloc HoLEP reoperation 12 years after GreenLight vaporisation performed by the same surgeon. The description reports many years of improved voiding and quality of life before urinary symptoms worsened again. The case documents the decision to retreat surgically, without providing a numerical postoperative assessment.
Documented details and sources
Only details explicitly stated in the sources. Missing information does not mean it did not occur.
- En bloc
Real-life En Bloc HoLEP case 28: Re-do after GreenLight vaporization
- Redo surgery
Real-life En Bloc HoLEP case 28: Re-do after GreenLight vaporization
- After GreenLight laser surgery
Real-life En Bloc HoLEP case 28: Re-do after GreenLight vaporization
Source checked: 2026-10-06.
Available transcript · English
Automatic YouTube captions, not clinically reviewed. Names, technical terms and numbers may contain errors.
They may contain transcription or translation errors; check the explanation in the video.
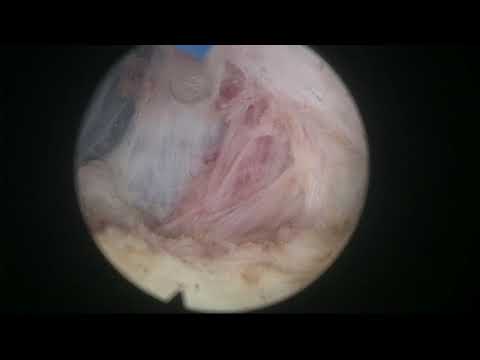
- hi this is fernando vomit sancha and today i am presenting an interesting case of a man that underwent a green light vaporization of the prostate uh 12 years i think earlier performed by me [Music] and he experienced a deterioration of the improvements that he originally had when we did the the green light vaporization so this man and i were thinking what to do when he was happy to to be operated again trying to improve and to get back to the excellent quality of life he got with the first treatment but this time of course we want to make a definitive um treatment and this is a very nice demonstration a very nice case where you can see how despite the excellent look of the posterior aspect you know
- which seems that it doesn't need any treatment now we see anterior tissue that we want to remove but one would say the posterior is okay you know why why touch that no but i'm going to show you how the unblock approach will [Music] find that there is more tissue there than we thought there would be and how the unblock approach is excellent for uh the redo cases okay here we just have to be careful with the sphincter i think we could have gone on even a little bit higher but i was uh trying to be careful and preserve the mucosa anteriorly so that when the sphincter closes the mucosa will help the sphincter carry out its role of closing [Music] in in a in a watertight fashion so that the patient will have perfect
- continence from the first day we are using the 150 watt quanta system at settings of 2 and 50 watts and using virtual baskets which is this mode of emission this pulse modulation that emits two consecutive bubbles you know the double bubble that provides excellent dissection properties as the classic holmium but much improved first pass coagulation and you're going to see in this video how we didn't really see bleeding almost at any stage all right so initially it looks as if there is not much tissue posteriorly but i have already quite a big experience on redo cases and often this is misleading you know so you have to keep looking and stick to the method stick to the to the technique and then we will start seeing uh that
- there is more tissue there that we would have said or would have guessed by the look of the endoscopic image of the capsule right here i had some difficulty with the legs so it was not easy to reach where i wanted so sometimes we have to do that by being patient and at some stage we managed to do what we want so that's the posterior plane you see trying to come upwards and do the early apical liberation so here you can see how we can go around the adenoma initially trying to release a little bit of the posture lateral aspect because otherwise it's going to be difficult to to release the apex completely so we need some mobility of the apex here for example i recognized you see that i was leaving some tissue so
- you know with hollop you have to evaluate you know what you're doing constantly constantly you have to be present in the operation and study the information that the camera is sending to you checking how the tissue looks like and there you can start seeing how there is a big amount of tissue posture laterally that wasn't removed in the first operation or probably we left a small rim of tissue there that has grown over time so if you want to to to provide the patient with a definitive result we have to go all the way down to the interface between capsule and adenoma and do the best possible job but here i was trying to release the apex it's nice to mark the white line you see because when you have to
- work there the fact that you see white tissue that has already been coagulated tells you exactly where the landmark is so you don't want to damage the sphincter or the sphincter's mucosa and this careful way of going around the apex very carefully initially here you have to follow the plane you see and when we are right at the epics below the sphincter you have to cut more horizontally and then of course as you have protected the sphincter and you have already done this horizontal uh line you see here for example horizontally you go inside so the sphincter is left uh [Music] behind and then then you have to go up to look for the uppermost possible plane you know even apically so here you see
- here again we can cut to detach the sphincter from the apex of the prostate but very fast once we have done that space we have to try to go back and look for the good plane so we can remove the adenoma entirely also in the apical level right so it's a matter of uh again checking what you're doing seeing if the plane is satisfactory following the line but here anteriorly going up up up until you get to the proper plane and this way you won't leave any more anterior tissue this is exactly what we want to remove in this patient here you can see that this pulse modulation provides excellent excellent cutting properties excellent dissection properties an excellent hemostasis as you go so first pass hemostasis is really good
- so you can only focus on the dissection and what i'm talking about you know the quality of of the plane that tells you if you have to go a little bit deeper or if you have to go closer to the adenoma because you're deepening in the capsule at some stage we will see a very thin capsule area here for example you see you don't want to follow that path so i make a mental note of that and continue with the operation but when i go back there i will have to correct the plane right so it's important to to advance in the operation do you know every moment you want to do something that is going to make things better and one thing that you have to understand is that as you release the abnorma from the capsule in more places
- more circumferentially it becomes more mobile there's freedom there's mobility there's better access you know so don't get stuck in one place go around the adenoma because as you gain mobility as you gain access things are going to get better and easier and you know that's why i think this technique is so fast and so nice because it moves around you have one line of attack which gives you the general idea of where is the the capsule and the separation with the capsule with the adenoma but of course you have to tailor the aiming of the beam you know you have to aim at certain moments right at the line of attack in other moments you might decide to fire a little bit outside of the line of attack
- and sometimes inside mostly i would say that first half of the operation you have to fire against the line or a little bit outside and as you continue with the having to adapt to the curvature of the enoma as it um for example here goes down you see the plane now it's not straight anymore it has to go down so you have to point your fiber downwards if you want to get to the bladder neck so you have to be very vigilant see the tissue information that you get as you dissect if it looks as if you are too deep in the capsule then you have to correct and get closer to the adenoma and the opposite so this is the only of course you have to control the distance of the fiber with the tissue to get the desired effect
- and also you can control the speed of movement so the displacement from one side to the other or up up or down you know you have to tailor how you're going to use the energy so you know when people ask me about settings what settings you have it seems like like the laser is going to do the job it's not true the laser is going to emit some energy but you have to adapt to the settings you're choosing so that they do what you want so of course some people prefer some settings but the same settings of the laser with different strategies of manipulation of the fiber can probably give different tissue effects all right so it's not the setting only it's the surgeon who is going to decide what to do here
- you can see that occasionally my fiber touches the tissue and this is because this is a very fibrous prostate it was operated before some processes of fibrosis sometimes a little bit hard tissue you know so sometimes the no touch doesn't cut it you know and you have to do a little bit of contact of course always judging where do i want to go what is my plane on how i'm i'm going to fire the the laser so that i get the desired effect knowing what i know and what i keep learning every minute about the geometry of this particular prostate so here you see how the fiber gets closer to the adenoma to try to avoid in here for example we want to correct the plane we don't want to continue down there because that
- would cause a perforation but you see as the movement of the fiber is quite fast we never penetrate too much in the capsule so it's difficult to to to go deep so the moment we see that we are getting a little bit deep then we correct the plane and here you can see how the fiber stays up very close to the adenoma and the position of the fiber is corrected with every excursion of the fiber you see here i'm going at this level as i go to the other side i go up a little bit so constantly adapting to get the effect that you want i think it's a very very demonstrative case of the how the unblock technique with early apical liberation works really well for these redo cases uh it also works extremely well for the
- virgin cases that never had an operation before but um in these redo cases that sometimes have very awkward prosthetic fossas and sinekias and so on you know you don't even need to go in the bladder first you can perfectly start at the apex and then you will enter the bladder and watch bladder and do what you want here the laces stopped briefly we were operating in one of the operating theaters that is quite small it was very hot in the operating room and i think the laser overheated for for a moment so we stopped for a moment and let it uh cool down a little bit and then we continued i think this and block technique is very demanding for the laser because we are firing constantly you know there's very
- little pausing time most of the time we are lazing and operating of course you have to take your time to see the anatomy to decide what's coming next but most of the time i would say we are lazing almost continuously and that must be demanding for the laser i have to say that most lasers i use uh can't stop sometimes so [Music] i haven't found a laser that doesn't ever stops you know sometimes you have this brief pausing time and then you continue with your work so there we are uh finalizing the posterior aspect connecting it with the lateral aspect see following this technique that i was mentioning before where the fiber gets very close to the adenoma and as you as you progress you get closer you see one excursion to the left
- now the fiber goes up a little bit and then to the right and then the fiber goes up a little bit more and then to the left again you know that's the dynamic of the dissection of the posterior plane the yellow tissue could be enormous so that's why i was considering what to do but sometimes it was just too little tissue it's already coagulated probably it will fall off and come out with urine as it is a necrotic little uh piece of tissue very little if it was a nodule we would go for it and try to take it out no matter the cost or no matter how thin the capsule gets at the end but if it's a minor millimetric yellow thing that is all coagulated maybe i wouldn't care about it so here we are coming under the adenoma
- that's a vaporization of a yellow little piece you see so we don't when you leave a little piece of yellow tissue you might as well stop for a moment and coagulate that's the six o'clock bladder there is uh this attachment here you see so as you progress with the operation you start understanding the the shape of the prostate a little bit better then it's a matter to use the tool you have at hand to get the the effect that you want the bladder neck in operated patients it's usually very very fibrous very stiff and sometimes it might be a little bit more difficult to cut it it's very important to learn to position yourself properly with your camera so that the line of attack is always in the middle of the screen
- and you can see at normal in one side and capsule on the other side this this is what helps you judge if the plane is correct or not and what you have to do next here see we had a little bit of difficulty accessing that part here it's not good enough so position yourself properly try to recognize the tissue where you are in what position and what is the direction of the dissection and then of course continue continue you see adjust to the curve so in your mind you know the shape of a prostate the shape of the curve and you can with all that information in your head you can progress in the operation using the tool safely judging the tissue constantly so i would say it's a meditative state you enter when you start
- operating with holmium because your mind is and your cerebellum is are working you know in in conjunction to to help you carry out a task understanding and integrating a lot of information that you get from the tissue that you get from your hands that you get from from the image to try to to complete the operation that's cutting attachments to the bladder neck you see it's a very tough very fibrous bladder neck so it takes a little while to cut i have to say with pulse modulation cutting of wholemium has been enhanced so much that it is now much faster much more satisfactory than it was before so i would really recommend if you're going to start holleb to get one of the pulse modulated lasers
- because you don't worry about hemostasis so much you just worry about anatomy and finding the right plane and it becomes a very simple very simple operation and i am convinced that you have better chances to learn you have a pulse modulated laser than if you have a conventional holmium so here we are that is now checking for the uo there it is and there it is okay so the case is nearly finished i hope you are convinced like i am that uh an unblock approach works really well for redo cases we have published a number of them already in the in the youtube channel and they're always interesting i love these cases this is probably my favorite case because they're always challenging and i always marvel
- at how much more tissue we can take out after the previous surgery here we are changing the systoscope for the nephroscope so we can start with a more solution i cannot insist enough in how important it is to have a trained team that can help you properly so you can be fast with the changes now in this change for example we changed the systoscope for the nephroscope but the most later had to be ready and handed to me at the right moment the pedal that i was using for the laser had to be changed for the pedal that manipulates them oscillator so you see the teamwork is is paramount in this case here you can see it's a fibrous prostate it's a little bit difficult to chew by the by the blades and again here the methodology is always
- the same the adnorma stays on top the blade is in the middle of the image in the lower part of the image and on both sides we can see a triangular shape that is looking mostly black if it looks pink it means that we are getting too close to the bladder so that is my uh safety uh tip you know keep the most litter a little bit inside the bladder don't be afraid to push it in two or three centimeters because uh if you keep the morse later too close to the to the lens then the tissue won't let you see these little triangles on the sides of the blade that tell you how far you are from the bladder wall so more solution took place quite fast this most later can take 10 even 20 grams per minute sometimes
- and on average in our hands it's about 11 grams per minute so this was a fast fast motilation patient had the catheter removed the next morning and went home without any trouble and i hope you enjoyed this video from the channel i'm getting very good feedback from many urologists around the world enjoy this operations and tell me that they learn a lot and i'm very glad to share this and keep sharing this thank you very much for your attention you