
Surgery
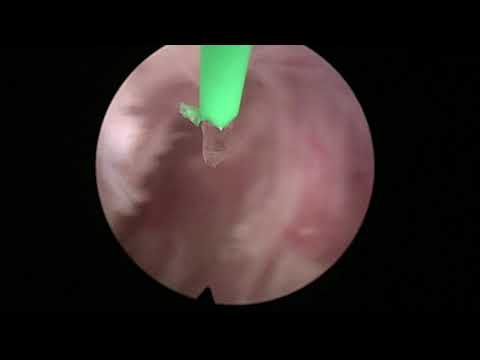
Real-life En Bloc MoLEP (MOSES 2.0 HoLEP) case 30: big gland
Dr. Fernando Gómez Sancha · ICUA
Dr. Fernando Gómez Sancha · YouTube
Language: English. YouTube audio metadata.
Surgical content for professionals. Contains footage of an operation.
Playback connects to YouTube. Your search query is not sent to the player.
About this video
Case 30 of the Real Life series: en-bloc MoLEP using MOSES 2.0, in a gland described as large in the title. The author identifies this as an unedited, full-length recording and uses it to discuss the procedure step by step. No numerical gland size is supplied in the written description.
Documented details and sources
Only details explicitly stated in the sources. Missing information does not mean it did not occur.
- En bloc
Real-life En Bloc MoLEP (MOSES 2.0 HoLEP) case 30: big gland
- MOSES / MoLEP
Real-life En Bloc MoLEP (MOSES 2.0 HoLEP) case 30: big gland
Source checked: 2026-10-06.
Available transcript · English
Automatic YouTube captions, not clinically reviewed. Names, technical terms and numbers may contain errors.
Selected spellings of enucleation, morcellation and holmium terms have been edited. This is not a full audio or clinical review; the original captions remain the source.
They may contain transcription or translation errors; check the explanation in the video.
- hello this is fernando mesancha this is another real life haul case showing an unblock technique and i will try to explain again the the the the subtleties of this uh technique and i hope you can pick up some tricks this man had a relatively large prostate i don't remember the exact size but uh i decided that entering the bladder was going to cause a lot of traction in the sphincter because it was a big middle lobe and so i chose to start by by doing the apical release from the beginning without forcing the entry often when you try to force the entry you will cause a 12 o'clock split in the urethra and that's a bad start for a procedure that wants to preserve continents as the primary concern
- here is the the limitation of the sphincter from the apex i found there was a little bit of mucosal up there causal fold so i decided to [Music] to cut it as well i didn't think that was sphyntheric and here i'm cutting these fibers that you find at four o'clock something like that when you deepen a little bit there you know that if you do a little bit of lateral movement of the scope while you dissect this plane uh you know that that won't hurt the sphincter because you already detached it at that level so of course i don't push laterally too hard i don't want to go and damage the sphincter laterally so here again i'm doing the same cutting this fibers at four o'clock in this case it would be seven eight o'clock
- and then of course if you go to the floor of the side of the montanum and usually you can find your way towards the proper plane the real plane between the norma and capsule sometimes there is some doubt and then you can do a little bit of mechanical push like that to find the proper plane to make sure that you are in the right plane okay so here in this this operation the idea is that you're going to try a lot of things oh this is interesting this is some material coming out of a small abscess i think which is quite common in bph patients um but as i was saying many times we're going to try things we you know you don't naturally know where the plane is there's no signs to tell you where's the proper plane but of course
- we will try sometimes to challenge the plane we are using so that sometimes we will check if if there is a plane deeper than where we are and sometimes we will have to correct but the idea is if you do that without forcing too much without risking too much then it becomes a safe safe thing not all the prostates show you a beautiful plane uh sometimes it's inflammatory in this case we saw some pus coming out of of of a cavity and um so often the plane is inflammatory this is okay this is the best uh kind of plane you can you can find i think although you sometimes find it in certain areas and not in other areas okay so this was the development of the posterior plane i'm checking here if there's
- any bleeder because i thought [Music] it could be some bleeding going on some bleeder going on that i could probably stop but often it is the mucosa that bleeds and i don't bother there here you can see the contour of the sphincter and i put the fiber at 12 o'clock to try to do the early apricon release so initially the prostate is quite fixed to the capsule so there's very little mobility there's very little space to get where you want to get and of course we don't want to force this sphincter it's just like trying to remove this tissue detach it from the capsule through a keyhole uh you know through a little hole a little diameter so it's very important to mobilize the adnoma strategically
- so that we can liberate the apex without damaging the center without stretching the sphincter too much so here what i'm doing is to liberate the posterior apex so instead of trying to all the way up i initially release the posterior apical tissue here from the capsule because you see this was attached to this here but now it's open so we have a little bit better access so what i'm doing is i'm following a a series of steps i'm following a strategy here you see i'm i'm seeing that we have to cut a little bit horizontally here initially and i don't mind doing that because that will try to keep the battlefield a little bit inside a little bit proximal and further and further far away from the sphincter of course
- cutting horizontally means that we open a little bit of access to get more and more anterior each time but it doesn't necessarily mean that we're going to leave adenoma in place so i'm just cutting uh initially this this direction is vertical almost and then when you get close to the where the sphincter is you go more horizontal like that you see that's a change direction trying to follow the plane here 12 o'clock sometimes there's fibrous tissue that needs to be cut similar to what we found when we cut the frenulum of the very montanum to connect the posterior plane here as you can see there is a progressive approach to the anterior part and also very very careful all right so don't uh despair you know be patient
- make uh progressive uh improvements in the situation so that things get easier and easier we will liberate the attachments of the sphincter with the apical tissue and then we will try to go all the way up to remove the adenoma at the apex i don't want to leave anything there i don't think it's necessary and i think it might compromise uh the future of the patient if you leave anterior rapical tissue so here again i'm cutting on the adenoma a little bit because when i deepen this white line in that direction cutting into the anoma i gain some access i got some of the fibers that are sticking together the adenoma and the apex and then of course i try to go all the way to the capsule to find what is the proper plane so most
- of these incisions are going to be removed when we enucleate the adenoma and here i'm doing as i did in the other side trying to mobilize a little bit the apex posteriorly so this dissection would go probably from you know from the six o'clock that we had already done towards three o'clock in this side towards nine o'clock and then of course you have to go distal to check you don't want to continue dissecting upwards there because if you do that you're going to stretch the sphincter you're going to you know catch the mucosa there just at that level so here i'm going to continue trying to follow the path i marked with the white line and very carefully very carefully i don't mind cutting a little bit on the normal at the
- beginning because that's will give me access and then i will look for the proper plan here i usually look at the fibers of the capsule on the external aspect the lateral aspect the right side of the screen to try to understand the direction of these fibers and that's going to show me the direction of the plane but again i return backwards you know i withdraw the scope a little bit to be able to see what's happening at the apex i don't want to continue the dissection of the plane if i'm going to be stretching these fibers that i'm cutting now so cut horizontally below the sphincter it is more vertical and this way we're going to work our way to connect the two ascending dissection lines at 12 o'clock so here
- you see it's very very careful slowly slowly if you have trouble and you end up cutting horizontally a little bit into the adenoma and then of course you connect with the other side you can always check at the end the apex and remove the tissue of the apex but our most important consideration i think it's to try to prevent early stress incontinence that we used to see before when we did a classical dissection as described originally with this three lop technique where one would dissect the plane without looking without care i think for the sphinctest mukusa of course you will open the plane but you will probably rip off you will cut the attachments and here we're starting to see the light you see that ascending from one of the
- lines and looking at the apical part we can connect to the other side so let's do it carefully and progressively trying to make sure that we don't leave as i said tissue anteriorly so this would be a better plane but i'm not taking it towards the midline until i'm sure that the distal fibers have been cut so here i can get closer and closer towards 12 o'clock of course being very careful and making sure that at some stage we will go back to check if there is any other fiber to cut but you have to work on your dissection lines we want to have a good line that we can recognize we don't have to we don't want to have four or five that was the instrument that was dislodged for a moment as i say you see here i'm trying to work
- to construct a line of dissection that will connect the anterior plane with the lateral plane trying to follow all the way up but of course you will see how i don't continue forcing the 12 o'clock region of course i will see go back and check go back and check check if there's any tissue up there and before i continue the dissection at that level towards 12 o'clock i'll go out to check you see there's another nodule here of course we want to remove all the nodules not no matter how close they are to the sphincter you don't want to leave a nodule there you might want to leave it for the end you know if if you consider that you're taking a risk or you're not comfortable in doing this dissection at the apical
- level but here you see i'm trying to construct this anterior line of dissection trying to liberate all the anonymous tissue and again carefully check if there are some fibers that might be attached to the sphincter there of course if we are in the white region we know that we are not in the mukusa because it's very close there you saw the contour of of the sphincter we're working a little bit close to that region but um with a lot of gear of course when we use the pulse modulated lasers like this is the luminous 120 watt moses laser at settings of 2 joules and 50 hertz and we have the advantage that cutting is enhanced so very useful to cut this fibrous 12 o'clock attachment and of course coagulation is enhanced
- which means that we can concentrate mostly on the dissection and the strategy and we don't have to concentrate so much on keeping a good hemostasis so that's the moment i think when the connection is done now the sphincter or the ap calibration has been completed now i had to work to try to build a uniform line of dissection anteriorly to improve the connection and make sure that no tissue is left behind at that level there we are again checking very slowly there's no rush and i tell you it's been for this patient 15 minutes to dissect the apical tissue but then the procedure is going to move very fast afterwards so spend your time take your time construct a nice anterior line and then make sure that it connects with
- the lateral line and that the lateral lines connect to the posterior line so you have a circumferential line that you can follow here with the wonderful also modulated more specific laser here we are progressing now very fast because the dissection effect is going to come with very good first pass hemostasis that will allow us to move very fast of course we're going to find some individual vessel at some stage in the operation sometimes more sometimes less this is trying to connect the lines you see trying to make sure that we don't go very deep and clearly we forget about the lateral and the posterior and we want to progress uniformly from the apex towards the bladder neck of course as i said at the beginning
- we have to try if you find that your plane is going too deep then you will have to correct and then you have to adjust your targeting and instead of firing where you are firing you will have to fire a little bit more medial if uh on the other hand we find that it seems that we have left some tissue attached to the capsule then we have to go back we have to take it out dig it out all right so this is now approaching uh the 12 vocal lock region there are many vessels here so i'll spend a little bit of time trying to control them you don't see the vessel very well because of the blood you can try to get to the area and do the helicopter the helicopter is a rotational movement of the tip of the fiber
- to see if you can stop the bleeder at some stage or you can try to separate a little bit from the bleeding so that you can see where it is most often it's not about the ability of the laser to coagulate the vessel but your ability to see where the vessel is bleeding and how to target the laser to to coagulate it in extreme cases if it gets very difficult you have to put a resectoscope inside and often with a loop you can control these vessels i i do it sometimes so it's not a sin it's not a problem either you have to have the resect scope in the table on the table ready in case you need it still a useful instrument and there for example i saw a little bit deep plane so i'm correcting the important aspect is that you
- manipulate your fiber and your instrument in a way that everything you do is safe you know you don't go too deep you don't stick the fiber against the tissue so that it could deepen too much sometimes i do a little bit of contact but what i'm trying to say is if you are relatively careful if you use the energy carefully and you gain some confidence you can then progress and do hollap in a very safe way here you can see the excellent double effect of dissecting the plane here for example we found two slightly different depths of dissection when this happens just have to connect both depths and there's no big deal huh don't get confused don't get stressed it's just a little technical uh correction that you have to do
- as i was saying this here you can see how you can dissect the plane and at the same time you get the benefit of very nice first pass hemostasis you can see how the tissue gets white in contact with the energy so you dissect and coagulate at the same time it's it's a wonderful feature that allows us to work really really fast so we can do large glance in a relatively short time relative time and with the benefit of a very very minimal blood loss and difficulty seeing well during the procedure is a it's a great thing that's the entry in the bladder at 12 o'clock there you can see how now the dissection progresses towards the side it's very nice to have this this beautiful landmark of the line of dissection that tells you
- where you are working and of course you have to be able to anticipate the circumferential anatomy of the prostate so here in the last part of the operation typically the fiber has to get closer to the adenoma so you could instead of firing at the the line of dissection most of the times you're going to target the laser a little bit closer to the adenoma and that's because if you do that then most of the energy is going to be absorbed by the adenoma there will be very little energy going to the capsule maybe just to coagulate but not to cut or deepen you know in an area where the capsule might be relatively thin so this is uh now reaching the bladder neck laterally working calmly you know working
- systematically you see that most of the time the pedal is activated so there is some dissection going on and even when i'm not doing anything really crazy or really fast the operation is progressing very nicely it's now 21 minutes into the operation you see that we are approaching the bladder neck posteriorly so we are nearing a completion of the procedure so it uh now we enter the bladder you see so we didn't enter the bladder at the beginning and this is the posterior line and notice how the fiber is staying anteriorly staying close to the adenoma i don't want to cut there i want to cut up there right because that will disrupt the fibers that are fixing the normal to the capsule without penetrating in the capsule
- you have to be careful uh concentrate not only on the targeting but also on the distance where uh the what distance you have to keep from the tip of the fiber to the tissue to get the desired effect of dissecting the plane and getting proper hemostasis without penetrating in the capsule you see this is all a progressive effort to liberate more and more the adenoma to gain the mobility you need in a in order to reach certain areas here we're progressing laterally and approaching the bladder neck area my fiber is keeping up keeping up keeping in an perennial position very close to the anoma most of the times the presence of the scope below the adnoma is putting some tension i'm not doing any pressure just
- i just want to see the line dissection in the middle of the screen so when i position that's checking for the uo so when i'm positioning my excuse me my scope to watch the line here i'm protecting the uo just making sure that the incision and the level of dissection is a little bit medial so we don't go back to the uo and we we don't damage it and here again the the fiber is keeping very close to the adenoma very very close as i was saying the presence of the scope sometimes is generating some tension in the tissue and there is some temp tenting effect you know the you're pulling when you when you when you push the normal upwards you're pulling fibers of the capsule and then if you cut there
- you're going to cut it cut the capsule so what you want to do is to keep the fiber to target very close to the anomala so you don't deepen even often we have to correct when you see that the plane is a little bit thin so you have to correct keep firing upwards you see it will look as if some tissue is staying but it's usually not a normal tissue it's just capsular tissue that you're leaving behind and this is a very very careful again liberation of the posterior aspect to try to approach the bladder neck usually this plane changes direction very fast so you are dissecting a horizontal plane and then suddenly it becomes almost like a right angle it becomes very vertical as you approach the bladder neck posteriorly so
- you have to be careful and fire always inside or medial or in the side of the adenoma and when you target the the line of dissection of course this is an adjustment that you have to do every second so every second of the operation you're wondering where do i fire and you have to be careful that way that's the other uo so i'm trying to mark and cut a little bit medially so that we get away from it there's some middle lobe so often the middle up sits on the trigon i could be get very close to the to where the uos are so here again now i'm trying to push you see that loop the left lobe of the patient a little bit into the bladder and that gives me better access in this side that's a great trick
- i'm not trying to push the whole anomaly because there's still a lot of attachments and often if you force the adenoma into the bladder if you want to flip it into the bladder and you push it very hard you might disrupt the capsule here you can sometimes open the capsule if you push too hard when the adnoma hasn't been detached nearly completely from the from that region so just a little push will open the space for you to enter and then again always try to correct if you think that you're going a little bit deep keep the fiber close to the adenoma to avoid deepening the plane then if you think that the six o'clock attachment is small enough so that if we push the anoma into the bladder it won't
- break anything then you can try to to work your your flipping of the anoma here and if it doesn't flip keep don't stop don't don't continue pushing i just check that there is no other attachment that it's limiting the mobility usually the free adenoma should go into the bladder quite easily so if it doesn't you know you have to wonder why and check it's almost completely gone but there's some attachment deep there you see that's why it doesn't want to go in the bladder so one of the nice things of having good hemostasis is that you can see what you're doing and then of course you can continue with the liberation here i'm trying to be strategic targeting the tissues so i can lift the anomaly and i can detach the
- middle lobe completely while being after the uos and complete the nucleation in this case it's been now almost 29 minutes so in half an hour we finish the dissection of this relatively large prostate and then of course we will secure the hemostasis so that we can do a nice more solution see nowadays most of these operations take under one hour there you can see there is some retrotrigonal growth of of this adenomas so sometimes the change in the plane direction when you're doing the posterior is not 90 degrees it's it's probably less meaning that you not only have to go upwards but also sometimes it's it's a very tricky dissection so here again bladder neck the mucosa can bleed sometimes significantly
- i don't really worry too much about uh that site this is a sphincter area a little bit you know we can see a small 12 o'clock split in the mucosa but it's a very good preservation of the mucosa circumferentially so the patient was perfectly continent the following day when we removed the catheter and he went home again if you in this phase i call it the trimming and coagulation phase if you see that there is some tissue that looks at notice to you you can go in and check often it's not a big deal but it's incredible how when you see this big cavity you think that a small nodule is not going to matter but these cavities collapse over time and they become rather small cavities and maybe a nodule that is not looking
- obstructive uh in this in this moment could look obstructive or could be obstructive later on with this where the capsule when the capsule collapses and gets smaller so i like to be as thorough as possible and of course i don't worry for a millimetric uh little bit of tissue that is hanging there but i i want to check sometimes see there's no harm in going back and checking if you might have left some nodule to to make sure that you do a good job and of course we check the hemostasis uh because it's really very nice when you can get a clear urine postoperatively patients are very happy and everybody's happy so take your time that's again the sphincter looks pretty good and once you see that there is clear
- visibility and you check that there are no bleeders some people turn off the irrigation to see if there's any bleeder because you reduce the pressure in the in the fossa and then maybe you will see more bleeders than unusual so that's all i think correct it's something that sometimes i do not every time but when i'm happy with with the hemistasis then i proceed to do more selection see that the setting changes if you use the the same setting for hemostasis you have to be very careful to keep a distance that will not disrupt the plane i have another setting in the second pedal and that is i think one joule and 35 40 hertz it's a much softer the position of energy that is not aggressive so if you're
- firing on a on a plane that is already gone a little bit deep you don't want to use a lot of blasting energy there that might open the capsule a little a little bit more but you want to use a soft form of energy like this you see that doesn't complicate things i think that this disruptive nature you know the explosive nature of hollop might sometimes break the vessels without coagulating them right away and then of course these vessels initially do not bleed because there is some form of spasm in the vessel and then when you go back after some minutes you see that the vessel has started bleeding so that's why you have to check and recheck uh although with pulse modulation and moses we have really really
- improved hemostasis and this hemostasis time has been reduced in a big in a big way you know that with moses there's some groups now doing ambulatory surgery so the recommendation is to do the nucleation do the hemostasis do the morcellation and then go back inside with the laser to complete the hemostasis so this is all something i almost never do but if i if i had to do a military surgery we cannot do a military because our patients are operated in the evening that was the deeper region there you see it's no problem if if you correct of course if you follow that plane that way to the outside uh of of the capsule then of course there will be trouble but you see when you go a little bit deep
- you just correct your plane you don't let it go get worse in this patient we removed the catheter the next morning there's no need to keep the catheter for several days i think they are so de-obstructed after hollap that the urine preferentially goes out and rather than going anywhere else of course there's a big preparation might be trouble but this uh small areas of uh thinning of the capsule are of no consequence clinical consequence at least so that's the mucosa of of the bladder sometimes at the edge there are some bleeders and you don't easily see them unless you look for them so this is what i am typically looking for at the end before more selection okay so this is five minutes of hemostasis time
- we are now changing the instrument to be able to start with the more solution phase it's important to to have a good team that can help you in the operating room that allow you to do a fast change of instruments change the camera prepare them oscillation it's important to have the most later ready i think when the operation is starting so you don't want to come to this moment and have to wait to set it up and that is the most selection position we have discussed this many times you have to keep the blade a little bit inside so that you can see the gnome anteriorly the blade in the middle of the image posteriorly and then two black triangles natural to the to the blade that will tell you that you are far away
- from from the bladder if these black triangles get pink then you know that you're getting close to the bladder and might be a risk for an accident here i'm not using a second irrigation line i know that everybody recommends it and many many many surgeons use it i try to be very conscious of balance between entry in the bladder and and outflow so with this equipment when i see that the most solution is working well you see that the you don't see very much the opening in the morse later blade tip and the fact that suction is keeping the tissue close to that opening makes sure that there's not so much water coming out so i can trust in in my experience that the bladder is still full there's not much water coming out
- if morcellation is inefficient and you start seeing the blade the mouth off of the blade more often and you keep sucking sucking sucking water out of course the bladder can't collapse and then there might be a risk for the bladder so if more selection is not efficient i try to stop refill the bladder palpate suprapubically that the bladder is full before i continue see sometimes the anomalous have very very hard nodules inside very hard fibromas that are difficult to mercileate the morse later will will chew preferentially the soft tissue and at the end of mars lesion you're left with these beach balls that are very very difficult to chew not everybody has them as they these also sometimes the more slater is
- working in optimal condition with very good vacuum very good suction and the blade is sharp and you can morcelate even the tough pieces but some other times for some reason it becomes very difficult and then you have to go in with a receptoscope maybe and cut these nodules into smaller pieces or if if it's a big nodule sometimes you can make cuts in the surface and when you go in with more slater again then it's easier to musculate but often i i use the receptor scope when i find these these nodules this morcellation is going well it takes a little bit of time because the amount of tissue is significant and of course more slating a big anoma takes longer but with this piranha system we are measuring
- usually about an average of 10 or 11 grams per per minute unless you know when more installation is very inefficient but this is a good case i think you see it's a very static more solution you don't move from the safety position where you are working and as long as the morcellation is happening and everything is good you don't need to change your strategy too much often i i try to reduce the the normative tissue into a smaller piece and then i try to to to suck it and bring it into the fossa because if you do that then the adnoma is going to be still mobile it will move from side to side which is what you want but it would be clashing a little bit with the walls of the fossa or the walls of the bladder neck like it
- i think it's happening now a little bit and then it doesn't go away too far often when when you swallow the tissue when they when the the blade has to swallow the tissue is cutting there might be a blockage and if there is a blockage then there's no vacuum there's no aspiration in the tip of the blade and then the there's that this engage disengagement of the adenoma the anoma floats away and if you are in the bladder that can happen when marshellation is inefficient that can happen more often and if you are in the fosa when the piece has been reduced significantly uh then that can happen but the noma doesn't go very far and then the suction will catch it again so that more solution is a little bit more
- efficient so with each more solution and every surgeon has different tips and tricks i think it's uh preferable to have these black triangles on the side of the of the blades than only seeing i mean if you if you if you keep the tip of the most later very close to the lens then you will only see white tissue and you lose awareness of where you are in relation to the bladder of the or the bladder neck or the prostatic fossa there we are the promotation is progressing really well it's now 42 minutes in the operation so it must have been a big big prostate sometimes we wait the tissue as we finish the procedure but often we're just working working you know and we have to move to the next patient and
- we don't have a lot of time for for these things outside the study or or something like that often the pathologist tells us how much the tissue waited when he received it after fixation with formalin but we record many videos and often i forget who is the patient we operated and we we you know it's difficult to know the exact size to see in big big biggish glands like this probably by the way it looks it's probably probably more than 100 grams of adenoma [Music] well you have to be patient and relaxed waiting to complete more selection you have to be very present in the moment you know in the operation uh don't lose concentration because everything has gone very well but things could change very fast if you're not
- careful and it's important that your team is also involved i tell my nurses you know if i forget to open the inflow or you know maybe the bladder is full enough i don't open the inflow i start most lesion you know you have to check that i have opened the inflow because if you do that then you're a super nurse and when i do this mistake you will save the day you know because we are doomed to to to make mistakes at some stage you know working in this long list and it's important to to build a safe environment where you can work and both the nurse that is scribe scrapped by you and helping you and the circulating nurse and the anesthetist and everybody understands the procedure and can help you uh participate you know
- everybody has to be present in the operating room often the attention drifts away with conversations and you know it's a routine operation and it's important that you keep your focus uh during more solution and during the whole operation actually until it finalizes uh happily huh so as the piece gets smaller the suction is more effective bringing it against the blades and it's easier to move from side to side there's less inertia inside the water and but of course some other things happen sometimes the basket gets full of tissue and the vacuum is a little bit uh less because of this with the perineum oscillator and then you have to change the the bucket of tissue and empty the water and deposit
- so sometimes we have to stop and start and wait for two or three minutes until the your team can can do the change and in that case i don't leave the water open i i close it i want to over distend the bladder sometimes i wait until it fills completely again i feel it with my hand on the on the pubis and this is a little bit of a blockage you see that the suction didn't didn't work you see it's not sucking tissue so we press the button that releases the the vacuum a little bit on the on the machine uh but you see yeah the more solution is not so efficient anymore so i think i told my my team to to change the basket of tissue which was quite full at the time although it seems that some of the pieces
- want to be more slated so be careful when this happens because you can suck too much water out and then the bladder will collapse so i think i just told them please change the the instruments and you'll see that after the change oscillation efficiency will will come back will return to normal hemostasis is holding and visibility is holding i always say that there is a window of opportunity for marcellation if you keep the bladder distended for enough time and if you distend the fossa there will be some blood accumulation and the visibility will will drop and maybe you have to go back to do hemistasis again before continuing which is a great loss of time there we are so everything was changed
- and look at the renewed efficiency of marcellation i like to keep the the blade often just above the bladder neck it's a very safe position here you see how if you have the piece or the the blade too close to the lens then you have very little information of what where you are of course i am quite immobile i fix the the the blade in that position but i don't enjoy more slating like this for a long time you know you don't you should see a little bit that's why i moved a little bit away of course with experience you can you know tolerate some of this but uh for for people who are beginning i think you should stress the safety measures um i know where i am i'm probably one or two centimeters above the bladder
- neck away from the bladder but as i said in your case when you're learning if you're learning maybe you're already very experienced and you can do a very safe more solution without without so much care so much attention to safety details but in general uh well every surgeon has to has to know what is his experience and what are the what is the level of risk he can take safely let's say let's put it that way we shouldn't take any risks but the truth is when you operate a lot sometimes you do take a little bit of risk and this is the end of the procedure i hope you enjoyed it this was 49 50 minutes for a quite large prostate i cannot tell you how how large i hope you enjoyed the dissection of the
- apex and the dissection of the bladder neck area and how this looks in the real life see you around and i think the video is finishing