
Surgery
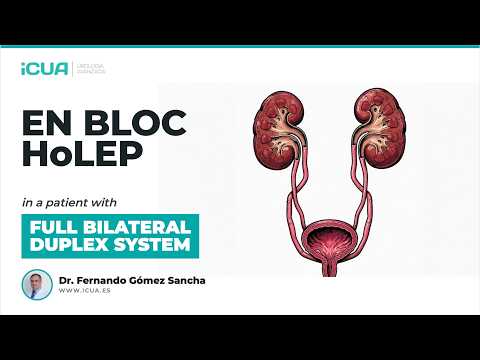
En Bloc HoLEP With 4 Ureters — Complete Bilateral Duplex System
Dr. Fernando Gómez Sancha · ICUA
Dr. Fernando Gómez Sancha · YouTube
Language: English. YouTube audio metadata.
Surgical content for professionals. Contains footage of an operation.
Playback connects to YouTube. Your search query is not sent to the player.
About this video
An en-bloc HoLEP in a patient with a complete bilateral duplex collecting system: four ureters and four separate ureteral orifices. The description reports that all four orifices were identified and preserved during enucleation and morcellation. The teaching focus is anatomical orientation and protection of the orifices while maintaining the en-bloc approach with early apical release.
The anatomical variant
The description explains that each kidney drained through two separate ureters, producing four independent orifices at the trigone. The operative account concentrates on identifying those orifices and keeping them protected during enucleation and morcellation.
Documented details and sources
Only details explicitly stated in the sources. Missing information does not mean it did not occur.
- En bloc
En Bloc HoLEP With 4 Ureters — Complete Bilateral Duplex System
- Early apical release
ne the surgeon must respect during enucleation. The en bloc approach with early apical release was ideal here. Developing a single continuous plane from the apex and lifting the adenoma as one unit keeps the dissection oriented and the bladder neck under
- Ureteral duplication
En Bloc HoLEP With 4 Ureters — Complete Bilateral Duplex System
Source checked: 2026-10-06.
Available transcript · English
Automatic YouTube captions, not clinically reviewed. Names, technical terms and numbers may contain errors. Check them against the video; complete audio coverage has not been verified.
Selected spellings of enucleation, morcellation and holmium terms have been edited. This is not a full audio or clinical review; the original captions remain the source.
They may contain transcription or translation errors; check the explanation in the video.
- Hello, this is Fernando Messa and I'm going to show you a full bilateral duplex system in this patient who had four ureric corifaces. Here you can see the second one [sighs] and this is uh now the third orifice and the fourth. Um, so this is quite unfrequent, but um I think you need to be aware that sometimes we're going to find a duplex system that has two uh orififices. So keep it in mind because you might find um you might find this case and you need to be careful with the distinction and of course protection of all these
- orififices. I thought it was a nice case to show and uh otherwise it was quite um uneventful and here you can see this is the demarcation again of the white line and let's go through the procedure again trying to mark the 12:00 uh properly and um now the procedure starts by entering the plane in the paracolicular space. You see, letting the energy find uh a reasonable plane and estimating how how deep we go. Although I don't pay too much attention to the the quality of the of the plane
- at this at this stage. In this case, we entered a nice paracolicular space. As you see there, I always go to the floor of the verontmentum to to try to find the the plane. If the prostate is not so big, like in this case, I don't remember exactly, it probably was like 50 g or something, [snorts] the entry is quite horizontal. If the prostate is is much bigger then probably I would try to go a little bit more vertical when I enter you know at the at the floor of the verontanum. So here again we are developing this space more or less trying to see where we're going and now this is the connection cutting the frenum on top of of the veru and trying
- to start the the limitation of the um posterior line of dissection. Remember I always think about the prostate as a little box where we're going to dissect four planes. the posterior plane, the lateral plane in each side and then the anterior plane. So there's always a plane and there's always a line of dissection. So the plane is what we are developing and the line of dissection is is what I'm centering in the middle of the screen so that I can see a little bit of the capsule and the adenoma as we progress. Notice how I do very long movements. I don't try to do back and forth or side to side very short movements. Because when you do longer movements, you get a more uh regular line. And we want to progress
- regularly with a very wide front of dissection rather than um trying to deepen in one area and then having a a a very regular line as a result. So here this is the development of the posterior plane. If we see these yellow elements, you see this that looks like adnoma. I don't mind exploring a little bit deeper to see if that's an ole. So very carefully you can uh progress and try to understand the plane. You know that the disadvantage of this uh pulse modulations that give you excellent first passimostasis is that probably we lose a little bit the sight of the beautiful plane that we can see. for example when we do mechanical dissection.
- So this is the progress. I never force uh I never try to go too far, you know, never try to reach the bladder and neck or anything like that. Uh because the the prostate the the anoma is fixed to the to the sphincter um still and you see we try to go under prostate lifted up there's still a lot of tissue attached on the sides here you see. So instead of progressing towards the bladder neck when I notice that there is some resistance or the plane is getting thinner and thinner I then try to go to the apex to try to start the apical liberation. I think all the all that we do posterly doesn't force the sphincter much. Uh but the the the difficulty with the sphincter or the the stress to the
- sphincter might come a little bit later. Here I'm starting to develop the lateral line in this side. [snorts] Again trying to find a plane that looks capsular. Um usually smooth fibrous mostly white and of course uh not perforated this is the definition also coherent with the depth of dissection that we have found posteriorly. So as you can see here I am connecting the lateral line to the posterior line. so that we can have a uniform line of dissection that informs us of of the plane. You see? But before I continue going up, I'd rather come here at the apex to try to free the sphincter from the apex a little bit more anterly. This is a very careful
- dissection of the sphincter and the apex which usually you know pays off in the sense that it reduces the chance of incontinence for the patient post-operatively to a very low very low very low rate of incontinence stress incontinence temporary stress incontinents so again when I did some liberation at the sphincter my endoscope can move a little bit more freely without uh putting tension on on on this sphincter. Probably there was someone in the operating room and I was explaining some stuff that's why I stopped because usually I try to reduce the posting time to a minimum. Okay. So here again we're trying to progress anteriorly but there is a moment uh where you start
- feeling that there is some resistance you see. So I'd rather not uh I know really I don't know what was happening there. I don't remember exactly. No, the patient was coughing maybe. Uh yeah, this this was this is one of the problems with spinal anesthesia. Sometimes patients are awake and they are coughing and I think we will see that at the end of the procedure there is a split at 12:00 in the mucosa of the sphincter which is the result of of uh the patient coughing and and probably contracting the pelvic floor against against the instrument. No. So despite your intention to do a very very careful sphincter to preservation sometimes you you face problems. No. So when you when you use spinal anesthesia especially
- when you use a lot of sedation no some patients are a little bit stressed uh you can see this man was coughing so much and if [snorts] they're sedated you cannot tell the patient to not cough or sometimes they cannot avoid coughing. So there's a little risk. So you have to be quite careful there. That's a 12:00 tissue. And what I'm doing is I'm trying to establish this um access incisions. I call them access incisions. So we cut two or three millimeters in depth uh or less maybe one or 2 mm. And that establishes some separation from the sphincter and the epical part and allows for a progressive approach towards 12:00. So again you can see that u we follow
- the line of dissection. I always I'm very careful trying to establish a line of dissection that you can easily follow. So I spend time constructing this uh lines of dissection. Okay, that's close enough to the 12:00. And here again, I'm going to deepen the white line initially to try to see if we can preserve the mucosa, keep it attached to the sphincter rather than ripping it off from from the from the sphincter fibers. And now here again the initial posterior uh line of dissection for the lateral plane I'm trying to connect always try to connect the lateral line with the posterior line you see so we have a more or less continuous uh dissection and here you see we have to get under the
- sphincter over the adenoma so it's a progressive approach and I do very very gentle force trying to go up and uh you know just gain 1 millm at a time trying to come up with my dissection and trying to of course follow the the the good plane. know so it's always exploring and uh trying to understand and uh trying to mobilize the that enoma enough that u so that I can get a good access to the to the anterior part you know I think this definition of of a nucleation where we dissect the capsule from the adenoma strategically because we know that as we develop the
- the plane the adenoma gets more mobility. So when we get good mobility of the adnoma, we get better access to where we want to get. And this 12:00 region is probably the most difficult to reach and the most critical because you're trying to bring your endoscope up, you know, pulling the sphincter anteriorly. And uh that's why I like this kind of approach where I release quite a lot laterally so that there's mobility enough so that my endoscope can can can be on top of of of the apex of the adenoma laterally and I can do a little a little pressure on on the adenoma to try to lower to try to lower the prostate position in the
- pelvis and try to minimize is the traction at the sphincter level. So this would be almost the end of the early aical release where you see we have planned a stepby-step uh liberation the ascension at the apex in both sides and um to try to make sure that the apex drops and we can get uh tension free let's see uh or or try to get a tension free access to the anterior plane. [sighs] So I'm more and more convinced that um these concepts are true and uh very interesting in the sense that if we face the steps of the operation in a clever manner to gain progressive
- mobility of the adnoma we will gain effortless access to the to the to the places we want to reach. And uh most of the times I'm holding my camera with my fingertips trying to be extremely gentle with the movements and not applying force. If you remember, you know, my old uh masters doing TRP, the manipulation of the rectocope sometimes was very aggressive. You know, they would shake it to to get rid of a piece that got uh stuck to the loop and things like that. No. And I I try to be extremely gentle with the movements of my hands. And uh despite I use some of uh some some pressure let's say against the adoma to try to for example here in the anterior plane we want to reduce the
- traction to the sphincter. So instead of having an endoscope pointing up all the time what I try to do is to exert a little pressure on the adnoma with my endoscope. You see the endoscope is sliding around the adinoma and that's that's how you find the line of dissection because you see you put a little bit of pressure against the adoma with the endoscope. It's it's a tiny tiny pressure but it's enough to make sure that the prostate moves inside the pelvis. So when you're anteriorly, it's going to go down in the pelvis and the position of the of the endoscope here at this at this moment in the operation is quite horizontal, which means that you're not doing excessive traction on the sphincter. So I think capitalizing this uh this mobility of the adinoma,
- this progressive, you know, mobilization and and also being able to use the endoscope, you know, this way. Okay. So, we slide around the the the the adenoma. It takes us to the line of dissection. And at the same time, you're trying to make sure that when you are above the adenoma, you put a little bit pressure bringing it down in the pelvis, reducing the radial forces on the on the sphincter. When we are lateral, we also try to bring the surgical field to the center. So it's very striking when you when you see the the hands that the movements that we do with the endoscope at the beginning when we're trying to do the early epical release are somewhat more extreme that that than the movements that we do when we are already
- um around this adoma and pushing it always towards the center very carefully with minimal pressure but enough to mobilize uh the prostate in the pelvis. You know that when you do a bmanual examination, you can feel how the prostate goes up and down and um I think this is one distinct advantage of block enucleation. So basically the fact that we are capitalizing the the the the whole adoma the presence of the whole anoma in the fossa to be able to displace the prostate a little bit uh inside the pelvis to the center and this way the the traction on the sphincter is going to be uh less and less. So again this is lateral line. You see I'm trying
- to understand the the line. I'm trying to draw long lines because long lines are uniform and uh when I use my energy I use the energy very gently so that it would be nearly impossible. That's the cough again. Hey you see the patient's coughing a lot. So uh sometimes these men they they have this um pulmonary conditions and they cannot avoid uh coughing. On the other hand, they're not so good candidates for general anesthetic. So [gasps] yeah, it's a balance h and uh we we have to deal no with these situations. Um we notice that if we use a little
- cushion um so that the patient is lying down of course but the the head is a little bit higher than the pelvis on the table. Sometimes we reduce a little bit this tendency to cough from the patients but it's just an observation. Here you can see we went a little bit deep. This is like a 3 mm deepening in the capsule. So that's going to give us a nice uh hint know that we have to correct of course our targeting. We have to be careful to try to develop the plane without making that initial let's say perforation go deeper. Okay. So I need to target closer to the adnoma to try to prevent making a bigger uh perforation
- after finding that. So I think this I I [snorts] always say that the small professions are allowed you know because when we are navigating a difficult plane or a plane that is not so obvious or evident we are going to cause small professions and the way to keep them small is to use the energy very gently. So finding a working distance that doesn't cut too aggressively and then of course targeting close to the anoma. We want to stay close to the anoma and of course avoiding doing a lot of uh force with the instrument because if you do a lot of force with the instrument you might even break the capsule with the instrument rather than perforating with the cap with the with the laser. So again this is uh you know our daily
- daily work daily situations where we have to negotiate the planes and uh as I mentioned before in my definition of surgical you know um plane or or the capsular plane um we have to work uh following the depth that we already found trying to adapt to um to the to the plane by carefully moving, you know, moving in a controlled manner using the energy carefully. So we get a slight amount of dissection, not too much and um of course monitoring the aspect of the capsule. You know, if you were to leave some tissue behind or when you review
- the fossa, you see that you left a chunk of tissue because you took the wrong plane, you can correct that. You can take it out later. But of course, we don't want to go deep into the into the capsule. Sometimes, especially in this region, no, when we're starting to climb up towards the bladder neck, uh the plane is nearly vertical and we are firing against the vertical plane, you know, in a perpendicular manner. So we need to be very careful to point the energy close to the to the adnoma anteriorly so that the energy will still give us separation disruption. You see and I'm not firing down there. I'm firing a little bit further up to try to keep the energy um away from the capsule and to try to develop the plane without deepening
- excessively. So there we are trying to continue with this dissection. You see it's a very slow procedure in the sense that I don't do I don't do aggressive movements or anything just very very carefully but as you can see that the time that I spend pausing yeah during the operation is very little. So this continuous work even when it's slow and um careful at the end provides a very good um surgical time because you progress uh relentlessly and you progress slowly but um this way the operation moves fast.
- So here I think we are in a position to flip the anoma. So I lift it first, then I push one lobe. You see that's the prostatic urethra which is usually in the midline already uh in contact with the bladder neck which means that one of the loes is in the bladder. We have to be careful not to not to pull too much from this the fibers in this side. So in order to be able to flip the adnomite has to go easily. I would never push hard or anything because using the force in in in endoscopy is always it's always wrong. Uh so never push too hard, never do uh I've seen people bend the the endoscope during surgery because they do a lot of force and I think that's absolutely wrong.
- Now here in these cases of course we have to be very aware of the UOS the ectopic uh well uos and then and um you know localize them properly so that we can make sure that we don't hit them with the laser and um there I am trying to find both UOS this one is a little bit hidden there okay so now the final 6:00 pedical detachment carefully going from from side to side from side from lateral to medial. Uh I don't like to I don't like to I wouldn't like to kite uh this pedicle from right to left for example until it's completely because uh I think it's safer
- to go from lateral to medial and then meet at at 6:00. Again another check uh to keep the energy away from the UOS and to try to complete the the enucleation. So you see this is now 22 minutes uh after we started. So it's it's very interesting know how if you develop the skill to dissect mostly all the time. Ah, so when you go to the right, when you go to the left, when you go up, when you go down, [snorts] the operation is going to be and you see here, here this is the this is a 12:00 split in the mucosa. I think it was caused by the by the coughing of the patient, but you can see that the lateral aspects of the sphincter were preserved and he was perfectly continent
- after the operation. So, [snorts] but uh yeah, the coughing can be can be a problem especially if you're working you know very close to the sphincter and then the patient coughs maybe you're cutting and uh if you're not able to stop that might be a problem. So, and of course it's difficult to explain because the anesthetist tells you, you know, what can I do? And the patient of course is not guilty. He's probably sedated or partially sedated. And uh so this is this is something I would like to know how how you manage that. I mean general anesthesia would be would be preferable in many cases but in our environment uh you know the the anesthetist uh favor
- spinal over general in in in in these patients in the majority of patients we don't have much trouble but sometimes we get this these situations okay so this is a hemoasis of the mucosa you know that homemium laser has a very uh disruptive way to cut the tissue. So that um if you don't do um hemoistasis of the mucosa, you might get some some bleeding and now we're changing the the instruments. Initially I take out the camera [sighs] and I try to clean it with some to to avoid fog in the camera. And then we connect the uh nephroscope or the morsoscope and then we do a fast change trying not
- to decompress the bladder too much. That's the that's my hand releasing. The nurse will pull the endoscope out while I keep the external sheath in place. And then we very fast change to to the morcellator. And during morcellation, you see, you have to develop a technique for morcellation that allows you to be fast as well. You want to be able to get in there, morcellate, fast, finish, and then uh go away, you know, because we know that visibility will decay during morcellation. and you want a method that allows you to do very fast morcellation, very continuous morcellation and you're not so worried about the possibility of
- emptying the bladder and things like that. So my my my my method is this black triangle method. I have two little black triangles on the side of the morcellator blade. When when this is black, I I know that I'm far away from the bladder and I can continue with my morcellation. And also if I see the opposition the the engagement of the tissue against the moscator is good. If I don't see the opening of of the blade too much then I know that uh there's not so much water coming out so I can keep morcellating the bladder is is full. I've seen a paper today about um intra surgical during the operation to to monitor the the bladder pressure from Dr. Omar and I it was very interesting. I think we will get uh
- more sophistications that will make morcellation even safer. And um I think we're coming to an end. This is now 26 minutes after the beginning of the operation. So you can see that um a nucleation is a very efficient um operation. Of course, when you learn a nucleation, you have to use the sports mentality. You want to train your skills. You want to develop better technique. You want to get better at dissecting more, stopping less. And then, you know, this is the end of the this is the end of operation. All the best to everyone. See you around. Bye-bye.
Available transcript · Spanish
Subtítulos en español publicados por el canal. Pueden ser una traducción asistida por IA; no se utilizan para inferir atributos clínicos.
They may contain transcription or translation errors; check the explanation in the video.
- Hola, soy Fernando Gómez Sancha y voy a mostrarles un sistema doble bilateral completo en este paciente que tenía cuatro orificios urétricos. Aquí se puede ver el segundo Y este es ahora el tercer orificio y el cuarto. Creo que usted necesita ser consciente de que a veces vamos a encontrar un sistema dúplex que tiene dos Así que tenlo en mente porque podrías encontrar este caso y tienes que tener cuidado con la distinción y, por supuesto, la protección de todos estos orificios. caso para mostrar y de lo contrario
- fue bastante tranquilo y aquí se puede ver esta es la demarcación de nuevo de la línea blanca y vamos a pasar por el procedimiento de nuevo tratando de marcar las 12 horas correctamente y Ahora el procedimiento comienza entrando en el plano en el espacio paracollicular. energía encontrar un plano razonable y estimar la profundidad a la que vamos aunque no preste demasiada atención a la calidad del avión en este En este caso entramos en un bonito espacio paracollicular. Siempre voy al piso del Verumuntanum para tratar de encontrar el plano si la próstata está
- No era tan grande, como en este caso, no recuerdo exactamente, probablemente era como 50 gramos o algo así. La entrada es bastante horizontal. Si la próstata es mucho más grande, entonces probablemente trataría de ir un poco más vertical cuando entro en el suelo del verum montanum. Así que aquí, de nuevo, estamos desarrollando este espacio más o menos, tratando de ver hacia dónde vamos. Y ahora esta es la conexión, cortando el frenillo en la parte superior de la veru y tratando de iniciar la delimitación de la línea posterior de disección. Recuerda, siempre pienso en la próstata como una pequeña caja donde vamos a diseccionar cuatro planos, el plano posterior, el plano lateral en cada lado y luego el plano anterior. Así que siempre hay un plano y siempre hay una línea de disección.
- Así que el plano es lo que estamos desarrollando y la línea de disección es lo que estoy centrando en el centro de la pantalla para que pueda ver un poco de la cápsula y el adenoma mientras progresamos. Observen cómo hago movimientos muy largos. No trato de hacer hacia atrás y adelante o de lado a lado, movimientos muy cortos, porque cuando usted hacer movimientos más largos, se obtiene una línea más regular y queremos progresar regularmente con un frente muy amplio de disección en lugar de tratar de profundizar en un área y luego tener una línea muy regular como resultado. Así que aquí este es el desarrollo del plano posterior. Si vemos estos elementos amarillos, se ve que parece adenoma, no me importa explorar un poco más profundo para ver si eso es un nódulo. Así que con mucho cuidado se puede avanzar y tratar de entender el plano.
- Usted sabe que la desventaja de estas modulaciones de pulso que le dan excelente primera paso hemostasis es que probablemente perdemos un poco de la vista del avión. El hermoso plano que podemos ver, por ejemplo, cuando hacemos disección mecánica. Así que este es el progreso. Nunca intento ir demasiado lejos, nunca intento alcanzar el cuello de la vejiga o algo así. así porque la próstata, el adenoma está fijado al esfínter todavía y ves Tratamos de ir debajo de la próstata, levantarlo, todavía hay un montón de tejido adherido a los lados aquí. Usted ve, así que en lugar de progresar hacia el cuello de la vejiga, cuando me doy cuenta de que hay es alguna resistencia o el avión se está haciendo más y más delgada, entonces trato de ir a la Apex para tratar de comenzar la liberación apical.
- Creo que todo lo que hacemos posteriormente no fuerza mucho el esfínter, pero la dificultad con el esfínter o el estrés en el esfínter podría venir un poco más tarde. Aquí estoy empezando a desarrollar la línea lateral. En este lado, de nuevo, tratando de encontrar un plano que parece cápsula, por lo general suave, fibrosa, En su mayoría blancos y por supuesto no perforados. Esta es la definición también coherente con la profundidad de disección que hemos encontrado en la parte posterior. Así que como se puede ver aquí, estoy conectando la línea lateral a la línea posterior para que Podemos tener una línea uniforme de disección. Es eso. Viene desde el avión. Pero antes de continuar subiendo, preferiría venir aquí en el ápice para tratar de liberar el esfínter
- desde el ápice un poco más anterior. Esta es una disección muy cuidadosa del esfínter y el ápice, que por lo general, ya sabes, paga en el sentido de que reduce la posibilidad de incontinencia para el paciente postoperatoriamente a una muy baja, muy baja, muy baja tasa de incontinencia, incontinencia de esfuerzo. - Está bien, está bien. Incontinencia por esfuerzo temporal. Así que de nuevo, cuando hice un poco de liberación en el esfínter, mi endoscopio puede mover un poco el esfínter sin poner tensión en él. Probablemente había alguien en el quirófano cuando le estaba explicando algunas cosas. Por eso me detuve porque normalmente trato de reducir el tiempo de pausa al mínimo. - Está bien, está bien. Así que aquí de nuevo, estamos tratando de progresar anteriormente. Pero hay un momento. Donde empiezas a sentir que hay alguna resistencia.
- Verás, así que prefiero no saber, realmente, no sé lo que estaba pasando allí. No recuerdo exactamente. No, el paciente estaba tosiendo, tal vez. Sí, esto, esto era esto es uno de los problemas con la anestesia espinal. A veces los pacientes están despiertos, y están tosiendo y creo que vamos a ver que en el Al final del procedimiento, hay una división a las 12 horas en la mucosa del esfínter. - Está bien, está bien. Que es el resultado de la tos del paciente y probablemente la contracción del suelo pélvico contra el instrumento, no. Así que a pesar de su intención de hacer una muy, muy cuidadosa preservación del esfínter, a veces Usted enfrenta problemas, no. Así que cuando usted cuando se utiliza la anestesia espinal, especialmente cuando se utiliza una gran cantidad de sedación, Algunos pacientes están un poco estresados. Se puede ver que este hombre estaba tosiendo mucho.
- Y tampoco. Si están sedados, no puede decirle al paciente que no tosga o a veces no puede evitar la tos. Así que hay un pequeño riesgo. Así que hay que tener mucho cuidado. Es un pañuelo de las 12. Y lo que estoy haciendo es que estoy tratando de establecer estas incisiones de acceso, las llamo acceso las incisiones. Así que cortamos dos o tres milímetros de profundidad, o menos, tal vez uno o dos milímetros. Y eso establece cierta separación del esfínter. - Está bien, está bien. - Está bien, está bien. Así que es el esfínter y la parte apical y permite un enfoque progresivo hacia Las 12 en punto. Así que de nuevo, se puede ver que seguimos la línea de disección. Siempre soy muy cuidadoso tratando de establecer una línea de disección que puedas seguir fácilmente. Así que paso tiempo construyendo estas líneas de disección.
- - Está bien, está bien. Eso es lo suficientemente cerca de las 12 horas. Y aquí de nuevo, voy a profundizar la línea blanca inicialmente para tratar de ver. Si podemos preservar la mucosa, mantenerla unida al esfínter en lugar de arrancarla de las fibras del esfínter. Y ahora aquí de nuevo, la línea inicial posterior de disección para el plano lateral y tratando de conectar, siempre tratar de conectar la línea lateral con la línea posterior. Usted ve, por lo que tenemos una disección más o menos continua y aquí usted ve, tenemos que conseguir debajo del esfínter. Tenemos que llegar debajo del esfínter y tenemos que llegar debajo del esfínter y tenemos para superar el adenoma. Así que es un enfoque progresivo y hago muy, muy suave fuerza tratando de ir hacia arriba y, uh, Ya sabes, sólo ganar un milímetro a la vez, tratando de llegar a mi sección y tratando
- por supuesto, seguir el, el, el, el buen plano. Así que siempre está explorando y, tratando de entender y, tratando de movilizar el, El adenoma es suficiente. - Está bien, está bien. Así que, uh, para que pueda tener un buen acceso a la, a la parte anterior, ya sabes, yo Piense en esta definición de, de la eenucleación donde diseccionamos la cápsula del adenoma estratégicamente, porque sabemos que a medida que desarrollamos el plano, el adenoma obtiene más movilidad. Así que cuando tenemos una buena movilidad del adenoma, tenemos un mejor acceso a donde queremos llegar. Y esta región de las 12 es probablemente la más difícil de alcanzar. - Está bien, está bien. Y el más crítico, porque usted está tratando de traer su endoscopio hacia arriba, ya sabes, tirando el esfínter anteriormente y, uh, es por eso que me gusta este tipo de enfoque en el que se libera
- bastante lateralmente para que haya movilidad suficiente para que mi endoscopio puede, puede, puede, puede estar en la parte superior de, de, del ápice del adenoma lateralmente. - Está bien, está bien. - Está bien, está bien. Y luego hacemos un poco, un poco de presión en, en el adenoma para tratar de bajar, para tratar para bajar la posición de la próstata en la pelvis y tratar de minimizar la tracción en el esfínter el nivel. Así que esto sería casi el final de la liberación apical temprano donde se ve que hemos planeado una liberación paso a paso, la ascensión en el ápice en ambos lados y, um, para tratar de Asegúrese de que el ápice cae. Y podemos obtener, uh, libre de tensión, vamos a ver, uh, o, o tratar de obtener un acceso libre de tensión hacia el plano anterior.
- Así que estoy más y más convencido de que, um, estos conceptos son verdaderos y, uh, muy interesante en el sentido de que si nos enfrentamos a los pasos de la operación de una manera inteligente para obtener progresivas movilidad del adenoma, obtendremos acceso sin esfuerzo al plano anterior. - Está bien, está bien. - Está bien, está bien. - Está bien, está bien. Así que voy a girar la cámara hacia los lugares a los que queremos llegar. Y, uh, la mayoría de las veces estoy sosteniendo mi cámara con mis dedos, tratando de ser extremadamente suave con los movimientos y sin aplicar fuerza. Si recuerdas, sabes, mis viejos maestros haciendo TORP, la manipulación del resicatoscopio a veces era muy agresivo, ya sabes, que lo sacudiría a, para deshacerse de una pieza que se quedó atascado en el bucle y cosas así. No, no lo es. Y yo, trato de ser extremadamente suave con los movimientos de mis manos. Y trato de ser extremadamente suave con los movimientos de mis manos. A veces es difícil llegar al punto en el que estoy tratando de llegar las manos y a pesar de que uso algunos de algunos algunas presiones digamos en contra de la
- adenoma para tratar de por ejemplo aquí en el plano anterior queremos reducir el tracción al esfínter así que en lugar de tener un endoscopio apuntando hacia arriba todos los tiempo lo que trato de hacer es ejercer una pequeña presión sobre el adenoma con mi endoscopio se ve el endoscopio se desliza alrededor del adenoma y eso es así es como se encuentra la línea de disección porque ves que se pone un un poco de presión contra el adenoma con el endoscopio es un pequeño pequeña presión, pero es suficiente para asegurarse de que la próstata se mueve dentro del la pelvis por lo que cuando usted es anteriormente va a ir hacia abajo en la pelvis y el la posición del endoscopio aquí en este en este momento en la operación es bastante horizontal lo que significa que usted no está haciendo tracción excesiva en el esfínter así Creo que capitalizando esto esta movilidad del adenoma esta progresiva usted sabe
- movilización y y también ser capaz de utilizar el endoscopio usted sabe de esta manera por lo Nos deslizamos por allí allí allí el adenoma que nos lleva a la línea de disección y al mismo tiempo usted está tratando de asegurarse de que cuando usted está Por encima del adenoma se ejerce un poco de presión para bajarlo a la pelvis. reduciendo las fuerzas radiales allí en el esfínter y que es el endoscopio Cuando estamos laterales también tratamos de traer el campo quirúrgico al centro por lo que es muy sorprendente cuando cuando usted ve las manos que los movimientos que hacemos con el endoscopio al principio cuando estamos tratando de hacer el apical temprano liberación son algo más extrema que que los movimientos que hacemos cuando ya estamos alrededor de este adenoma y empujándolo siempre hacia el centro y Seguimos presionando hacia abajo y luego al final sólo vamos a girar el esfínter arriba y abajo con sólo un poco de presión y luego terminas con
- es muy poco amable de una gran cantidad de presión y es particularmente difícil de hacer con el endoscopio como automáticamente ir hacia abajo y hacia abajo con el endoscopio que ni siquiera tiene que ser muy cuidadoso este proceso por ejemplo el adenoma es muy importante que usted hace esto aquí con mucho cuidado con una presión mínima, pero Lo suficiente para movilizar la próstata en la pelvis. examen bimanual se puede sentir cómo la próstata sube y baja y creo Esta es una ventaja distinta de la eenucleación en bloque así que básicamente el hecho de que están capitalizando el el el adenoma entero la presencia del adenoma entero en la fosa para ser capaz de llevarlo abajo de este lugar porque queremos ser Y de esta manera, la tracción en el esfínter va a ser menos y menos. así que de nuevo, esta es la línea lateral, ves, estoy tratando de entender la línea, estoy tratando de dibujar líneas largas, porque las líneas largas son uniformes. Y cuando uso mi energía, uso la energía muy suavemente, de modo que sería casi imposible. Esa es la tos de nuevo, veo que el paciente está tosiendo mucho. Así que a veces estos hombres, tienen estas condiciones pulmonares, y no pueden evitar toser. Por otro lado, no son tan buenos candidatos para anestesia general.
- Así que sí, se trata de Y tenemos que lidiar con estas situaciones. Nos dimos cuenta de que si usamos un pequeño cojín, de modo que el paciente está acostado, por supuesto, pero la cabeza está un poco más alta que la pelvis en la mesa, a veces reducimos un poco esta tendencia a toser de los pacientes. profundidad, esto es como una profundización de tres milímetros en la cápsula. así que eso nos va a dar una buena pista, ahora que tenemos que corregir, por supuesto, nuestro objetivo, tenemos que tener cuidado de tratar de desarrollar el plano sin hacer que inicial, digamos perforación ir más profundo.
- adenoma para tratar de evitar hacer una perforación más grande después encontrando el adenoma. Así que creo que esto, siempre digo que las pequeñas perforaciones están permitidas, ya saben, porque cuando estamos navegando un plano difícil o un plano que no es tan obvio o evidente, vamos a causar pequeñas perforaciones. Y la forma de mantenerlas pequeñas es usar la energía muy suavemente. Así que encontrar una distancia de trabajo que no corta demasiado agresivamente. Y luego, por supuesto, apuntando cerca del adenoma, queremos permanecer cerca del adenoma. Y por supuesto, evitando hacer mucha fuerza con el instrumento, porque si haces mucha fuerza con los instrumentos, incluso podrías romper la cápsula con el Así que de nuevo, esto es un ya sabes, nuestro trabajo diario situaciones diarias diarias donde tenemos que negociar los planos y como mencioné antes, en mi definición de
- cirugía ya sabes, avión o el plano capsular, tenemos que trabajar siguiendo la profundidad que ya encontramos, tratando de adaptarse a la a la el avión moviéndose cuidadosamente, ya sabes, moviéndose en un controlado la manera de utilizar la energía con cuidado, por lo que obtenemos un ligero la cantidad de disección, no demasiado. el aspecto de la cápsula, ya sabes, si usted fuera a dejar algunos tejido detrás, cuando se revisa la fosa, se ve que dejó un pedazo de tejido, porque tomó el avión equivocado, se puede Correcto que usted puede sacarlo más tarde. Quiero ir profundamente en la en la cápsula a veces, especialmente en esta región, cuando estamos empezando a subir
- hacia el cuello de la vejiga, el plano es casi vertical, y nosotros están disparando contra un plano vertical, ya sabes, en un de una manera perpendicular. Así que tenemos que tener mucho cuidado para apuntar la energía cerca de la para el adenoma anteriormente, de modo que la energía todavía dará una interrupción de la separación, ya ves, y no estoy disparando hacia abajo allí, estoy disparando un poco más arriba para tratar de mantener el energía lejos de la cápsula y tratar de desarrollar el avión Por lo tanto, aquí estamos tratando de Continúe con esta disección, ya ve, es una muy lenta el procedimiento. En el sentido de que no hago, no hago movimientos agresivos o Cualquier cosa, con mucho cuidado. que el tiempo que paso haciendo una pausa durante la operación es
- Así que este trabajo continuo, incluso cuando es lento y cuidado, al final proporciona un muy buen tiempo quirúrgico porque Usted progresa. infinitamente, y progresas lentamente, pero de esta manera la operación Así que aquí creo que estamos en una posición para voltear el Así que lo levanto primero, luego empujo un lóbulo. Esa es la uretra prostática, que suele estar en la línea media, ya en contacto con el cuello de la vejiga, lo que significa que Uno de los lóbulos está en la vejiga. No para no sacar demasiado de esto Las fibras en este lado. Así que con el fin de ser capaz de voltear el adenoma, tiene que ir fácilmente, yo nunca presionaría fuerte o cualquier cosa porque el uso de la fuerza en la endoscopia es siempre
- Siempre está mal, así que nunca presiones demasiado, nunca lo hagas. la gente dobla el endoscopio durante la cirugía, porque hacen mucho de la fuerza y creo que eso está absolutamente mal. Ahora aquí, en estos casos, por supuesto, Tengo que ser muy consciente de los EE.UU. este ectópico uh bien EE.UU. y luego y um usted sabe localizarlos adecuadamente para que podamos asegurarnos de que no los golpeamos con el láser y Ahí estoy tratando de encontrar a los dos . Este está un poco escondido allí . Bueno, ahora el último desprendimiento pedicle a las seis con cuidado yendo de un lado a otro de lado de lateral a medial no me gusta no me gusta no me gustaría hacer este kite
- pedicle de derecha a izquierda, por ejemplo, hasta que es completamente porque creo que es más seguro para ir de lateral a medial y luego se reúnen a las seis de nuevo otra comprobación para mantener la energía lejos de los EE.UU. y tratar de completar la la desenucleación por lo que ve esto es ahora 22 minutos después de que empezamos por lo que es es muy interesante saber cómo si se desarrolla la habilidad de diseccionar la mayor parte del tiempo ah así que cuando vas a la derecha cuando vas a la izquierda cuando vas hacia arriba cuando vas abajo la operación va a ser y se ve aquí aquí esta es la esta es una división de 12 horas en el Mucosas creo que fue causado por la tos del paciente pero se puede ver que el Los aspectos laterales de este dedo fueron preservados y estaba perfectamente continente después de la operación por lo que
- Pero sí, la tos puede ser un problema, especialmente si estás trabajando. Usted sabe muy cerca del esfínter y luego el paciente toser tal vez usted está cortando Y si no eres capaz de detener eso podría ser un problema así y por supuesto es difícil de explicar y por supuesto es difícil de explicar porque esto es cirugía basada en la profundidad y esto permite el derecho de parada repentina concreto por lo que, por supuesto, también se convierte que es sólo porque es la falda es un esfínter de madera golpeado por lo que sería un poco El anestesista te dice que sabes lo que puedo hacer y el paciente, por supuesto, no es culpable. Sedado o parcialmente sedado y uh así que esto es esto es algo que me gustaría saber cómo usted manejar que me refiero en la anestesia general sería sería preferible en muchos casos pero en nuestro ambiente uh usted sabe el favor anestesiólogo espinal en general en en estos pacientes En la mayoría de los pacientes no tenemos muchos problemas pero a veces tenemos estas situaciones
- Está bien, así que esto es una hemostasis de la mucosa Usted sabe que el láser de casa tiene un muy manera disruptiva de cortar el tejido para que Si no haces hemostasis de la mucosa podrías tener un poco de sangrado y ahora estamos Cambiando los instrumentos inicialmente saco la cámara y trato de limpiarla con algo para evitar la niebla en la cámara y luego conectamos el nefroscopio o el telescopio Morse y luego nos hacer un cambio rápido tratando de no descomprimir la vejiga demasiado que es el que es mi mano en realidad Tranquilo . La enfermera sacará el endoscopio mientras yo mantengo la funda externa en su lugar . cambio muy rápido al morselador y durante la morselación se ve que tiene que desarrollar
- una técnica para la morselación que le permite ser rápido también Usted quiere ser capaz de entrar allí Morselate rápido terminar y luego irse ya sabes porque Sabemos que la visibilidad se deteriorará durante la morselación y desea un método que permita Usted para hacer morselation muy rápido morselation muy continuo y no está tan preocupado por el posibilidad de vaciar la vejiga y cosas por el estilo así que mi mi mi mi método es este un negro Método del triángulo tengo dos pequeños triángulos negros en el lado de una cuchilla morselator cuando cuando esto Sé que estoy muy lejos así que lo estoy haciendo muy rápido como se puede ver porque esto es un lejos de la vejiga y puedo continuar con mi morselation y también si veo la oposición el El enlace del tejido contra el morselador es bueno si no veo la apertura de la cuchilla
- demasiado entonces sé que no hay tanta agua que sale así que puedo seguir morselating el la vejiga está llena he visto un periódico de hoy sobre intra quirúrgico durante la operación para controlar la presión de la vejiga del Dr. Omar y fue muy interesante creo que vamos a conseguir Más sofisticaciones que harán que la morselación sea aún más segura y creo que estamos llegando a un final. Esto es ahora 26 minutos después del comienzo de la operación para que pueda ver que una enucleación es una operación muy eficiente por supuesto cuando se aprende una enucleación tienes que usar la mentalidad deportiva quieres entrenar tus habilidades quieres desarrollar mejor técnica que desea obtener mejor en diseccionar más detener menos y entonces usted sabe que esto es
- El final de la esta es el final de la operación todo lo mejor para todo el mundo te veo alrededor adiós-adiós